18
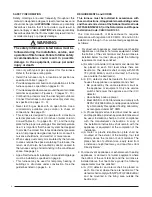
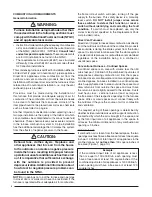
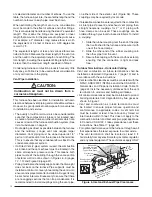
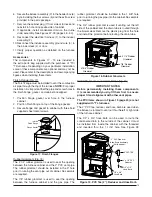
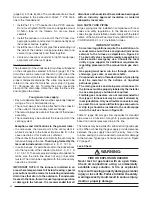
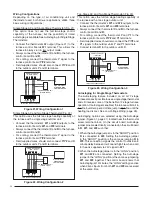
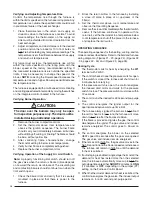
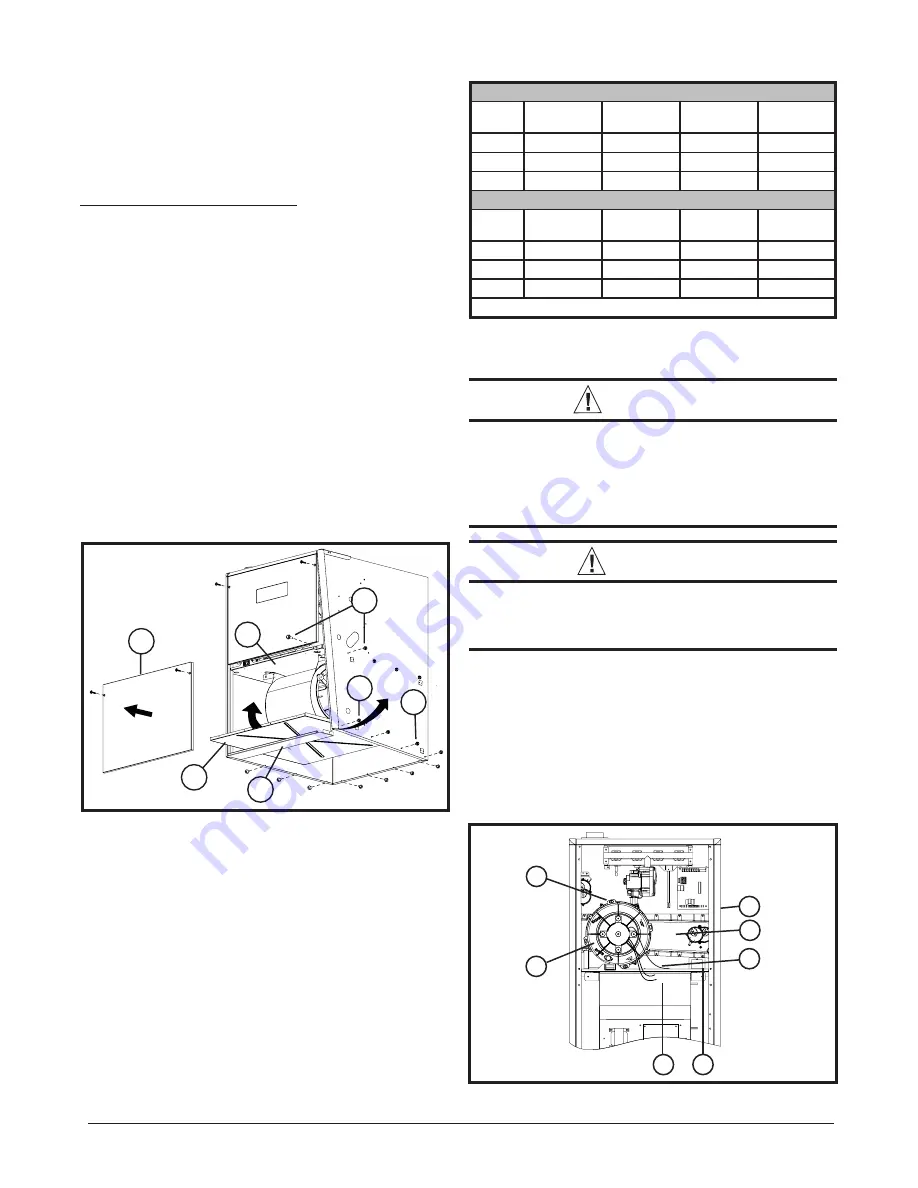
Figure 16. Inducer Assembly Rotation
2
5
1
4
6
3
7
Inducer Assembly Rotation
WARNING:
Inducer rotation must be completed before
the furnace is connected to gas and electric. If
both utilities have been connected, follow the
shutdown procedures printed on the furnace
label and disconnect the electrical supply.
CAUTION:
It is good practice to label all wires prior
to disconnection. Wiring errors can cause
improper and dangerous operation.
1. Disconnect the electrical harness (1) from the inducer
assembly (2). See Figure 16.
2. Remove the inducer assembly ground wire (3) from
the blower deck (4) or door.
3. Remove four screws (5) securing the inducer assembly
(2) to the header box (6).
4. Remove drain tube from inline drain assembly.
5. Rotate the inducer assembly (2) to its new position.
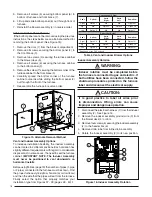
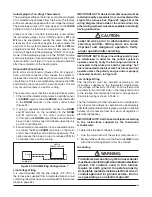
5. Remove all screws (5) securing bottom panel (6) to
bottom of furnace and front brace (7).
6. Lift up and slide bottom panel (6) out through front of
furnace.
7. Reinstall the blower assembly (4) in reverse order.
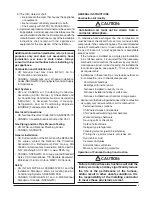
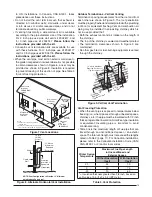
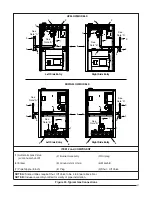
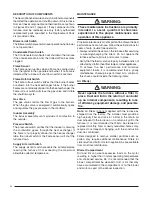
Alternate Bottom Panel Removal
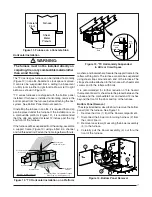
If the bottom panel cannot be removed using the previous
instructions, the steps below are an alternate method for
removing the bottom panel. (See Figure 15).
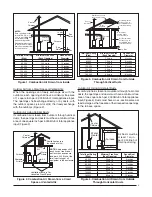
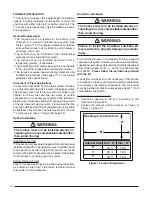
1. Remove the door (1) from the blower compartment
2. Remove all screws securing the bottom panel (2) to
the front brace (3).
3. Remove two screws (4) securing the furnace cabinet
to the blower deck (5).
4. Remove all screws (6) securing the furnace cabinet
to the bottom panel (2).
5. Remove the screw (7) securing the bottom corner of the
furnace cabinet to the front brace (3).
6. Carefully spread the bottom corner of the furnace
cabinet outwards while sliding the bottom panel (2)
out through the front of the furnace.
7. Reassemble the furnace in reverse order.
Figure 15. Alternate Removal Method
1
4
2
7
3
6
5
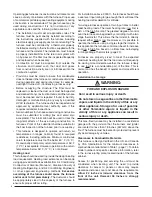
Vent and Inducer Assembly Options
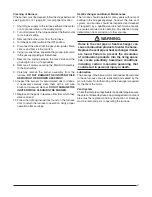
To increase installation fl exibility, the inducer assembly
can be rotated to 2 different positions. Each variation has
slightly different requirements with regard to condensate
disposal and, in some cases, the need to seal the furnace
cabinet.
IMPORTANT NOTE: The Inducer Assembly
must never be positioned to vent downwards on
horizontal installs
.
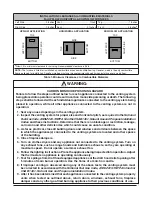
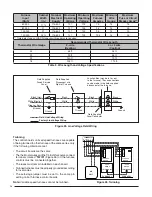
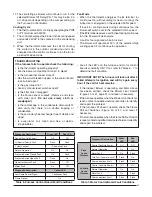
Before using Table 4 (page 19) the number of pipes (1-pipe
or 2-pipe) connected to the furnace must be known. Find
the proper furnace style (upfl ow, horizontal, or downfl ow)
and then the side that the pipes will exit from the furnace.
Finally select the option that properly matches your
installation type from Figures 37 - 39 (pages 48 - 50).
I
Conventional (1 Pipe)
Vent
Upfl ow
Horiz.
Right
Horiz.
Left
Downfl ow
Right
Option 1
N/A
N/A
Option 9
†
Up
N/A
Option 5
Option 6
Option 10
Left
Option 2
N/A
N/A
Option 11
†
Direct Vent (2-pipe)
Vent
Upfl ow
Horiz.
Right
Horiz.
Left
Downfl ow
Right
Option 3
N/A
N/A
Option 12
†
Up
N/A
Option 7
Option 8
Option 13
Left
Option 4
N/A
N/A
Option 14
†
†
Requires a 2 inch PVC endcap.
Table 4. Vent and Inducer Blower Options

