2
Chapter 2
Assembling
Assembling
The outdoor microphone Nor1218 is normally shipped
without preamplifier and microphone, since these
parts is normally shipped with the Sound Level Meter
Nor131 or Nor139.
Depending on the application, you will need a mast
or tripod for mounting the microphone system and
possibly devices for proper grounding and lightning
protection, see below.
We recommend cable type Nor4531, which comes
in standard lengths of 5, 10, 15, 30 and 50 metres –
other lengths are available on request.
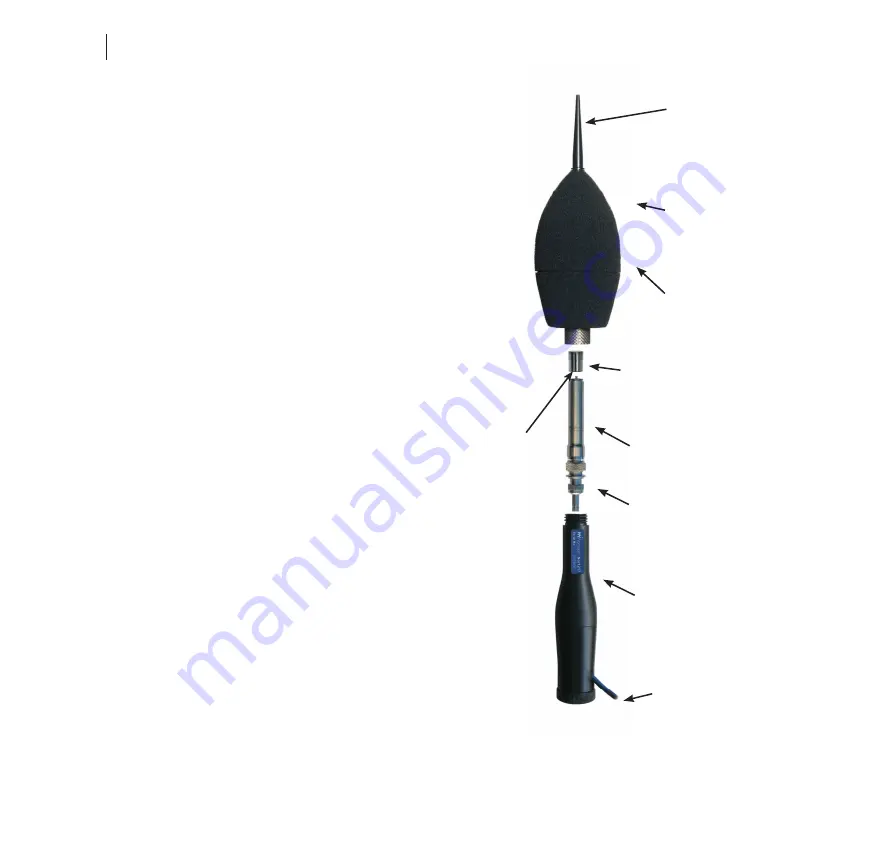
Unscrew and remove the upper part consisting of
birdspike and windscreen as one unit. Do not remove
the windscreen from this upper part as this may de-
stroy the weather protection and alter the acoustic per-
formance.
The unit is delivered with an adaptor for mounting
on a tripod. The cable is led through a slot in the side of
the adaptor. The base screw has a threaded hole like
those commonly used for cameras (3/8” UNC). The
base screw also forms a tension relief for the cable.
Remove the base screw and slide the cable through
the base unit. Assemble the microphone cartridge to
the preamplifier and connect the preamplifier to the
cable. We recommend mounting the supplied O-ring
between the microphone cartridge and the preamp-
lifier.
Birdspike
Wind, dust and
water protection
Upper part
Microphone cartridge
Microphone preamplifi er
Nor1207
Base
Connector/cable
Optional tripod
adaptor with tension
relief
O-ring
Summary of Contents for nor1218
Page 1: ...INSTRUCTION MANUAL Outdoor microphone nor1218 ...
Page 2: ......
Page 3: ...Outdoor microphone nor1218 ...
Page 6: ......


