6.
Once the pressure has been adjusted, replace
the locking cap.
7.
Replace the screw in the “out” pressure port
and tighten firmly.
COMPONENT REPLACEMENT
CONSULT FACTORY PRIOR TO THE
REPLACEMENT OF ANY COMPONENT.
All service work must be performed by
experienced and trained personnel.
Only use original NORTEC spare parts to replace
defective components. Damage caused by
non-approved parts is not covered under NORTEC’s
standard warranty.
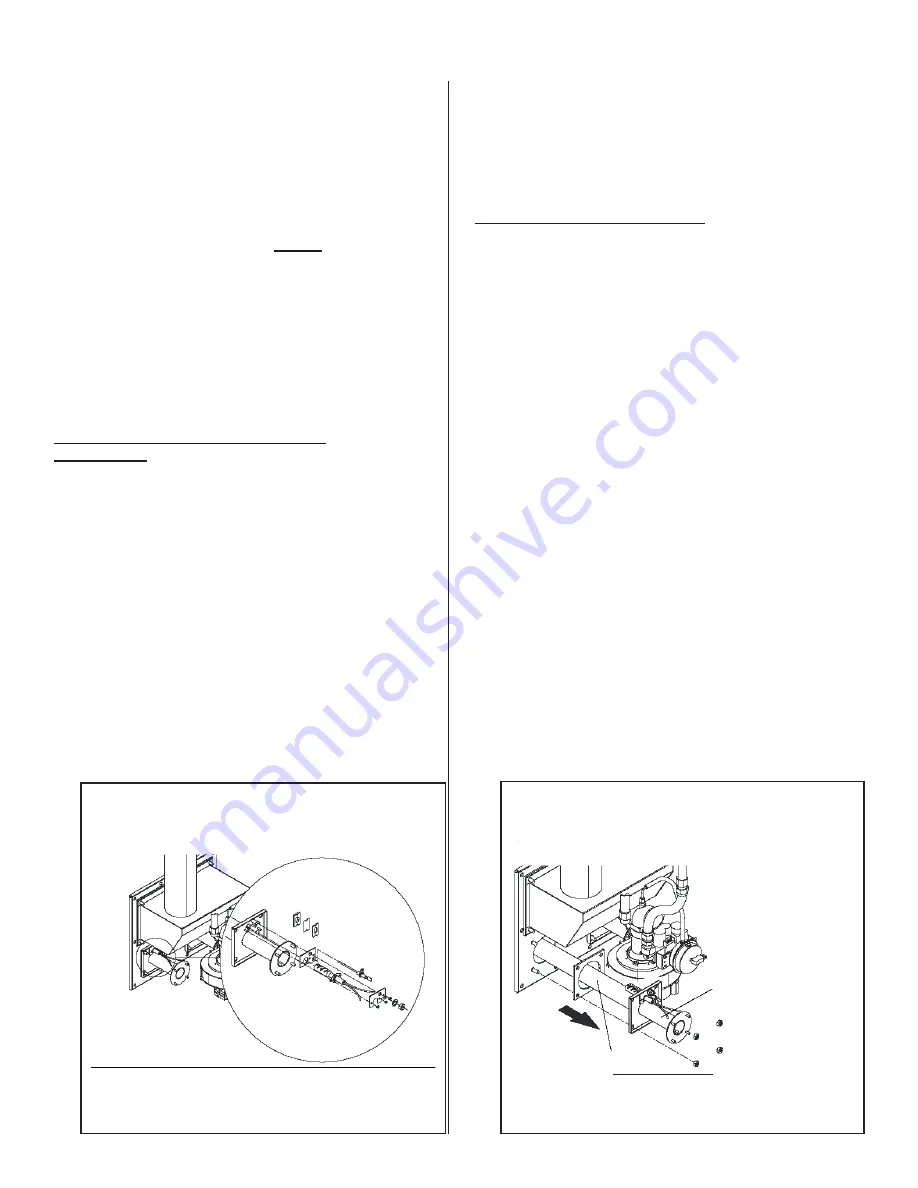
Hot Surface Igniter and Flame Sensor
Replacement
1.
Shut off electrical power and gas supply to the
humidifier.
2.
Remove the right side service access door.
3.
Disconnect all wiring to the igniter and flame
sensor.
4.
Unscrew the fixing nuts for the igniter and
flame sensor. Carefully remove the igniter and
flame sensor.
5.
Reverse the sequence above to install the new
igniter and flame sensor. Always install a new
gasket when replacing the flame sensor and
igniter.
CAUTION:
The silicon carbide igniter is
breakable. Handle with great care to avoid
damage.
Burner Removal and Installation
1.
Shut off electrical power and gas supply to the
humidifier.
2.
Remove the right side service access door.
3.
Disconnect all wiring to the combustion
blower, gas valve, air proving switch, igniter
and flame sensor (note the connector
assignment).
4.
Undo the union on the flexible gas hose and
disconnect the gas hose from the gas valve.
5.
Undo the 4 nuts on the blower outlet and
remove blower, leaving the gas valve/air inlet
assembly and the fan-board mounting bracket
(if present) mounted to the blower.
6.
Undo the 4 large nuts that secure the burner
mounting plate to the face of the heat
exchanger and
carefully
remove the burner
assembly. Handle the burner only by the
metal surfaces. Do not grip the ceramic
matting as grease, dust or dirt can affect the
performance of the burner.
7.
Reverse the sequence above to re-install the
burner after cleaning or, if necessary, replace
- 32 -
Hold Burner only on metal pipe
Ceramic Matting DO NOT TOUCH!
Figure #28
Burner Assembly
Figure #27
Flame Sensor and Ignitor Assembly
Summary of Contents for GS 100
Page 76: ......


