CJP
Issue 1
14/6/17
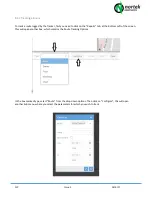
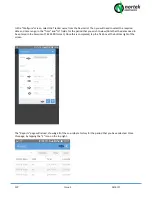
From the “Device” field, select the Tracker ID that you wish to Track, in this case “Chris’s Tracker”. (The Group field
can be ignored). Next select the date and time from and to period that you wish to track, the date should be entered
in the American YY-MM-DD format, e.g 2017-06-11 would be 11
th
June 2017.
Save the changes that you have made, by clicking the Tick icon in the Bottom Right Corner
You will then be taken back to the Main Map Screen. From here, click on the “Show” box:
This will now load all of the Co-Ordinates for that date period, and produce a Route on the Map Pane. You can also
export this GPS Data in an Excel spreadsheet format, by clicking the ”Export” box.
Note: If there is no tracking information for the period that you have entered on the previous configure screen, then
there will be route data or Map plotting information displayed, and you should go back and enter in a different time
/ date period

