Chapter 15 Bandwidth management
305
Nortel Business Secure Router 252 Configuration — Basics
Bandwidth Manager Class Configuration
Configure a bandwidth management class in the
Class Setup
screen. You must
use the
Summary
screen to enable bandwidth management on an interface before
you can configure subclasses for that interface.
To add a subclass, click
BW MGMT
, and then the
Class Setup
tab. Click the
Add Sub-Class
button to open the screen shown in
#
This is the number of a filter entry. The ordering of your filters is
important, as they are applied in turn. Use the
Move
button to reorder
your filters.
Filter Name
This is the
Class Name
that you configured in the
Edit Class
screen.
Service
If you selected a predefined application (FTP, H.323 or SIP), it displays
here.
Destination IP
Address
This field displays the destination IP address in dotted decimal notation
followed by the subnet mask. The IP 0.0.0.0/0 means all.
Destination
Port
This field displays the port number of the destination. 0 means all ports.
Source IP
Address
This field displays the source IP address in dotted decimal notation
followed by the subnet mask. The IP 0.0.0.0/0 means all.
Source Port
This field displays the port number of the source. The 0 means all ports.
Protocol ID
This field displays the protocol ID (service type) number, for example: 1
for ICMP, 6 for TCP or 17 for UDP. The 0 means all protocols.
Move
Type the number of a filter entry and the number for where you want to
put it. Click
Move
to move the filter to the number that you typed. The
ordering of your filters is important, as they are applied in order of their
numbering.
The filter entry numbers are not static names for the entries. A filter
entry's number changes as you move the filter entry up or down in the
list. Also, only the existing filter entries are counted, you cannot have any
blank filter entries. For example, if you have only three filters and try to
move number one to seven, it becomes filter three.
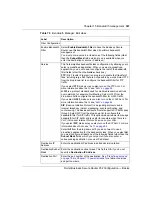
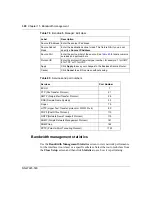
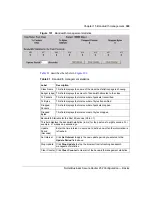
Table 78
Bandwidth Manager: Class Setup
Label
Description
Summary of Contents for BSR252
Page 28: ...28 Tables NN47923 500 ...
Page 44: ...44 Chapter 1 Getting to know your Business Secure Router NN47923 500 ...
Page 52: ...52 Chapter 2 Introducing the WebGUI NN47923 500 ...
Page 70: ...70 Chapter 3 Wizard setup NN47923 500 ...
Page 96: ...96 Chapter 5 System screens NN47923 500 ...
Page 114: ...114 Chapter 7 WAN screens NN47923 500 Figure 27 WAN IP ...
Page 120: ...120 Chapter 7 WAN screens NN47923 500 Figure 31 Dial Backup Setup ...
Page 128: ...128 Chapter 7 WAN screens NN47923 500 ...
Page 152: ...152 Chapter 9 Static Route screens NN47923 500 ...
Page 194: ...194 Chapter 11 Firewall screens NN47923 500 ...
Page 210: ...210 Chapter 13 VPN NN47923 500 Figure 67 Summary IP Policies ...
Page 222: ...222 Chapter 13 VPN NN47923 500 Figure 71 VPN Branch Office rule setup ...
Page 256: ...256 Chapter 13 VPN NN47923 500 Figure 81 VPN Client Termination advanced ...
Page 260: ...260 Chapter 13 VPN NN47923 500 ...
Page 264: ...264 Chapter 14 Certificates NN47923 500 Figure 83 My Certificates ...
Page 270: ...270 Chapter 14 Certificates NN47923 500 Figure 85 My Certificate create ...
Page 274: ...274 Chapter 14 Certificates NN47923 500 Figure 86 My Certificate details ...
Page 282: ...282 Chapter 14 Certificates NN47923 500 Figure 89 Trusted CA details ...
Page 298: ...298 Chapter 14 Certificates NN47923 500 ...
Page 316: ...316 Chapter 16 IEEE 802 1x NN47923 500 ...
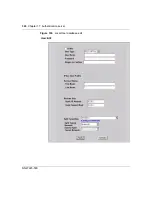
Page 320: ...320 Chapter 17 Authentication server NN47923 500 Figure 106 Local User database edit ...
Page 328: ...328 Chapter 17 Authentication server NN47923 500 ...
Page 376: ...376 Chapter 20 Logs Screens NN47923 500 Figure 150 Log settings ...
Page 386: ...386 Chapter 20 Logs Screens NN47923 500 ...
Page 393: ...Chapter 21 Call scheduling screens 393 Nortel Business Secure Router 252 Configuration Basics ...
Page 394: ...394 Chapter 21 Call scheduling screens NN47923 500 ...
Page 410: ...410 Chapter 22 Maintenance NN47923 500 ...

