48
Chapter 2 Introducing the WebGUI
NN47923-500
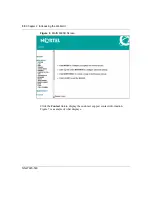
The
MAIN MENU
screen appears.
Restoring the factory-default configuration settings
If you just want to restart the Business Secure Router, press the rear panel
RESET
button for one to three seconds.
If you forget your password or cannot access the SMT menu, you will need to
reload the factory-default configuration file or use the
RESET
button the back of
the Business Secure Router to restore the factor-default configuration. Uploading
this configuration file replaces the current configuration file with the
factory-default configuration file. This means that you will lose all configurations
that you had previously and the speed of the console port will be reset to the
default of 9600bps with 8 data bit, no parity, one stop bit and flow control set to
none. The password will be reset to “PlsChgMe!”, also.
Procedure to use the reset button
Press the rear panel
RESET
button for longer than three seconds to return the
Business Secure Router to the factory defaults.
6
Reset Button on the Router; LineFeed. Press the
RESET
button for longer
than three seconds to return the Business Secure Router to the factory
defaults.
Uploading a configuration file through console port
1
Download the default configuration file from the Nortel FTP site, unzip it and
save it in a folder.
2
Turn off the Business Secure Router, begin a terminal emulation software
session and turn on the Business Secure Router again. When you see the
Note:
The management session automatically times out when the time
period set in the Administrator Inactivity Timer field expires (default
five minutes). Simply log back on to the Business Secure Router if this
happens to you.
Summary of Contents for BSR252
Page 28: ...28 Tables NN47923 500 ...
Page 44: ...44 Chapter 1 Getting to know your Business Secure Router NN47923 500 ...
Page 52: ...52 Chapter 2 Introducing the WebGUI NN47923 500 ...
Page 70: ...70 Chapter 3 Wizard setup NN47923 500 ...
Page 96: ...96 Chapter 5 System screens NN47923 500 ...
Page 114: ...114 Chapter 7 WAN screens NN47923 500 Figure 27 WAN IP ...
Page 120: ...120 Chapter 7 WAN screens NN47923 500 Figure 31 Dial Backup Setup ...
Page 128: ...128 Chapter 7 WAN screens NN47923 500 ...
Page 152: ...152 Chapter 9 Static Route screens NN47923 500 ...
Page 194: ...194 Chapter 11 Firewall screens NN47923 500 ...
Page 210: ...210 Chapter 13 VPN NN47923 500 Figure 67 Summary IP Policies ...
Page 222: ...222 Chapter 13 VPN NN47923 500 Figure 71 VPN Branch Office rule setup ...
Page 256: ...256 Chapter 13 VPN NN47923 500 Figure 81 VPN Client Termination advanced ...
Page 260: ...260 Chapter 13 VPN NN47923 500 ...
Page 264: ...264 Chapter 14 Certificates NN47923 500 Figure 83 My Certificates ...
Page 270: ...270 Chapter 14 Certificates NN47923 500 Figure 85 My Certificate create ...
Page 274: ...274 Chapter 14 Certificates NN47923 500 Figure 86 My Certificate details ...
Page 282: ...282 Chapter 14 Certificates NN47923 500 Figure 89 Trusted CA details ...
Page 298: ...298 Chapter 14 Certificates NN47923 500 ...
Page 316: ...316 Chapter 16 IEEE 802 1x NN47923 500 ...
Page 320: ...320 Chapter 17 Authentication server NN47923 500 Figure 106 Local User database edit ...
Page 328: ...328 Chapter 17 Authentication server NN47923 500 ...
Page 376: ...376 Chapter 20 Logs Screens NN47923 500 Figure 150 Log settings ...
Page 386: ...386 Chapter 20 Logs Screens NN47923 500 ...
Page 393: ...Chapter 21 Call scheduling screens 393 Nortel Business Secure Router 252 Configuration Basics ...
Page 394: ...394 Chapter 21 Call scheduling screens NN47923 500 ...
Page 410: ...410 Chapter 22 Maintenance NN47923 500 ...

