Page 204 of 536
Chapter 20 — Meridian Mail Compact Option installation and maintenance
553-3121-210
Standard 3.0
January 1999
a
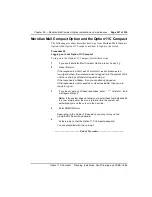
If the connector on the PMS is not female,
insert a
female-to-female gender changer
(A0351509)
.
5
Use a 40 ft. null-modem cable
(NTMW55AA)
to connect P2 on the RSM
Assembly Module to the guest administrative console.
a
If the console is configured as DTE, connect a null modem
adaptor
(NTND93AA)
to one end of the cable.
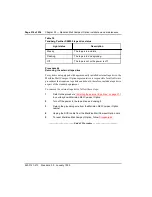
Using an MDF cable
From the RSM Assembly Module you can run one of two MDF cables: a male
to male or a male to bare wire. The male to male MDF cable connects the
RSM Assembly Module to a BIX Pack. The male to bare wire voice cable
must be wired to a BIX or similar modular distribution frame.
1
Determine whether the hotel’s PMS is configured as data
communications equipment (DCE) or data terminal equipment (DTE).
Refer to the documentation for the product.
2
Use the appropriate MDF cable to connect P5 on the RSM Assembly
Module to a BIX or similar modular distribution frame, and connect
your peripherals according to the connections described in
.
Using the RSM Assembly Module
On the RSM Assembly Module is an LED which, when lit, indicates that
Meridian Mail is functioning properly and transmitting data to the PMS port.
When Meridian Mail is off or not functioning correctly, the LED turns off,
and the RSM Assembly Module automatically bypasses Meridian Mail and
allows the PMS and the Option 11C Compact system to communicate
directly.
Below the LED is a switch that allows you to manually bypass Meridian Mail.
CAUTION
Potential data loss
If you connect your peripherals using P5, do not connect any
peripherals to P2, P3, or P4 on the RSM Assembly Module.
Summary of Contents for Meridian Meridian 1
Page 3: ...553 3121 210 Standard 3 0 January 1999 ...
Page 17: ...xiv Contents 553 3121 210 Standard 3 0 January 1999 ...
Page 97: ...Page 78 of 536 Chapter 8 Installing a new system 553 3121 210 Standard 3 0 January 1999 ...
Page 107: ...Page 88 of 536 Chapter 10 Installing the system ground 553 3121 210 Standard 3 0 January 1999 ...
Page 113: ...Page 94 of 536 Chapter 11 Installing the power supply 553 3121 210 Standard 3 0 January 1999 ...
Page 125: ...Page 106 of 536 Chapter 12 Adding an expansion cabinet 553 3121 210 Standard 3 0 January 1999 ...
Page 209: ...Page 190 of 536 Chapter 18 Connecting the trunks 553 3121 210 Standard 3 0 January 1999 ...
Page 323: ...Page 304 of 536 Chapter 21 Installing Hospitality 553 3121 210 Standard 3 0 January 1999 ...
Page 419: ...Page 400 of 536 Chapter 23 Pre programmed data 553 3121 210 Standard 3 0 January 1999 ...
Page 555: ...Page 536 of 536 Chapter 25 Fault locating and clearing 553 3121 210 Standard 3 0 January 1999 ...


