Page 218 of 536
Chapter 20 — Meridian Mail Compact Option installation and maintenance
553-3121-210
Standard 3.0
January 1999
2
Plug the printer’s AC power cord into an appropriate outlet, and turn on
the power. There is no need for it to be on the same circuit as the
Meridian Mail Compact Option cabinet.
3
Ensure that the printer is turned off.
4
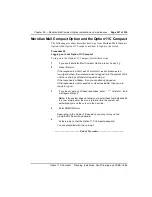
Press and hold the setup button on the front control panel of the printer
and, at the same time, power on the printer.
Figure 49
The LA75 Plus Companion printer control panel
5
Release the setup button one to two seconds after powering on.
The printer prints a list of the default settings. When the list is
complete, it goes back to the beginning of the list, reprints the first
setting, and stops. (Refer to
. Additional settings
are all defaults.)
CARD-080
←
↑
→
↓
Ready
Set-up
RDY
Serial Port
Fault
Quiet
LQ
Quiet/
Quality
Protocol
DEC
FF
LF
Summary of Contents for Meridian Meridian 1
Page 3: ...553 3121 210 Standard 3 0 January 1999 ...
Page 17: ...xiv Contents 553 3121 210 Standard 3 0 January 1999 ...
Page 97: ...Page 78 of 536 Chapter 8 Installing a new system 553 3121 210 Standard 3 0 January 1999 ...
Page 107: ...Page 88 of 536 Chapter 10 Installing the system ground 553 3121 210 Standard 3 0 January 1999 ...
Page 113: ...Page 94 of 536 Chapter 11 Installing the power supply 553 3121 210 Standard 3 0 January 1999 ...
Page 125: ...Page 106 of 536 Chapter 12 Adding an expansion cabinet 553 3121 210 Standard 3 0 January 1999 ...
Page 209: ...Page 190 of 536 Chapter 18 Connecting the trunks 553 3121 210 Standard 3 0 January 1999 ...
Page 323: ...Page 304 of 536 Chapter 21 Installing Hospitality 553 3121 210 Standard 3 0 January 1999 ...
Page 419: ...Page 400 of 536 Chapter 23 Pre programmed data 553 3121 210 Standard 3 0 January 1999 ...
Page 555: ...Page 536 of 536 Chapter 25 Fault locating and clearing 553 3121 210 Standard 3 0 January 1999 ...


