Page 276 of 536
Chapter 20 — Meridian Mail Compact Option installation and maintenance
553-3121-210
Standard 3.0
January 1999
9
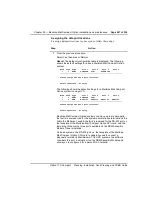
Fill out the appropriate fields.
10
Press [Save Schedule].
You are returned to the Volume Administration screen. From here you
can press [View Backup Schedule] to display the schedule you just
entered. To edit the schedule, you must begin again at
.
11
Turn on the power to the external tape drive and ensure that it is never
turned off.
—————————— End of Procedure ——————————
Once you have entered a schedule, backups proceed automatically. You may
choose to leave the same tape in the drive at all times. New backup data will
overwrite the old backup data.
Note: A backup tape will wear out over time. Please ensure that you
replace it regularly with a new tape, according to the manufacturer’s
recommendations.
Scheduled backups are useful in the event of emergencies, but you should still
perform an immediate full-system backup before proceeding with any
significant hardware or software procedures to ensure that no data is lost.
Restoring the system
Should the system fail, a recent backup tape allows you to restore the system
to the point at which the backup was made.
Procedure 49
Restoring the system
1
Refer to the “Restore from backup” chapter in the
System Installation
and Modification Guide (NTP 555-7001-215) to run the System
Installation and Modification from the Meridian Mail Compact Option
Install/data tape.
Note: Always use the same software release that was used to create
the backup.
2
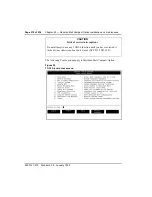
From the System Installation and Modification Menu, choose
“3 More Utilities”
→
“3 Restore System from Backup.”
Summary of Contents for Meridian Meridian 1
Page 3: ...553 3121 210 Standard 3 0 January 1999 ...
Page 17: ...xiv Contents 553 3121 210 Standard 3 0 January 1999 ...
Page 97: ...Page 78 of 536 Chapter 8 Installing a new system 553 3121 210 Standard 3 0 January 1999 ...
Page 107: ...Page 88 of 536 Chapter 10 Installing the system ground 553 3121 210 Standard 3 0 January 1999 ...
Page 113: ...Page 94 of 536 Chapter 11 Installing the power supply 553 3121 210 Standard 3 0 January 1999 ...
Page 125: ...Page 106 of 536 Chapter 12 Adding an expansion cabinet 553 3121 210 Standard 3 0 January 1999 ...
Page 209: ...Page 190 of 536 Chapter 18 Connecting the trunks 553 3121 210 Standard 3 0 January 1999 ...
Page 323: ...Page 304 of 536 Chapter 21 Installing Hospitality 553 3121 210 Standard 3 0 January 1999 ...
Page 419: ...Page 400 of 536 Chapter 23 Pre programmed data 553 3121 210 Standard 3 0 January 1999 ...
Page 555: ...Page 536 of 536 Chapter 25 Fault locating and clearing 553 3121 210 Standard 3 0 January 1999 ...


