background image

12

12

north kiteboarding

 10 solid manual

9.  vario trim

 
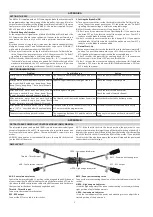
With this function, North offers you the opportunity to trim the kite according 
to your preferences. The Vario Trim enables you to influence the kite’s flying 
characteristics.

Please remember that the kite is optimally trimmed for most kiter’s needs when 
it leaves the factory. Do not change the default setup before you have gathered 
sufficient experience with your kite. 

In the default setup, the steering lines and the brake lines are tied to the knots 
that are marked in black. 
By moving the steering lines at the bar leader lines from the black knot up to the 
white knot, you can increase the kite’s speed. This setup is suitable for unhooked 
moves and freestyle maneuvers. It also reduces the steering forces.

9. vario trim

Summary of Contents for Solid 10

Page 1: ...user manual solid 10 ...

Page 2: ...ive safety information and useful tips for your first steps with the Solid in this manual We hope that you will enjoy your kite for a long time Kiteboarding is an incredibly fascinating sport If you wish to know more about NORTH KITEBOARDING and the latest products please visit our homepage at http www northkites com or our special snowkite site at http www north snowkites com Thank you Your North...

Page 3: ...d only use North kites if you are familiar with the use of power kites Never act carelessly when using this product Remember that you are not only responsible for your own safety but also for the safety of third parties while using this product 1 release of liability 2 2 safety 3 3 rigging the kite 4 4 launching 6 5 using the adjuster 7 6 relaunch 8 7 landing 9 8 packing the kite 10 9 vario trim 1...

Page 4: ...serving the warnings listed in this manual and by using common sense when practicing the sport RELEASE AND WAIVER OF CLAIMS By purchasing this North Kite product you agree to the fullest extent permitted by law to the following points TO WAIVE ANY AND ALL CLAIMS against Boards More and all related parties that may result from using this North Kite product now and in the future TO RELEASE Boards Mo...

Page 5: ...pull of the kite and remember that the kite may knock you over and drag you along Make sure that all the material you use is fully functional and in good conditions Never use damaged lines kites or bars Prepare yourself thoroughly for flying a kite and familiarize yourself with the theoretical basis of kiting Safe Location Before launching make sure that flying a kite is allowed in your chosen loc...

Page 6: ... trailing edge with a sufficient amount of snow or rocks The kite s leading edge is now pointing downwind Now unwind the lines from the bar while walking upwind Put the bar on the ground with the red side to the left The lines must run free and untangled from the bar to the kite Untwist the lines if necessary Attaching The Safety Leash After securing the kite on the ground with sufficient weights ...

Page 7: ...eart Safety release The special designed safety device Iron Heart can be easily triggered by pushing the red slider away from you After releasing the safety system the kite will remain connected on your safety leash and sink to the ground 3 Rigging The Kite ...

Page 8: ...dow It helps to keep the brake line pulled behind you to prevent the kite from launching prematurely Another good possibility is to have an assistant hold the kite down on the ground and then release it at the edge of the wind window Flying And Depowering The Kite Our kites are steered through a bar just like any conventional kite Always make sure that the red side of the bar is to your left By pu...

Page 9: ... can increase the kite s power by pulling the upper red loop toward you Additionally the North Bar offers you the opportunity to change the depower travel at the adjuster For this purpose simply untie the large knot at the adjuster and change the line to the desired length Please remember that these changes significantly affect the kite s trim The kite is delivered with optimum default settings 5 ...

Page 10: ...gust to relaunch the kite If the kite is not in a suitable position for relaunch sit down hold the bar securely in your left hand and grab the break lines from underneath the bar with your right hand Pull the break lines far enough behind you so that the kite rises turns around in the air and falls down on the ground again Now it is ready to launch Let go of the central line depower completely and...

Page 11: ...as an anchor In strong wind or with limited space in lee you can also land the kite at the edge of the wind window with the help of an assistant The second method is to land the kite with the help of the diagonal line By pulling this line the kite slows down begins to fly backwards and eventually collapses on the ground In strong wind it will however retain a certain amount of pull Therefore we re...

Page 12: ... up the lines Pull the safety line to shorten the flying lines and keep them shortened during the first few windings For safety reasons the safety leash should be disconnected from your body while winding up the lines Now you can wind up the lines on the bar in a figure of eight until you reach the diverters 8 Packing The Kite ...

Page 13: ...with the rubber bands on the bar ends to prevent uninten tional unwinding Place the kite with both ends on top of each other and put the bar carefully on top of the kite Now you can roll up the kite from the sides towards the center and squeeze the air out 8 Packing The Kite ...

Page 14: ...t kiter s needs when it leaves the factory Do not change the default setup before you have gathered sufficient experience with your kite In the default setup the steering lines and the brake lines are tied to the knots that are marked in black By moving the steering lines at the bar leader lines from the black knot up to the white knot you can increase the kite s speed This setup is suitable for u...

Page 15: ...essary to shorten the front lines with the help of the webbing adjuster 10 Maintenance And Care Do not expose your kite unnecessarily to UV radiation and sunlight When the kite was packed in a wet condition unpack it and dry it carefully before storing it over extended periods Always keep the kite in a dry place Minor damages of the canopy can be repaired with spinnaker cloth Clean the kite only b...

Page 16: ...ult of loss of use of this product This warranty does not cover damage caused by misuse abuse neglect or normal wear and tear including but not limited to punctures rigging with other than North Kiteboarding components damage due to excessive sun exposure or damage due to over inflation of the bladders damage caused by improper handling and storage damage caused by use in waves or shore break and ...

Page 17: ...For further information please visit www northkites com cover rider fabio ingrosso PIC bertrand boone ...

Reviews: