

Operation – Preparing the Sprayer for Each Use
23
If the sprayer has been used previously, it must be prepared BEFORE EACH SUBSEQUENT USE.
WARNING
Read instructions below carefully for inspecting and preparing the sprayer.
Damaged or clogged equipment could result in leaks or uncontrolled spray.
Leaks could result in injury to the operator or bystanders from chemical exposure,
or cause damage to the environment.
Important safety rules:
Power off.
Make sure all power is OFF before cleaning, inspecting, or servicing the sprayer.
Guards / shields.
Make sure all guards and shields are replaced after servicing the sprayer.
Replacement parts.
If a part needs replacement, only use parts that meet the manufacturer's
specifications. Replacement parts that do not meet specifications may result in a safety hazard
or poor operation of the sprayer.
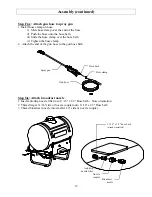
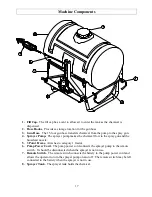
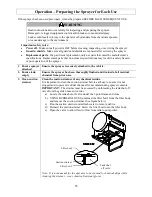
1. Ensure sprayer
attached
Ensure the sprayer is securely attached to the vehicle.
2. Ensure tank
empty
Ensure the sprayer has been thoroughly flushed and drained of all residual
chemical from prior uses.
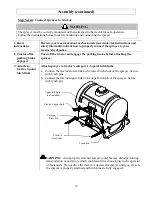
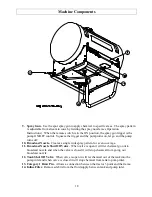
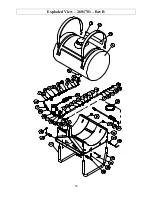
3. Clean suction
strainer
Clean the suction strainer of any chemical residue.
It is important to clean the suction strainer before each use to ensure it is not
clogged and to prevent residual chemical from contaminating sprayer contents.
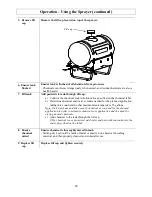
IMPORTANT:
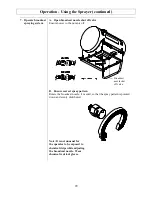
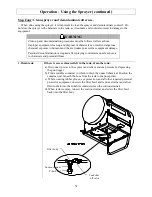
The strainer must be accessed by unthreading the tank shut off
valve from the garden hose swivel nut.
a)
Locate the tank shut off valve under the 3 point frame and close.
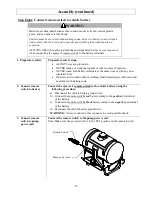
b)
USING RUBBER GLOVES, unthread the filter bowl from the filter body
and remove the suction strainer. (See figure below.)
c)
Run the suction strainer under fresh water to remove debris.
d)
Reinsert the suction strainer. Screw the filter bowl onto the filter body.
e)
Open the valve to allow fluid to flow from tank to pump inlet.
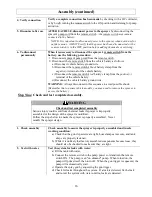
Note: It is not unusual for the operator to be exposed to chemical drips while
cleaning the strainer – wear chemical resistant gloves
Tank shut
off valve
Suction strainer
Filter body
Filter bowl


