
Troubleshooting
34
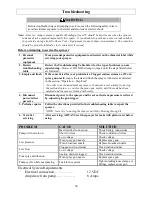
WARNING
Before troubleshooting or attempting to service, read the following safety rules to
avoid accidental exposure to chemical and also risk of electric shock.
Note:
A reserve, clean container capable of holding at least 55 should be kept for use when the sprayer
tank needs to be emptied temporarily for repairs. It is advisable to purchase a reserve tank suitable
for pesticide storage from Northern Tool + Equipment for use in these circumstances. The container
should be properly labeled as to its contents if it is used.
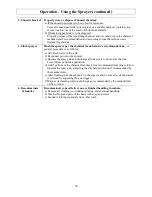
Before attempting to service the sprayer
:
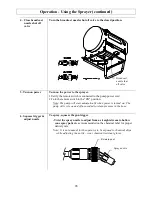
1. Personal
protective
equipment
Wear personal protective equipment as directed on the chemical label while
servicing your sprayer.
2. Review
troubleshooting
table
Review the Troubleshooting Table below for the type of problem you are
experiencing.
However,
DO NOT attempt to repair until the steps listed below
are followed.
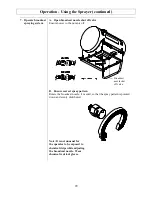
3. Empty and flush
If the cause listed for your problem is a Clogged suction strainer, or Worn
spray gun nozzle:
empty the tank and flush the sprayer with water as directed
in the section, "Operation – Step Four".
- In order to avoid accidental exposure to chemicals, never attempt to unclog
the suction strainer, or service the spray gun nozzle, until the tank has been
emptied and the sprayer flushed with water.
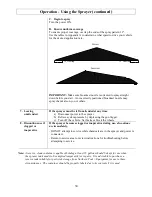
4. Disconnect
power/relieve
pressure
Disconnect power to the sprayer and be sure all system pressure is relieved
by squeezing the gun trigger.
5. Perform repairs
Follow the directions provided in the troubleshooting table to repair the
sprayer.
NOTE: Never try to unclog the sprayer nozzle by blowing through it.
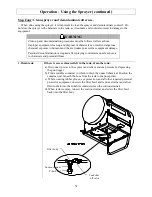
6. Test after
servicing
After servicing, ALWAYS test the sprayer for leaks with plain water before
using.
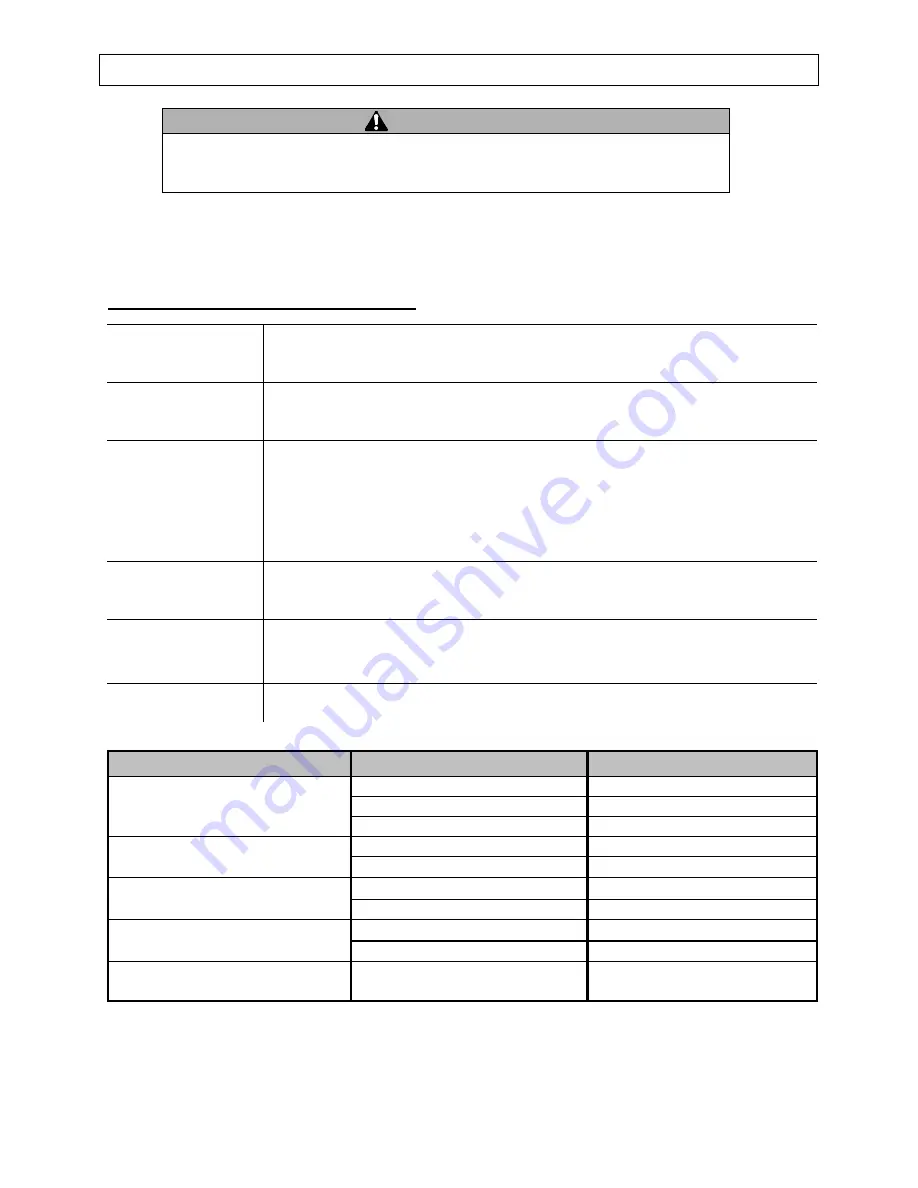
PROBLEM
CAUSE
SOLUTION
Pump will not turn on
Bad electrical connection
Check battery connections
Short in wires
Check condition of wires
Low voltage
Check voltage
Low pressure
Worn spray gun nozzle
Replace spray gun
Worn broadcast nozzle
Replace broadcast nozzle
Low flow
Clogged suction strainer
Clean suction strainer
Low voltage
Check voltage
Poor spray distribution
Suction strainer clogged
Clean suction strainer
Worn spray gun nozzle
Replace spray gun
Pump cycles while not spraying
Leak in the system
Tighten leaking hose clamps or
fittings, replace spray gun
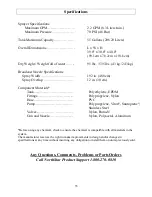
Electrical System Requirements
Electrical connection………………
12 VDC
Amp draw from pump……………..
8 Amps


