Page 21 of 36
Maintenance Interval
Maintenance Point
* To check for air leaks, apply a solution of soapy water around joints. While compressor is pumping to
pressure and after pressure cuts out, look for air bubbles to form.
** The pump oil must be changed after the first 20 hours of operation. Thereafter, when using synthetic
blend, non-detergent air compressor oil, change oil every 100 hours of operation or once a year,
whichever comes first.
+ Perform more frequently in dusty or humid conditions.
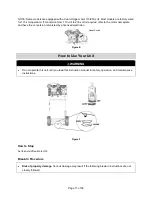
Checking Safety Valve
Before starting the air compressor, pull the ring on the safety valve
to make sure that the safety valve operates freely. If the valve is
stuck or does not operate smoothly, it must be replaced with the
same type of valve.
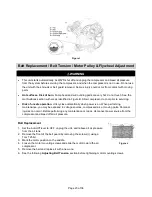
Checking Air Filter
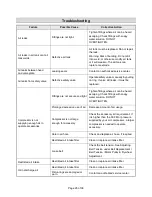
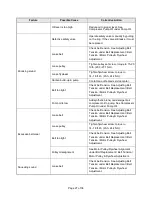
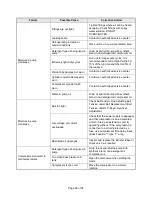
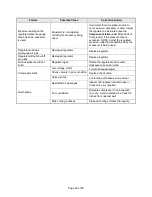
A dirty air filter will not allow the compressor to operate at full capacity. Keep the air filter clean at all times.
1. Ensure the Auto/Off switch is in the OFF position.
2. Allow the unit to cool.
3. Remove the two outer metal covers (A) from the base (C)
by pushing in on the cover and turning counter-clockwise.
4. Check the filter elements (B). If they are dirty or filled with
paint, replace them.
5. Place the outer metal covers back over the filter elements,
line up the slots, and push in and turn clockwise.
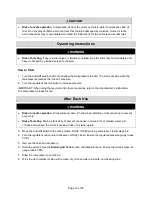
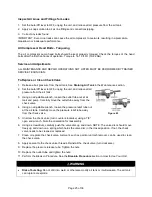
Draining Air Tank
NOTE: All compressed air systems generate condensation that accumulates in
any drain point (e.g., tanks, filter, aftercoolers, dryers). This condensate contains
lubricating oil and/or substances which may be regulated and must be disposed of in accordance with local,
state, and federal laws and regulations.
1. Set the Auto/Off switch to OFF.
2. Turn the regulator knob counter-clockwise to set the outlet pressure to zero.
3. Remove the air tool or accessory.
4. Pull the ring on the safety valve allowing air to bleed from the tank until tank pressure is approximately
20 PSI. Release the safety valve ring.
5. Drain the water from the air tank by opening the drain valve (counter-clockwise) on bottom of tank.
Figure H
Figure G

