Page of 15
8
should be attached to the vehicle frame.
8. Ensure rated “D” or bow shackles are used in conjunction with an approved tree trunk
protector to provide a safe anchor point.
9. When extending winch cable, ensure that at least FIVE (5) wraps of cable remain on drum at
all times. Failure to do so could result in the cable detaching from the drum under load,
causing serious personal injury or property damage.
10. All winches are provided with a red cable marking to identify that 5 cable wraps remain on
the winch drum; when this mark appears at the rollers, no recovery should be attempted
beyond this marking.
11. Since the greatest pulling power is achieved on the innermost layer of your winch, it is
desirable to pull off as much line as you can for heavy pulls; however, you must leave 5
wraps minimum on the drum, to the red cable marking. If this is not practical, use a snatch
block and double line arrangement.
12. Neat, tight spooling avoids cable blinding, which is caused when a load is applied and the
cable is pinched. If this happens, alternately power the winch in and out.
Do not attempt to
work a bound cable under load; free by hand.
13. Apply blocks to wheels when vehicle is on an incline.
14. Battery:
Be sure that the battery is in good condition. Avoid contact with battery acid or other
contaminants.
Always wear eye protection when working around a battery.
Have the engine running when using the winch, to avoid depleting the battery.
15. Winch cable:
Be sure that the cable is in good condition and is attached properly.
Do not use the winch if cable is frayed.
Do not move the vehicle to pull a load.
Do not replace the cable with a cable of lesser strength.
The life of cable is directly related to the use and care it receives. Following each use, a cable
must be wound onto the drum under a load of at least 500 lbs. (230kg) or the outer wraps will
draw into the inner wraps and severely damage the cable during winching. The first winch use
should be a familiar run while in a relaxed, non-recovery situation. Spool out the cable until the
red cable mark appears (about five wraps on the drum), then rewind the cable onto the drum
under a load of 500 lbs. (230kg) or more. This will slightly tension and stretch the new cable and
create a tight cable wrap around the drum. Failure to do so may result in cable damage and
reduced cable life.
When the cable is replaced, apply a drop of thread bonder to seal the threads and prevent
leakage. Tighten the clamp screw properly but do not over-tighten. The clamp thread will
prevent loosening of the screw in arduous conditions.
When replacing the steel wire rope, be sure to disconnect the winch cable to “+” (positive) of the
battery, and disengage the clutch by move the clutch handle to the “OUT” position.
16. Do not attempt to exceed the pulling limits of this winch.
17. Do not drive your vehicle to assist the winch. Vehicle movement in combination with winch
operation may overload the cable, the winch itself or cause damaging shock loads.
18. Shock loads when winching are dangerous! A shock load occurs when an increased force is
suddenly applied to the cable. A vehicle rolling back on a slack cable may induce a
damaging shock load.
19. The winch shown in this manual is solely for vehicle and boat mounted, non-industrial
Summary of Contents for 141456
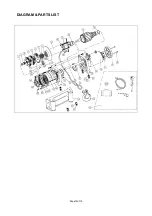
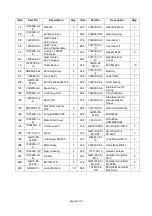
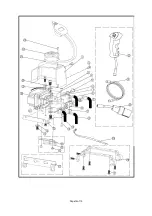
Page 12: ...Page of 15 12 DIAGRAM PARTS LIST...
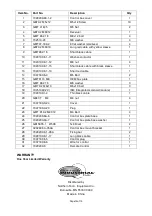
Page 14: ...Page of 15 14...


