background image

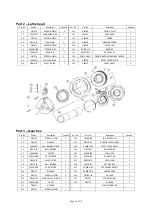
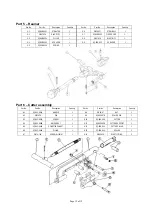
Part 5 – Reamer 

Ser. No. 

Part No. 

Description 

Quantity 

Ser. No. 

Part No. 

Description 

Quantity 

5-1 SQ50B-0501 

STELLATED  1 

5-6  GB308-77 

STEEL 

BALL  1 

5-2 GB879-76 

ELASTICITY 1 

5-7 SQ50B-0505 

FIVE 

EDGES 1 

5-3 SQ50B-0504 

PILLAR 

5-8  GB879-76 

ELASTICITY  1 

5-4 

SQ50B-0503 

SCRAPER 1 

5-9 SQ50B-502 

SCRAPER 1 

5-5 SQ50B-0506 

SPRING 


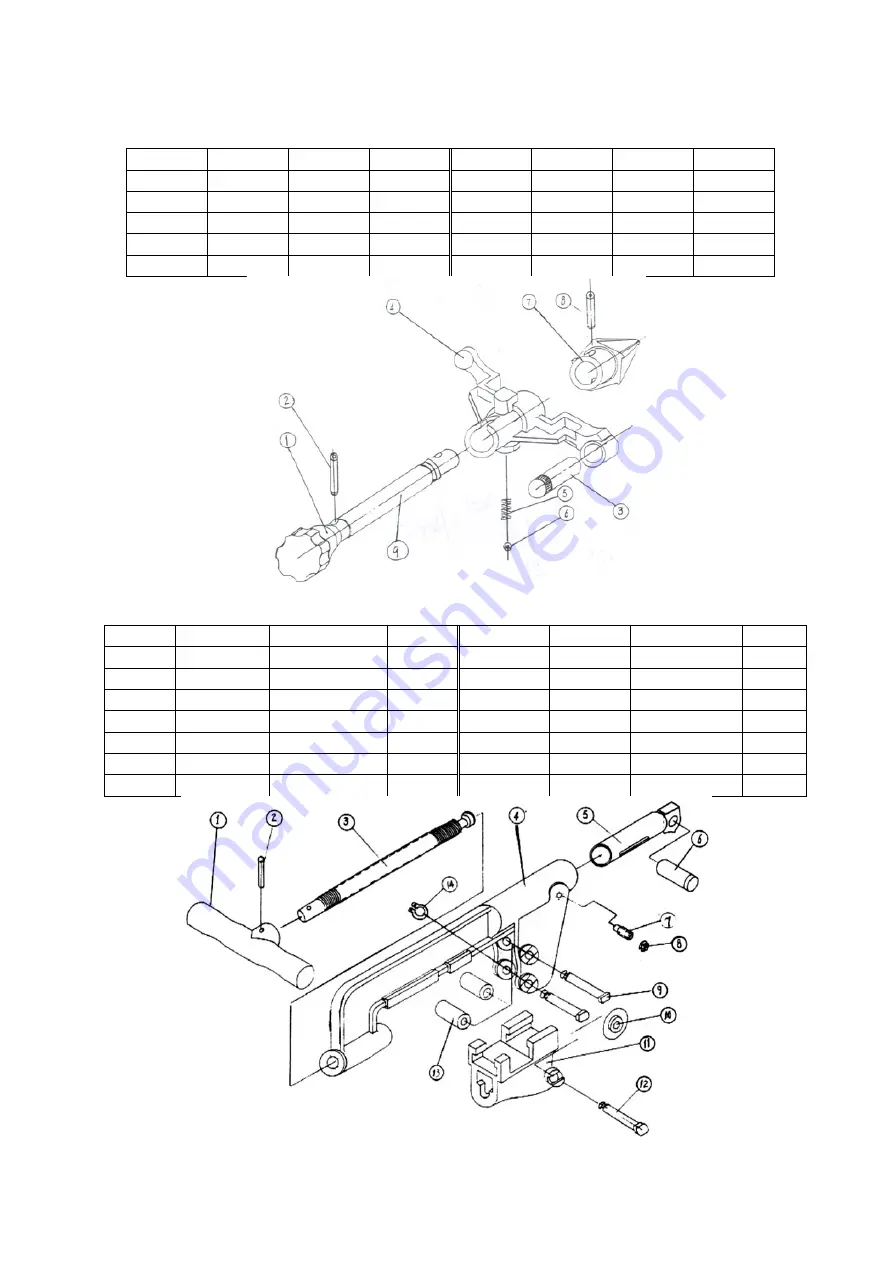
Part 6 – Cutter assembly 

Ser. No. 

Part No. 

Description 

Quantity 

Ser. No. 

Part No. 

Description 

Quantity 

6-1 SQ50C-601A  HANDLE 

6-8  GB54-87 

NUT 

6-2 GB19-76 

PIN 

6-9 SQ50C-607B 

ROLLER 

PIN 2 

6-3 SQ50C-602A 

SCREW 

6-10  SQ80A-606  CUTTER 

6-4 

SQ50C-604B 

KNIFE REST 

6-11 

SQ50C-603B 

CUTTER SUPPORT 

6-5 SQ50C-605A 

CONECTING 

SHAFT 1 6-12 

SQ50B-604 

CUTTER 

PILLAR 

6-6 SQ50C-606A 

PILLAR 

6-13  SQ50B-605  ROLLER 

6-7 

GB79-76A 

SCREW 8×12MM 

6-14 

GB894-76 

ELASTIC RING 


Page 12 of 12 

Summary of Contents for 891340

Page 1: ...Item 891340 Electric Pipe Cutting Threader User s Manual Assembly and Operation Instructions MADE IN CHINA...

Page 2: ...cation DO NOT use the machine until you have first contacted Northern Tool Equipment to determine if it can or should be performed on the product Before using the Electric Pipe Cutting Threader please...

Page 3: ...he work of a larger industrial tool Do not use a tool for a purpose for which it was not intended 7 Dress properly Do not wear loose clothing or jewelry as they can be caught in moving parts Protectiv...

Page 4: ...with grounded surfaces such as pipes radiators ranges and refrigerator enclosures 17 Replacement parts and accessories When servicing use only identical replacement parts Use of any other parts will v...

Page 5: ...e Die Head 3 Remove the Die Head assembly from carriage by moving up then down and pushing to the left 4 Set Die Head assembly on a flat surface with numbers facing up 5 Loosen Die Head lever nut and...

Page 6: ...ie Head Part 4 7 With the Die Head down turn the Carriage Handle clockwise to move it forward towards the pipe Verify that the inside diameter of the dies match the outside diameter of the pipe 8 Swit...

Page 7: ...en over pipe 4 Place Die Head Part 4 and Chamfering Tool Part 5 up in their resting position 5 Open Cutter Part 6 handle counterclockwise until it fits over pipe to be cut 6 Switch the power Push Butt...

Page 8: ...an Scrap Tray 1 9 receiver tank upper cover Oil Tank and strainer 3 Check Cutter wheel and replace if dull or damaged 4 If chuck jaw inserts show significant wear or damage replace them all 5 Clean Di...

Page 9: ...have broken teeth Replace set 3 Dies were installed incorrectly Check numbers on Die and Die Head Dies cannot engage the pipe 4 Die Head slots contain small pipe chips Clean Die Head and Dies Hammer...

Page 10: ...NG 1 1 6 SQ50C 107 SAFETY CIRCLE 1 1 21 SQ50C 106 2 SLEEVE 1 1 7 SQ50C 110 PIN 1 1 22 SQ50C 106 1 NUT 1 1 8 KAO 5K PUSHBUTTON 1 1 23 SQ50C 106 4 VALVE 1 1 9 SQ50B 125 SCRAPS TRAY 1 1 24 SQ50C 106 7 TI...

Page 11: ...t No Description Quantity Ser No Part No Description Quantity 3 1 GB70 76 SCREW 4 12MM 3 3 16 SQ50B 306 LOW GEAR SHAFT 1 3 2 GB97 76 WASHER 3 3 17 GB1096 79 PARALLEL KEY 6 14MM 1 3 3 SQ50B 307 BALL BE...

Page 12: ...2 BY501 4 HANDLE 1 4 9 BY504 4 SUPPORT DISK 1 4 3 BY501 03 SCREW 1 4 10 GB70 85 HEX SOCKET CAP SCREW 4 4 4 BY504 2 SCUTCHEON 1 4 11 GB97 85 WASHER 1 4 5 GB818 85 SET SCREW 2 4 12 GB71 85 WINBLE TIGHTE...

Page 13: ...SQ50B 0506 SPRING 1 Part 6 Cutter assembly Ser No Part No Description Quantity Ser No Part No Description Quantity 6 1 SQ50C 601A HANDLE 1 6 8 GB54 87 NUT 1 6 2 GB19 76 PIN 1 6 9 SQ50C 607B ROLLER PI...

Reviews: