


Page of 13
9
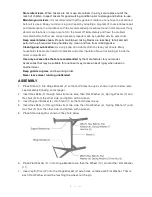
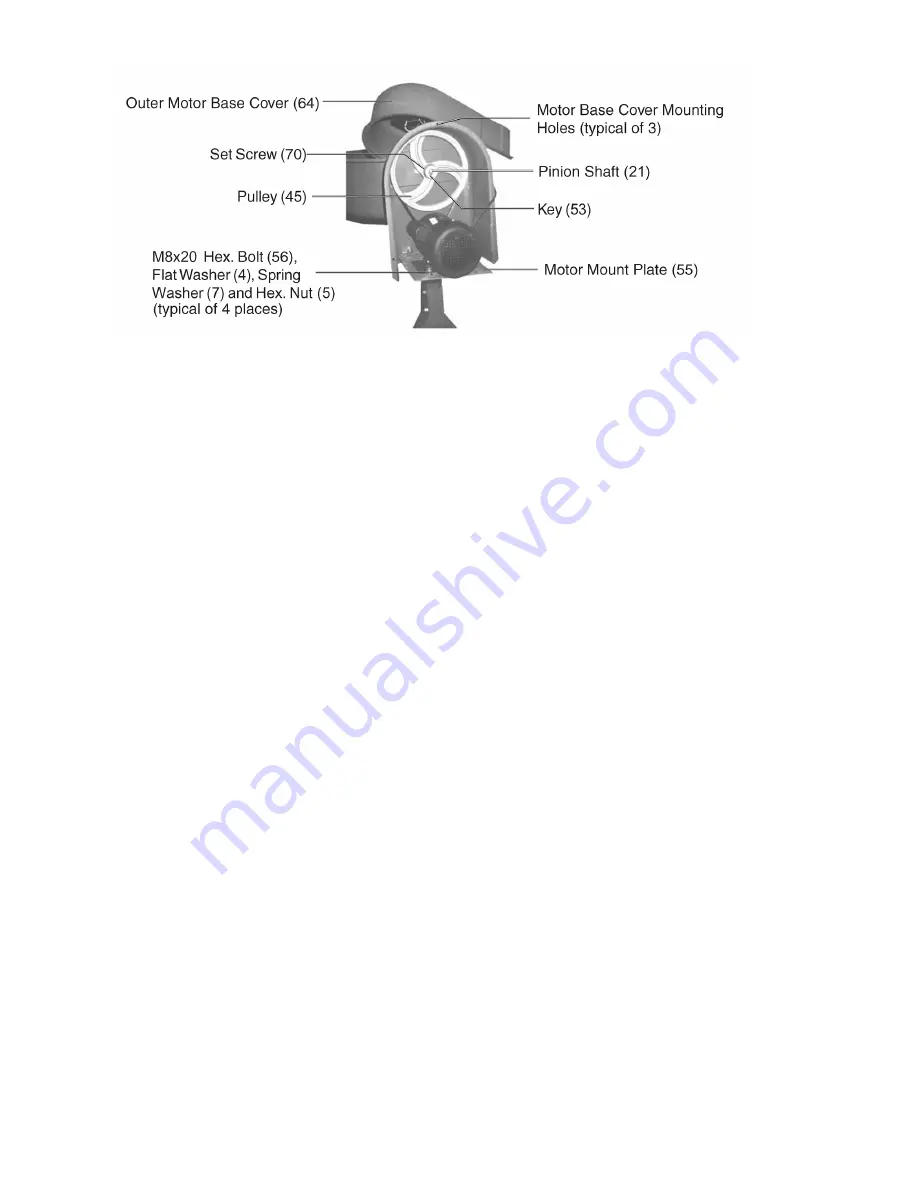
23. Once the Pulley is pushed in all the way, use an Allen wrench to tighten the Set Screw (70) on
the side of the Pulley hub.
24. Install the pulley Belt (68). Place Belt around Motor drive Pulley (54), then over the belt Pulley
(4
5
). Push the Motor inward until the drive pulley is directly under the belt Pulley. Tighten the four
Bolts securing the Motor to the Motor Mount Plate.
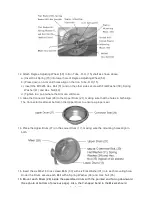
25. Push the Motor downward until the Belt tension is tight. This step may require tapping down the
Strap (61) behind the Inner Motor Base Cover (58). Refer to the photo at the top of the previous
page. When proper tension is achieved, tighten the Hex. Nuts on the Strap (61).
26. Check if Motor and belt turns true. Hand turn the belt Pulley and verify that the Motor drive
pulley and belt pulley does not rub against any other part, and that the pulleys turn true. Make
adjustments to Motor location as required.
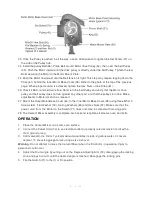
27. Mount the Outer Motor Base Cover (64) to the Inner Motor Base Cover (58) using three
M5x10
Screws (65)
, Flat Washer (59), Spring Washers (66)
and
Hex
Nuts
(67)
.
Make sure that the
power cord from the Motor to
the Switch (71) does not come in contact
with
moving parts.
28. The Cement Mixer assembly is complete. Go back and retighten all screws, nuts, and bolts.
OPERATION
1. Place the Cement Mixer on a solid, even surface.
2. Connect the Power Cord (72) to an electrical outlet (or properly rated extension cord) with a
third, ground prong.
3. Add material to the Drum. Typical maximum quantities include: 2 gallons water, 3 shovels
cement, 15 shovels aggregate rock using a size 3 shovel.
Warning
: Do not attempt to move the Cement Mixer when it is full and/or in operation. Injury to
personnel could occur.
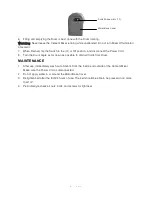
4. Adjust the Drum angle by pulling out on the Degree Adjusting Arm (50), disengaging the locking
pins, and push on Arm until the desired angle is reached. Reengage the locking pins.
5. Flip the Switch (71) to the (I) or On position.


