background image


By following these instructions, you will be able to start a fire in your Northern Stoker without using chemicals and/or 

any unnecessary risk to you or your furnace. 


1.


Take a look around your Northern Stoker to be sure there is no fuel (dry wood) or other combustibles, within 

8’ (2438 mm) of it, before starting a fire.  Do not store fuel or other combustible material within marked 
installation clearances.  

2.


Before starting , be sure you have removed the rain cap from the chimney.  

3.


Be sure the water level is at required level. circulating pumps are 

ON

, electronic control system is plugged in 

and selector “SYSTEM” is 

ON

.  

4.


Turn “

OFF

” combustion chamber fan at switch on the side (upper right side toogle switch on structure.) of 

the Northern Stoker.  

5.


Place some dry paper, birch bark, dry leaves, shavings or cardboard on the grate within the combustion 

chamber. On top of this, put some fine split wood, such as pine or cedar kindling. 

6.


Then place a few pieces of wood on top of your kindling. Now you are ready to strike a match and start a fire.  


7.


When you have started the fire, close the door.  


8.


It is time to turn 

ON

 the combustion chamber blower fan. (upper right side toogle switch on structure.) The 

fan must be on to provide proper combustion air. Press the START button “C” on the control panel. 

9.


You have a fire started and the combustion chamber blower fan is 

ON

. It is time to go get more fuel from the 

dry storage building (Suggestion: use a wheel barrow) in preparation to increase your fire. 

10.


When you need to add this additional fuel, turn “

OFF

” the combustion chamber blower fan, follow 

instructions on page 8 for Refueling the Northern Stoker. Wait a minimum of one minute or until smoke clears 
from the chimney. Open the door slowly, keeping the door between you and the fire opening. You can see the 
base fire and add the necessary fuel.  You may, also, notice some moisture in the fire drum, do not be alarmed, 
it is condensation and will only happen on a cold start.  

11.


When you have added the fuel to the fire, close and securly latch the door. 

NEVER LEAVE AN OPEN 

DOOR

. Turn “

ON”

 the combustion chamber blower fan. 

12.


Now you have successfully started the first fire in your new Northern Stoker. 


Notes:  Establish a routine for dry storage of fuel, care of the stoker & firing techniques. 

Check daily for creosote build up until experience shows how often cleaning is necessary. Remove cresote 
when evident, especially check the chimney flue, chimney connector and chimney.   
Inspect & clean flues and chimney regularly. 


Starting a Fire 


CAUTION! Never use Gas, Oil, Naptha, Diesel Fuel, Tires or any other inappropriate 

combustibles to start a fire. 

Do Not Burn Garbage, Burn Dry Wood Only. 

CAUTION! DO NOT CONNECT THIS UNIT TO A CHIMNEY FLUE SERVING ANOTHER 

APPLIANCE. 

BURN WOOD ONLY! 

WARNING: RISK OF FIRE! 

Do not operate with fuel loading or ash removal doors open. 

Do not store fuel or other combustible material within marked installation clearances. 

Inspect and clean flues and chimney regularly 

CAUTION – Hot Surfaces:  Keep children away.  Do not touch during operation. 


CAUTION! NEVER LEAVE AN OPEN DOOR. 

Do not operate with fuel loading or ash removal doors open. 

Approved Fuel: Dry split wood 

Summary of Contents for 30-30

Page 1: ...SEDNOVEMBER1 2013 Note In an effort to provide our customers with the best product and experience available Northern Stoker reserves the right to update and modify the contents of this Owners Manual a...

Page 2: ...Starting a Fire 7 Refueling 8 Cleaning your Northern Stoker 9 Electronic Control System 10 14 Maintenance Schedule and Approved Fuels 15 16 Troubleshooting Guide 17 Furnace Diagram 18 Specifications...

Page 3: ...burn 30 50 less fuel This would represent a very high return on your labour Your Northern Stoker will give you the best results if you burn the best possible fuel which is Dry Wood If you cut your own...

Page 4: ...oor clean and free from combustible materials CAUTION It is important to regularly clean the flue pipes and chimney and is especially important to thoroughly clean at the end of the heating season to...

Page 5: ...erneath a driveway they should be buried approximately 4 5 1219 1524 mm below grade If lines travel through a low or wet area they should be insulated and installed in a water tight piping Burying Tip...

Page 6: ...ys and various system setups to add your Northern Stoker Water Treatment fluid Please contact your Northern Stoker Dealer for the best way to do so as per your system design Model 30 30 requires appro...

Page 7: ...C BOILER PERIODICALLY TO ENSURE THAT IT WILL OPERATE SATISFACTORILY WHEN NEEDED 2 DO NOT RELOCATE OR BYPASS ANY OF THE SAFETY CONTROLS IN THE ORIGINAL GAS OIL ELECTRIC BOILER INSTALLATION 3 CAUTION TH...

Page 8: ...ater to water heat exchanger Forced Air Furnaces Forced air furnaces are the most common type of primary heat systems in residences today With the addition of a water to air heat exchanger installed i...

Page 9: ...fire 10 When you need to add this additional fuel turn OFF the combustion chamber blower fan follow instructions on page 8 for Refueling the Northern Stoker Wait a minimum of one minute or until smok...

Page 10: ...l into your Northern Stoker When placing the fuel in your furnace it should be placed in the firebox combustion chamber and not in the loading door frame area Wood can be loaded to the top of the open...

Page 11: ...en bottom auger This will clean the heat exchanger tubes and deposit the fly ash back into the combustion chamber Every two 2 weeks or there about it is advisable to remove the augers and clean the au...

Page 12: ...LOW WATER ALARM INDICATOR C START PUSH BUTTON D SYSTEM OFF ON ILLUMINATED SWITCH G INTERIOR LIGHT OFF ON SWITCH H CONTROLLER I TEMPERATURE FARRENHEIT J OUT1 INDICATES BLOWER IS ON M PV INDICATES ACTU...

Page 13: ...roller system to function correctly The switch will illuminate red if left in the OFF position This is a reminder to the operator to turn the switch ON for normal operation Note The auxiliary receptac...

Page 14: ...GLE DEGREE INCREMENTS TO 10 DEGREE INCREMENTS This button changes the set temperature UP Down buttons O from single degree increments to 10 Degree increment adjustments M PV INDICATES ACTUAL MANIFOLD...

Page 15: ...e UP arrow and DOWN arrow buttons O on the CONTROLLER H The range of adjustable temperature is 150 F to 185 F 65 6 C to 85 C Simply press up or down to the desired temperature shown at M Now the furna...

Page 16: ...chamber loading door and turn ON the blower fan Toggle switch located on the upper right side of structure Flip combustion chamber blower fan toggle switch ON D When you want to shutdown the furnace f...

Page 17: ...ean out augers Page 9 Observe light layer of soot fly ash or creosote on the combustion chamber walls chimney flue chimney connector or chimney and remove Page 9 Top up with water to ensure there is n...

Page 18: ...cian or Northern Stoker Dealer APPROVED FUEL NON APPROVED FUELS Dry split wood up to 25 moisture content Fire starter fluids of any kind Gas Diesel Fuel Oil Tires Naphtha YOUR INVESTMENT You have inve...

Page 19: ...le Fan Forced Furnace make sure that existing primary heat source is operating correctly If the temperature reading is inaccurate check that the temperature probe has a loose connection come out of th...

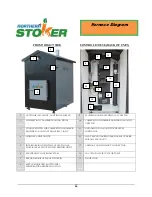
Page 20: ...TDOOR 120V LIGHT 11 EXPANSION TANK AND WATER LEVEL INDICATOR 4 CHIMNEY AND RAINCAP 12 HEAT EXCHANGER DOORS HOUSES AUGERS FOR ASH CLEANOUT 5 INTERIOR LIGHT SWITCH LOCATED ON 6 WATER LEVEL FLOAT SWITCH...

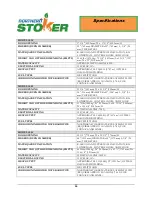
Page 21: ...OUSE AND FLOOR WEIGHT AND OUTSIDE DIMENSIONS EMPTY 3175 lbs 1440 kg 84 2134 mm L x 56 11 16 1440 mm W x 105 5 8 2383 mm H WATER CAPACITY 167 IMP GALLONS 758 L ELECTRICAL RATING 120V 60HZ 15A HEAT OUTP...

Page 22: ...Follow instructions in owner s manual OPERATE THE OIL GAS ELECTRIC BOILER PERIODICALLY TO ENSURE IT WILL OPERATE SATISFACTORILY WHEN NEEDED DO NOT RELOCATE OR BYPASS ANY OF THE SAFETY CONTROLS IN THE...

Page 23: ...21 Notes...

Page 24: ...N INFORMATION INSTALLED BY DEALER CUSTOMER INSTALLED FOR HOUSE COMMERCIAL AGRICULTURAL GARAGE SHOP GREENHOUSE OTHER ____________________________________________________________________________________...

Page 25: ...GES INCURRED TO PROPERTY BY DISTRIBUTORS DEALERS AND SUB TRADES DAMAGE CAUSED BY CORROSIVE WATER WATER TREATMENT PURCHASED FROM A NORTHERN STOKER DEALER MUST BE ADDED TO HELP WITH CORROSION LUBRICATIO...

Page 26: ...N INFORMATION INSTALLED BY DEALER CUSTOMER INSTALLED FOR HOUSE COMMERCIAL AGRICULTURAL GARAGE SHOP GREENHOUSE OTHER ____________________________________________________________________________________...

Page 27: ...GES INCURRED TO PROPERTY BY DISTRIBUTORS DEALERS AND SUB TRADES DAMAGE CAUSED BY CORROSIVE WATER WATER TREATMENT PURCHASED FROM A NORTHERN STOKER DEALER MUST BE ADDED TO HELP WITH CORROSION LUBRICATIO...

Page 28: ...GES INCURRED TO PROPERTY BY DISTRIBUTORS DEALERS AND SUB TRADES DAMAGE CAUSED BY CORROSIVE WATER WATER TREATMENT PURCHASED FROM A NORTHERN STOKER DEALER MUST BE ADDED TO HELP WITH CORROSION LUBRICATIO...

Reviews: