

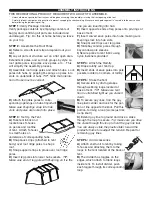
STEP 1:
Verify Package Contents
Verify package contents by emptying contents of
bag(s) and confirming all parts are included and
undamaged. Tip: Do this at home before you leave
on your trip.
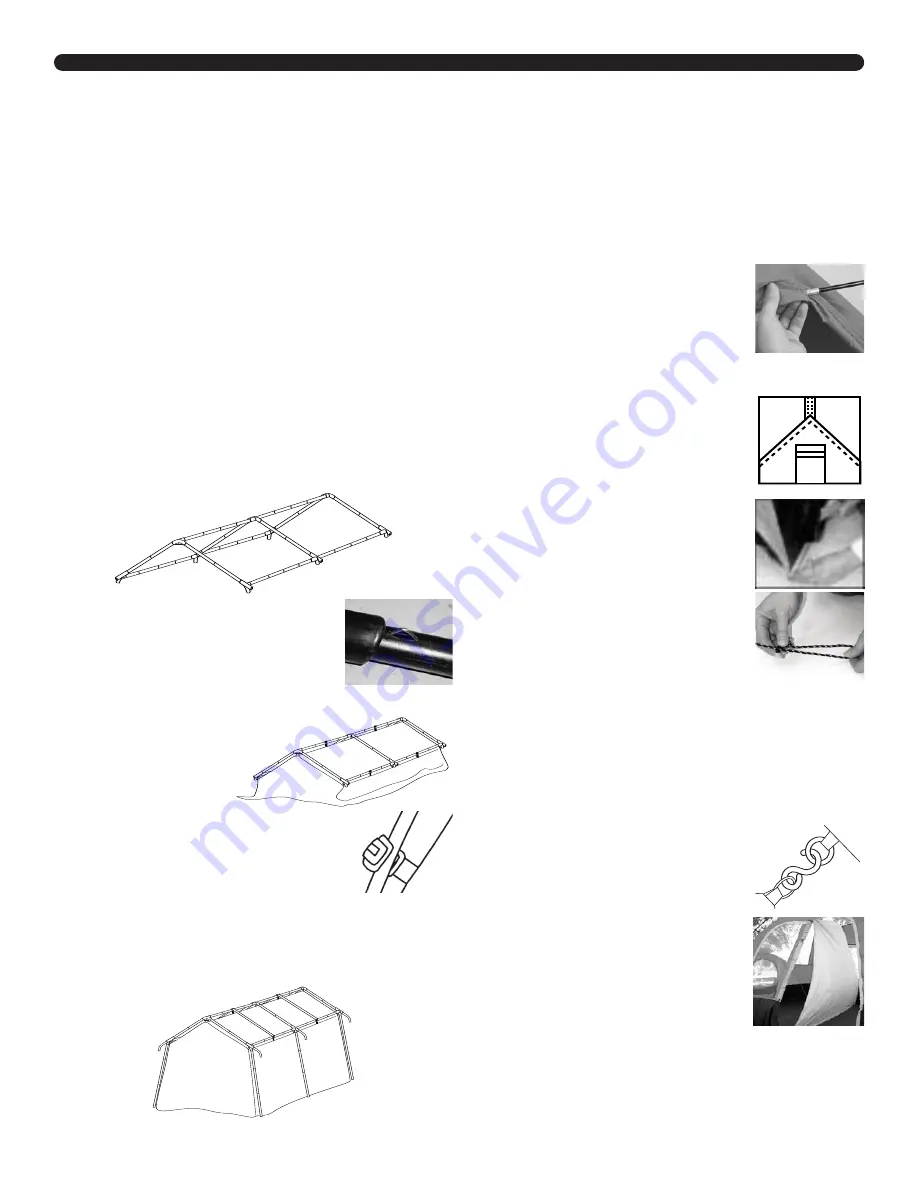
STEP 2:
Assemble the Roof Poles
A)
Select a smooth level site and spread out your
tent.
B)
Lay all parts of structure out on a flat open area.
Extend tent poles, and sort into groups by style i.e.
roof gable poles, leg poles, eave poles, etc…. This
will simplify the assembly process.
C)
Assemble roof ridge poles and attach hubs. Lock
poles into hubs by popping R-springs on poles into
slots on underside of hubs.
TIP: Note that orienta-
tion of hubs must be correct
.
D)
Attach the gable poles to corre-
sponding openings on hubs
.Important:
Make sure R-springs snap into hub
slots and poles are locked into place.
STEP 3:
Set Up the Tent
A)
Take tent fabric and
locate brass S-hooks
on peaks and roofline
of tent. Attach S-hooks
to small holes on
underside of corresponding hubs.
B)
Snap Quick Clips (attached to tent
body) over roof ridge poles to shape
roof.
C)
Snap support straps in place over roof ridge
poles.
D)
Insert leg poles into lower hub sockets.
TIP:
Make sure end of leg pole with R-spring on it is the
one you are inserting into hub.
E)
Insert opposite ends of leg poles onto pin-rings at
base of tent.
F)
Insert curved eave poles into hubs, making sure
R-springs lock into hub slots.
G)
Snap Quick Clips over leg poles.
H)
Slide bay window poles through
bay window pole sleeves.
I)
Secure poles to tent fabric using
nylon fasteners provided.
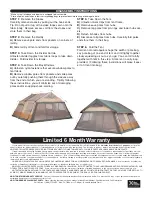
STEP 4:
Attach the Rainfly
A)
Drape rainfly over tent top.
B)
Insert ends of eave poles into pole
pockets located on corners of rainfly.
STEP 5:
Stake the Tent
A)
Secure tent by driving stakes
through webbing loops located at
base of tent.
TIP: Make sure tent
floor is stretched tight as you stake it
down.
B)
To secure guy lines, find the guy
line plastic slider and look for the por-
tion of line opposite the knot. Pull this
portion, forming a loop (works just like
a slip knot!)
C)
Extend guy line to ground and drive a stake
through the loop to secure.
Tip: make sure you drive
the stake through this loop to hold the guy line taut.
You can always slide the plastic slider toward the
product’s frame to readjust the tension.
Repeat for
remaining guy lines.
STEP 6:
Add Accessories
A)
Attach shelf unit to tent by taking
S-hooks and attaching them to the
loops in the tent located at the back of
tent.
B)
The divider has toggles on the
edges, which attach to fabric loops
inside tent. To install divider, push
each toggle through its corresponding
loop.
ASSEMBLY INSTRUCTIONS
THIS RECREATIONAL PRODUCT REQUIRES TWO ADULTS TO ASSEMBLE.
*
Unless otherwise specified all instructions will be given assuming the assembler is facing the front opening of the tent.
*
Carefully fold out your poles, using caution to prevent snapping the shock-cording. Make sure each pole segment is “seated” into the next section
before flexing the pole during set-up.
Summary of Contents for 88-97-08
Page 1: ......


