T6-D-USER-AV100-EN
Page 5-2
Maintenance
© Park Air Systems Limited 2020
(7)
Check the heatsink cooling fins for blockages.
(8)
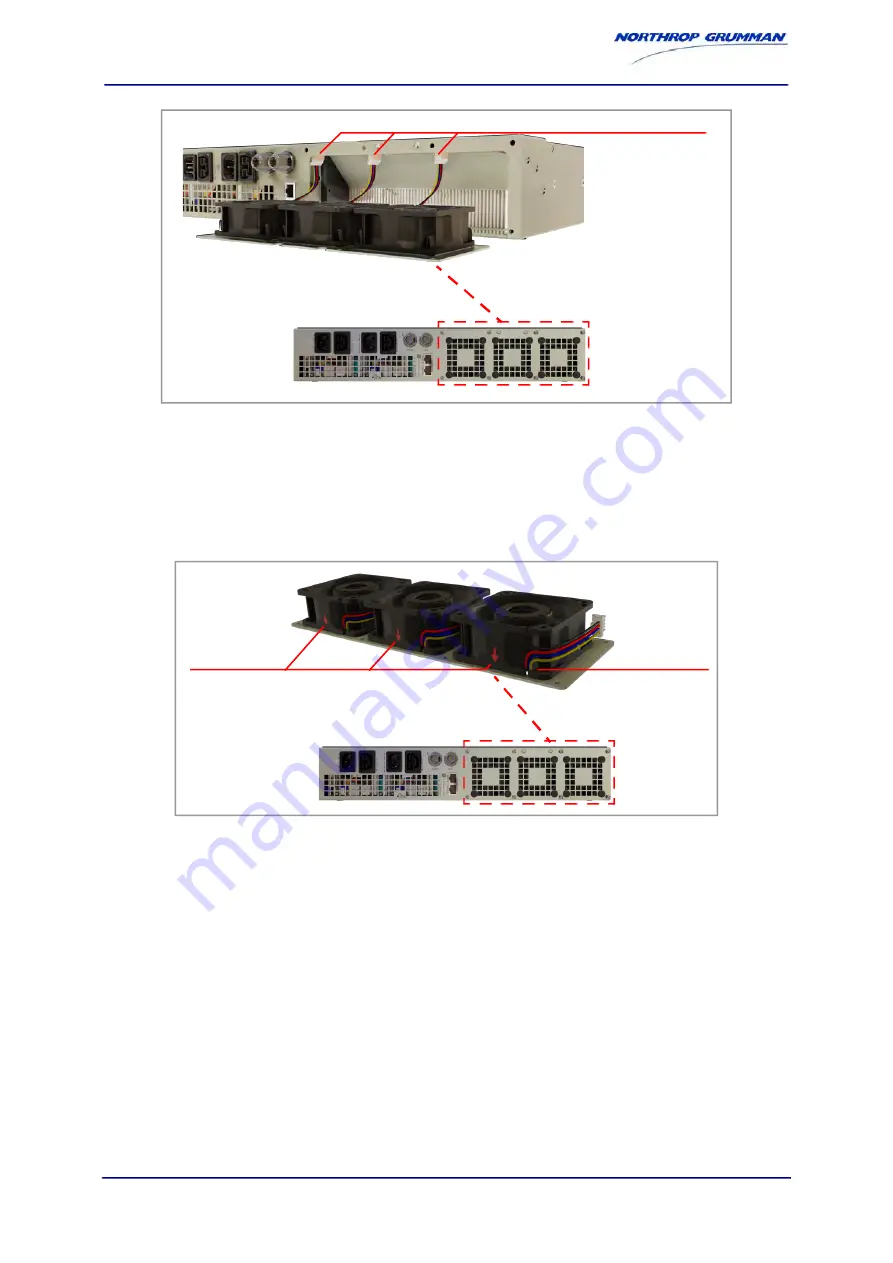
Connect the new fan/screen assembly.
Note:
The fan/screen assembly must be replaced with the same type.
Note the cable and fan position:
(9)
Insert the new fan/screen assembly into the rear of the amplifier.
(10) Fasten the fan/screen assembly with the eight (8) fixing screws.
(11) Install the amplifier to the cabinet (if applicable).
(12) Connect all the cables.
(13) Switch on the amplifier.
The amplifier continually checks the correct function of the fan.
Clip-on connectors
Cable position
Fan markings
Summary of Contents for Park Air T6-AV100
Page 12: ...T6 D USER AV100 EN Page xii Park Air Systems Limited 2020 Intentionally blank ...
Page 18: ...T6 D USER AV100 EN Page 1 4 Overview Park Air Systems Limited 2020 Intentionally blank ...
Page 28: ...T6 D USER AV100 EN Page 2 10 Description Park Air Systems Limited 2020 Intentionally blank ...
Page 34: ...T6 D USER AV100 EN Page 3 6 Installation Park Air Systems Limited 2020 Intentionally blank ...
Page 47: ...T6 D USER AV100 EN Page 7 2 Specification Park Air Systems Limited 2020 Intentionally blank ...
Page 51: ...T6 D USER AV100 EN Page 9 2 Fault finding Park Air Systems Limited 2020 Intentionally blank ...


