Chapter 4 - Understanding the Chart Screen
961/962 Operations and Reference Manual, Rev. A
Page 4-27
To edit this route or follow it now, press the
WAYPTS/
ROUTES
key until you reach the
ROUTES
screen, then
press the
EDIT
key (to edit the route) or
FOLLOW
key (to
follow it now).
NOTE:
For details about displaying a different route on the
CHART
screen,
see “Displaying a route on the chart screen” starting on page 8-3.
Going to a selected route point
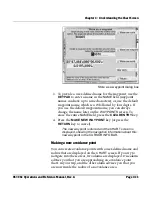
To select the desired route point, you may want to use the
LEFT ARROW
and
RIGHT ARROW
keys to highlight a route
“point,” not a named waypoint. Why? If you select, for
example,
POINT 3
from the route, you’ll follow the remainder
of the route after
POINT 3
. Instead, if you select a named
waypoint from the route, for example,
WAYPT D
, you’ll
navigate only to that named waypoint.
To go directly to an existing route point and continue along
the displayed route (remember to first display the route on the
CHART
screen; see “Displaying a route on the chart screen”
starting on page 8-3):
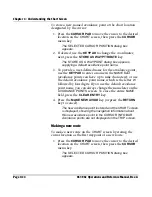
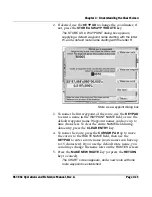
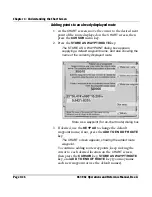
1. On the
CHART
screen, press the
CURSOR PAD
to select
the desired route point (use the
ARROW
keys, if
necessary), then press the
CURSOR
menu key.
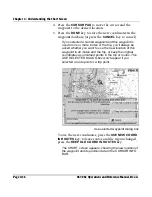
The
SELECTED ROUTE POINT
dialog box appears.
Summary of Contents for 961
Page 6: ...Page viii 961 962 Operations and Reference Manual Rev A ...
Page 8: ...Page x 961 962 Operations and Reference Manual Rev A ...
Page 14: ...Page xvi 961 962 Operations and Reference Manual Rev A ...
Page 92: ...Chapter 3 Using the Controls Page 3 34 961 962 Operations and Reference Manual Rev A ...
Page 160: ...Chapter 6 Creating Waypoints Page 6 18 961 962 Operations and Reference Manual Rev A ...
Page 176: ...Chapter 7 Creating Avoidance Points Page 7 16 961 962 Operations and Reference Manual Rev A ...
Page 202: ...Chapter 8 Creating Routes Page 8 26 961 962 Operations and Reference Manual Rev A ...
Page 380: ...Glossary Page G 8 961 962 Operations and Reference Manual Rev A ...


