background image

972 Installation Manual, Rev. B

Page 9

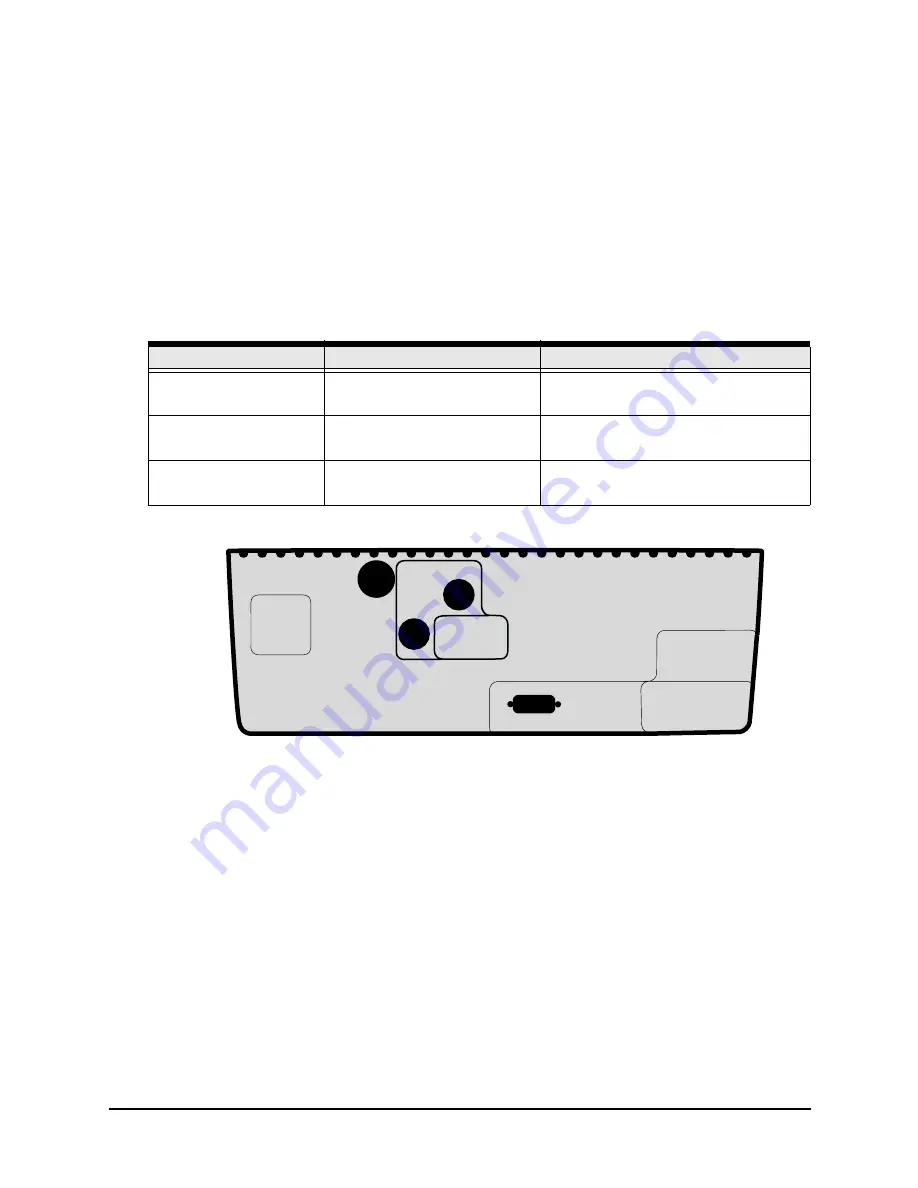
Control head connectors 

Control head connectors are shown in Figure 3 on page 9. The control head connects to:

•  

DC power, through the supplied WA-535 cable with a 7-Amp in-line fuse. 

•  

The processor module, using the supplied WC276-9 DVI video cable and the supplied 
WA612-9 data cable.


Processor connectors 

Interface connectors are shown in Figure 4: ”Processor connectors,” below. The functions of these 
connectors are described in Table 6. Interfacing is described in detail in Section Six, beginning on 
page 23.

Table 5: Interface connector functions

Connector name 

Connector function(s)

Connects to...

CONTROL (8-pin 
connector)

Control signals to and from 
the processor

CONTROL connector on the 
processor module

DATA
(DVI connector)

Digital video to control head

DATA connector on processor

POWER (3-pin 
connector)

Power input

10 to 32 VDC, 30 watts

PWR

FUSE

10 A

CTRL

DATA

 Figure 3:  Control head connectors

Summary of Contents for 972

Page 1: ...SYSTEM INSTALLATION MANUAL Revision B Part Number GM972IM Northstar a unit of Brunswick New Technologies Marine Electronics 30 Sudbury Road Acton Massachusetts 01720 www NorthstarNav com Service 978 897 6600 Sales 800 628 4487 ...

Page 2: ......

Page 3: ...hnical details 18 Installation Planning 18 Ethernet Switches 19 SECTION FIVE Checking out the system 21 Turning the 972 on and off 21 Chart data 21 Checking satellite status 21 Installation test checklist 22 Checking the network 22 SECTION SIX Interfacing the 972 system 23 The NMEA connector 24 Configuring the RS 232 port 28 Using the Aux Port 29 Connecting the 972 to a remote display 33 Connectin...

Page 4: ......

Page 5: ...ded Installations in these areas require special provisions for shielding and the installation design must provide total protection from any moisture Problems caused by moisture vibration and interference are not covered by warranty The processor must be mounted in a horizontal position so that its heat management system can work correctly For advice regarding equipment placement please consult wi...

Page 6: ...1 Northstar 972 Operator s Manual GM972UM 1 Owner registration card GD671 1 Mounting template GT972 1 Limited warranty statement GD683 1 Caution label GD972CAUT 4 BNC plastic caps HM420 1 10 foot power cable with 7 amp fuse WA535 B 1 10 foot NMEA interface cable WA215 Table 2 972 Control Head Installation Kit Qty Part name Part number 1 Flush Mounting Template GT15 1 Flush mount gasket HG412 1 Sun...

Page 7: ...ng HN421 12 Threaded stud 8 32 for flush mounting HS605 12 Lockwasher 8 for flush mounting HW400 12 Flat washer 8 for flush mounting HW405 Table 4 972 Optional equipment Part name Part number Ethernet cables See Section 4 Remote control and batteries 972RMC A Spare batteries for remote control BL134 Additional antenna cable WC255 or WC263 Northstar Echosounder Northstar Radar ...

Page 8: ...SECTION ONE Introducing the 972 Page 4 972 Installation Manual Rev B ...

Page 9: ...mends bench testing the 972 with a GPS antenna before installing it onto the vessel Bench testing ensures that the equipment is fully operational and lets the unit collect the current almanac and ephemeris data and a local position fix which results in less on board installation time WARNING Before starting the installation be sure to turn electrical power off If power is left on or turned on duri...

Page 10: ...l width and height requirements see the Northstar 972 Mounting Template P N GT15 which you can use to drill the mounting holes and cut the mounting panel in the exact recommended locations Use the supplied template to cut the hole for the control head and use the supplied gasket between the control head and the instrument panel to help seal against water penetration The use of anti seize compound ...

Page 11: ...at management system will work correctly Normal motion of the vessel will not cause a problem but vertical or permanently angled mounting of the processor will cause overheating of the unit s microprocessor A mounting plate is permanently mounted to the vessel and the processor slides onto the plate and is secured with two screws at the front edge Vertical clearance of at least 7 1 2 inches is req...

Page 12: ... run cables in a way that allows water to flow down into the connectors Don t route the data cables in areas adjacent to radar transmitter or large current carrying cables Don t attempt to cut or splice the DVI or control cables If longer versions are necessary use the optional longer cables see Figure 5 System Wiring below DO THIS Do make drip and service loops Do tie wrap all cables to keep them...

Page 13: ...e shown in Figure 4 Processor connectors below The functions of these connectors are described in Table 6 Interfacing is described in detail in Section Six beginning on page 23 Table 5 Interface connector functions Connector name Connector function s Connects to CONTROL 8 pin connector Control signals to and from the processor CONTROL connector on the processor module DATA DVI connector Digital vi...

Page 14: ...nector 18 pin AUX Connector 6 pin GPS Connector 7 pin CTRL Connector 8 pin DVI VGA Output Ethernet connector 4 USB connectors External drive VIDEO INPUTS 1 4 Figure 4 Processor connectors Ctl Pwr 972 Black Box 972 Control Head Control Cable available in optional 15m length WA612 15 DVI Cable available in optional 15m length WC276 15 WC276 9 DVI Cable DO NOT CUT WA612 9 Control Cable DO NOT CUT Kee...

Page 15: ...o 32 VDC 30 watts NMEA 18 pin connector NMEA Port 1 input output NMEA devices autopilot heading sensor etc NMEA Port 2 input output NMEA devices autopilot heading sensor etc RS 232 Port NMEA devices or PC interface AUX 6 pin connector RS 422 NMEA input output Northstar 491 echo sounder or older Northstar navigators for database transfer GPS 7 pin connector GPS antenna input 2301 GPS antenna VGA 15...

Page 16: ...he power wiring directly to the battery or dedicated electronics bus The green wire should be left unconnected The power cable has an inline fuse to protect the vessel s wiring and prevent electrical fires and damage to the unit If you shorten or lengthen this cable be sure to keep the inline fuse intact or provide circuit breaker protection Spare in line fuses are not supplied with the unit and s...

Page 17: ...de to side motion caused by the vessel s rolling can degrade speed over ground SOG and course over ground COG readings below the radiation plane of any INMARSAT or radar antennas and away from any other high power transmitting antennas see Figure 7 on page 14 high enough to provide an unblocked view of the sky in all directions and that minimizes or eliminates any objects that block the 2301 s vie...

Page 18: ...l mounting surfaces Normally these guidelines produce a relatively trouble free installation however since every installation is unique you may want to adjust these distances to the particular equipment Figure 7 Recommended separation distances between antennas NOTE Before permanently installing the 2301 try temporarily installing it and using the 972 to see if the location works well see Checking...

Page 19: ...pter 5 Base of 2301 6 2301 connector 7 Top of 2301 antenna To install the 2301 1 Install a 1 x 14 UNF thread antenna mount in the desired location 2 Screw a mounting extension onto the antenna mount 3 Feed the 2301 cable through the hole in the mounting extension bringing cable up through the hollow core of the extension and out the top 4 Screw a mounting adapter onto the extension bringing cable ...

Page 20: ...lly solder each wire to the appropriate cup as described in Table 7 below 4 Slide the backshell down the cable and screw it onto the connector body It should be hand tight 5 Using the supplied screws screw the strain relief onto the backshell 6 Slide the heat shrink tubing onto the connector Be sure to leave room for the locking collar to retract 7 Heat the shrink tubing until it shrinks around th...

Page 21: ...ot compatible with Northstar s N2 networking protocol NTSC video is not shared over the network because of bandwidth limitations Separate coaxial video cables must be run to each display unit that will display video Waypoint and route transfer between a 972 and a Northstar 951 952 957 958 or 6000i is accomplished using the AUX port as described in Using the Aux Port starting on page 29 Ethernet ca...

Page 22: ... port found on the Northstar 972 devices conforms to the electrical specifications set forth by the IEEE 802 3u 100Base TX standard This standard is also referred to as Fast Ethernet The cabling used is data grade category 5 or 5e Unshielded Twisted Pair UTP terminated with RJ 45 connectors on both ends The standard allows for transmission of raw data at speeds of 10 and 100 Megabits per second de...

Page 23: ...ore that two devices are being connected or if you wish to leave room for future expansion use an Ethernet switch that serves as a common connection point for all devices Never use crossover cables with a switch Ethernet Switches Ethernet switches allow for the interconnection of more than two devices Each device can exchange data with any other device connected to the switch Any standard 10 100 M...

Page 24: ...SECTION FOUR Networking the Northstar 972 Page 20 972 Installation Manual Rev B ...

Page 25: ...ng the system back on to allow all voltages to decay Chart data The 972 is shipped with all chart data preprogrammed in the processor Charts are unlocked for access as needed see the Northstar 972 QuickStart Guide and Reference Manual P N GM972UM Checking satellite status To see information about signals from the satellites press POSITION and then Sat Info The satellite map on the GPS satellites s...

Page 26: ...olumn press EDIT change to the desired setting then press ENTER For more in depth information about troubleshooting the 972 installation see SECTION SEVEN Troubleshooting and servicing the 972 system starting on page 35 Checking the network If two 972s are networked together they should be checked by turning all units on making sure that one has been designated as the master Then perform the follo...

Page 27: ...ully loaded system with all options installed might be wired as follows Connector Port Direction Device NMEA NMEA 1 IN Heading Sensor OUT Autopilot and other NMEA devices NMEA 2 IN OUT Other NMEA devices RS 232 IN OUT RS 232 data copied from Port 1 or Port 2 AUX AUX IN Sounder data OUT Sounder control VGA VGA OUT VGA video out to computer monitor or Northstar 1201 1202 VIDEO 1 VIDEO 4 VIDEO IN Vid...

Page 28: ...isplay a list of data format control options as shown below Table 9 NMEA connector pins Description Wire color Pin NMEA port 1 input A brown 3 NMEA port 1 input B blue 1 NMEA port 1 input ground white with blue stripe 4 NMEA port 1 output A violet 12 NMEA port 1 output B gray 7 NMEA port 1 output ground blue with white stripe 8 NMEA port 2 input A white with brown stripe 6 NMEA port 2 input B brow...

Page 29: ...d other equipment NMEA 0183 Version 1 5 Table 10 Setup options for the NMEA port Setting Choices OUTPUT FORMAT see below For either port 1 or port 2 choose NONE or 0183 V2 1 NMEA 0183 TALKER ID see page 26 choose GP LC or II to make the 972 look like a GPS receiver Loran C receiver or an integrated instrument NMEA 0183 LL PRECISION see page 27 choose hundredths of minutes thousandths of minutes or...

Page 30: ...tences first follow the above description to display the 0183 sentence screen then press the cursor pad to highlight the sentence you want to turn on or off then press On Off to toggle the sentence on or off Repeat for each sentence as desired When you re finished press Return to go back to the Port Setup screen If you want to set all the sentences to the factory settings for recommended output pr...

Page 31: ...places of precision However many older devices and some current autopilots designed to operate with the original 0183 and other formats can only function with two place precision Choosing the output rate The default rate for standard NMEA 0183 output is two seconds The 972 lets you use a one second update interval a rate of 1 Hz under limited circumstances for NMEA and diagnostic data output Using...

Page 32: ...ing the RS 232 port The RS 232 port on the NMEA connector is used to interface to a PC for downloading waypoints or for uploading 972 software updates The following sections describe the RS 232 port s settings To configure the RS 232 port 1 Press STAR to display the Options Service Info screen then press Port setup options 2 Press the cursor pad to select the RS 232 Port Setup line The choices for...

Page 33: ...sor pad to choose the baud rate and press ENTER Using the PORT OFF setting Use this setting to reduce the loading on 972 s the processor when you don t need the RS 232 port s input or output functions Using the Aux Port The 972 s Aux Port is used to connect with the optional 491 echo sounder or for transferring the database of routes and waypoints between the 972 and many older Northstar units To ...

Page 34: ...ectors P N KS672 This data transfer cable is not included You must select a cable use only shielded twisted pair To connect a 972 with a Northstar 952 951 or 941 the older unit must be using software version 3 12 or higher Assembling the cable To assemble the cable 1 Cut the cable to the desired length 2 Slide the following parts onto each end of the cable in the following order connector backshel...

Page 35: ...onfigure both units AUX ports to the D B TRANSFER function as described above Turn both units off and on again to initialize the ports 10 Test for the proper cable connection a Press WAYPTS ROUTES b Press Import Export c Press Import or Export d Press Test comm The message should read Remote link ok If so the hardware connection is successful and the two units can now transfer all waypoints and ro...

Page 36: ... Out A 6 Aux In A 5 Aux Out B 3 Aux In B 6 Aux In A 4 Aux Out A 952 951 941 10 PIN AUX CONNECTOR 6000i 6 PIN AUX CONNECTOR No connect No connect No connect No connect No connect Aux input B Ground shield Aux output B Aux input A Aux output A Shield termination Aux input B Ground shield Aux output B Aux output A Aux input A No connect 1 2 3 4 5 6 1 2 3 4 5 6 7 8 9 10 Figure 12 Connection to a 952 9...

Page 37: ...ents vary with each particular installation Check the manufacturer s instructions for further cabling and setup details Video signals are not passed over the network A separate coaxial video cable must be run to any 972 that will display video After you ve connected the 972 to the video device check the connection by pressing the VIDEO key to see the video image For instructions on moving the imag...

Page 38: ...SECTION SIX Interfacing the 972 system Page 34 972 Installation Manual Rev B ...

Page 39: ...ailure call your Northstar dealer or the Northstar Ser vice Department for advice system fails any initial self tests Possible internal failure Check all wir ing then call your Northstar dealer or the Northstar Service Department for advice DISPLAY the 972 powers up beeps but there isn t any video DVI cable may not be connected input voltage may be too low the display may have failed Call your Nor...

Page 40: ...works while you re travelling in one direction but not the opposite one The antenna may be partially shaded by metallic objects around it Re position or raise the antenna away from the object for a better satellite view Signals may be lost when the antenna is under a bridge or when shielded by buildings Poor SNR readings are obtained even after running the 972 for several minutes Check the quality...

Page 41: ...ng to the Dealer Express area on Northstar s website Contact Northstar for your dealer password before clicking on the Dealer Express link This area includes the following topics Table 14 Contacting Northstar Email Service service BNTMarine com Sales sales BNTMarine com Fax Service 978 897 1595 Sales 978 897 7241 Telephone Main number 978 897 6600 or 800 628 4487 U S mail Northstar 30 Sudbury Road...

Page 42: ...Returning a 972 for service 972 repairs are performed only by authorized Northstar dealers or at the Northstar factory Service includes a complete hardware and software check out For a system under warranty shipping charges to the factory are the only cost for factory repair The repaired unit will be returned via prepaid economy ground freight units returned overseas are chargeable The 972 and any...

Page 43: ...d payment arrangements The 972 should be shipped only in a properly designed carton with packing material and sent to the Northstar factory at the following address Northstar Service Department 30 Sudbury Road Acton MA 01720 USA Mark the Service Call Number on the outside of the box CAUTION Always back up any important user defined waypoints and routes before returning the unit for repair See the ...

Page 44: ...SECTION SEVEN Troubleshooting and servicing the 972 system Page 40 972 Installation Manual Rev B ...

Page 45: ...ing Flush mount standard 10 32 volts DC power 30 watts max Interfacing Two bi directional NMEA I O ports 1 AUX port One bi directional RS 232 port Interfaces to optional Northstar 491 for fishfinding or to an optional Northstar radar Waypoint upload download capability to a PC with appropriate software or to older Northstar units on non networked 972 units One VGA out port connects to Northstar 12...

Page 46: ...APPENDIX A 972 technical specifications Page 42 972 Installation Manual Rev B ...

Reviews: