4
Preparation
This product includes a
GLASS panel!
Always use
extreme caution
when handling
glass.
Failure to do so could result in
personal injury
or
property damage
.
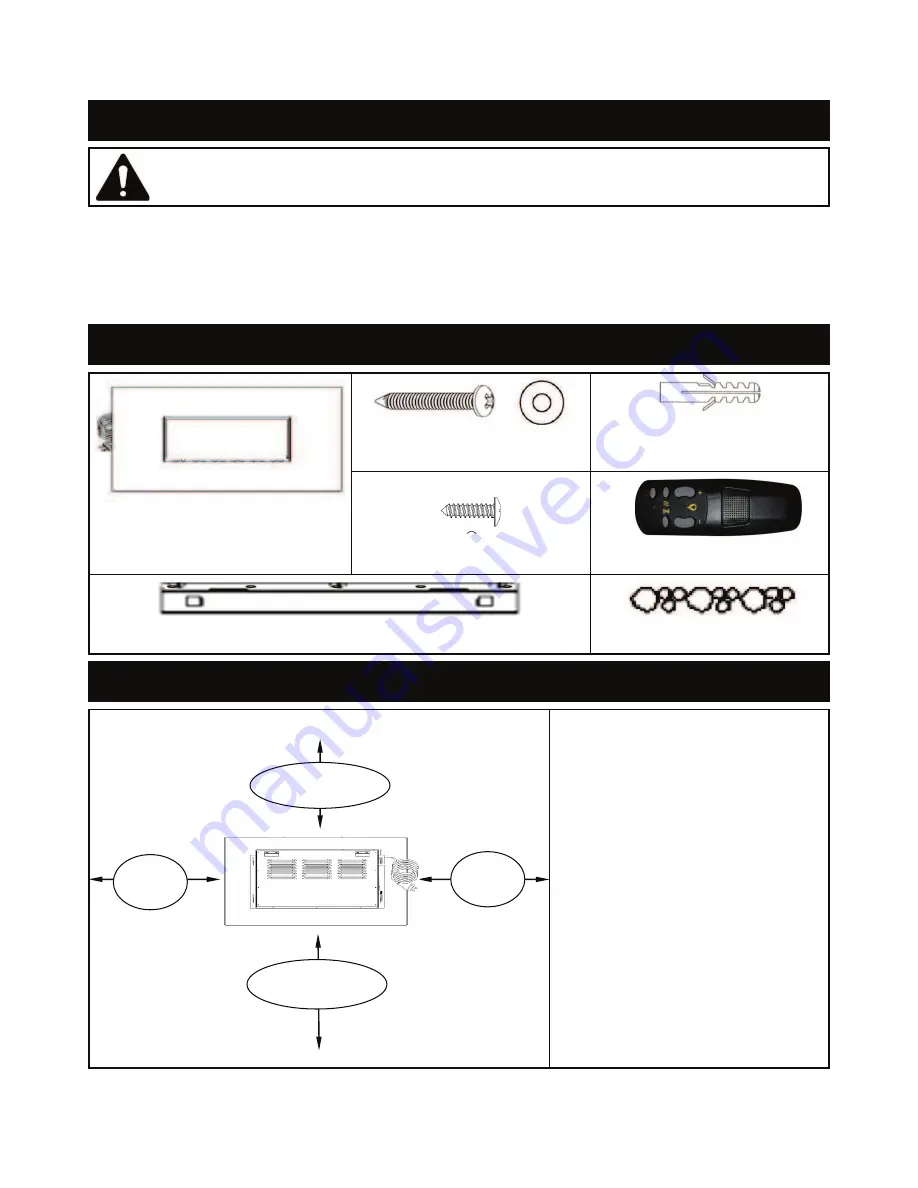
Remove all parts and hardware from the carton and place them on a clean, soft, dry surface. Parts
and assembly steps are grouped for free-standing or wall-hanging use. Check the parts list to make
sure nothing is missing. Dispose of packaging materials properly. Please recycle whenever possible.
You will need the following tools (not included):
Phillips screwdriver; stud finder; level; tape
measure; electric drill; 1/4” wood drill bit, hammer.
Parts and Hardware
A
– Fireplace ( 1 )
B
– Wood Screws & Washers
C
– Drywall anchors ( 3 )
D
– M4x8 Metal Screws (2)
RC
– Remote Control
E
- Wall Bracket (1)
F
- Decorative Glass
Installation and Assembly
Rear View of Fireplace
Step 1. Find a safe location.
Minimum clearance on each side:
19.7” (50 cm).
Minimum clearance below:
19.7” (50 cm).
Minimum clearance above:
39.4” (100 cm).
Minimum clearance from the
front
and sides: 3 feet (90 cm).
Choose a location near an outlet so
an extension cord is not required.
DO NOT
position the unit
directly
below
a power outlet.
See
Safety Information
on
pages
2 and 3
for warnings about
safe
placement, safe installation,
and
proper use
of this product.
19.7”
(50 cm)
Minimum 39.4”
(100 cm)
Minimum 19.7”
(50 cm)
19.7”
(50 cm)
( 3 sets )


