background image

ENGLISH

6

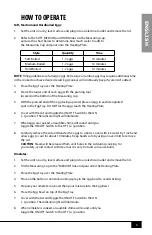
HOW TO OPERATE

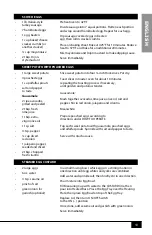
Soft, Medium and Hardboiled Eggs:

1. 

Set the unit on a dry, level surface and plug into an electrical outlet and remove the lid.

2. 

Refer to the SOFT, MEDIUM, and HARD lines on the Measuring Cup, 

and use the chart below to determine how much water to add to 

the Measuring Cup and pour onto the Heating Plate.

Style

Quantity

Time

Soft-Boiled

1-7 eggs

10 minutes

Medium-Boiled

1-7 eggs

12 minutes

Hard-Boiled

1-7 eggs

14 minutes

NOTE

: Time guidelines are for large eggs. Extra large or jumbo eggs may require additional time 

in the cooker to achieve desired result. Egg Cooker will continually beep if water isn't added.

3. 

Place the Egg Tray over the Heating Plate.

4. 

Pierce the larger end of each egg with the piercing tool 

located on the bottom of the Measuring Cup.

5. 

With the pierced end of the egg facing upward, place an egg in each designated 

spot in the Egg Tray. DO NOT let the eggs touch the Heating Plate.

6. 

Cover with the Lid and toggle the ON/OFF Switch to the ON 

( - ) position. The indicator light will illuminate.

7. 

When eggs are cooked, an audible chime will sound until you 

toggle the ON/OFF Switch to the OFF ( o ) position.

8. 

Carefully remove the Lid and transfer the eggs to a bowl. Cover with ice water by 1 inch and 

allow eggs to cool for about 10 minutes. Keep hands safe by using an oven mitt to remove 

the Lid. 

CAUTION

: Steam will be released from vent holes in the Lid during cooking. For 

your safety, avoid contact with steam as it is very hot and can cause burns.  

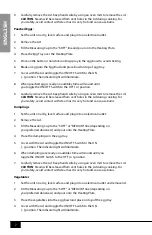
Omeletes: 

1. 

Set the unit on a dry, level surface and plug into an electrical outlet and remove the lid.

2. 

Fill the Measuring Cup to the "MEDIUM" line and pour onto the Heating Plate.

3. 

Place the Egg Tray over the Heating Plate.

4. 

Place a little butter or nonstick cooking spray in the egg bowl to avoid sticking.

5. 

Prepare your omelete in a bowl, then pour mixture into the Egg Bowl.

6. 

Place the Egg Bowl on top of the Egg Tray.

7. 

Cover with the Lid and toggle the ON/OFF Switch to the ON 

( - ) position. The indicator light will illuminate.

8. 

When omelete is cooked, an audible chime will sound until you 

toggle the ON/OFF Switch to the OFF ( o ) position.

Summary of Contents for EC7AQ

Page 1: ...All products are trademarks of Nostalgia Products LLC Worldwide design utility patented or patents pending 2022 Nostalgia Products LLC www nostalgiaproducts com rev 03 25 22 NW ...

Page 2: ...EC7AQ MyMini Premium 7 Egg Cooker Máquina para hacer huevos Premium 7 Cuisinière à 7 œufs de qualité Instructions and Recipes Instrucciones y recetas Instructions et recettes ...

Page 3: ......

Page 4: ... nostalgiaproducts com user manuals for the most updated manual Your safety and the safety of others is very important We have provided many important safety messages in this manual and on your appliance Always read and obey all safety messages This is the safety alert symbol This symbol alerts you to potential hazards that can cause serious injury to you and others All safety messages will follow...

Page 5: ...any manner Return the appliance to the nearest repair shop for examination repair or adjustment 9 The manufacturer does not recommend the use of accessory attachments other than what is provided by the manufacturer Use of attachments may cause injuries 10 DO NOT use the appliance for other than its intended use 11 DO NOT use outdoors FOR HOUSEHOLD USE ONLY 12 DO NOT place on or near a hot gas or e...

Page 6: ...led or tripping over a long cord 3 If a long detachable power supply cord or extension cord is used Extension cords can be used if care is exercised in their use The marked electrical rating of the cord or extension cord should be at least as great as the electrical rating of the appliance When using a longer cord or extension cord make sure that the cord does not drape over a countertop or tablet...

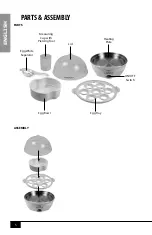
Page 7: ...ENGLISH 5 PARTS ASSEMBLY PARTS ASSEMBLY ON OFF Switch Egg Tray Heating Plate Lid Egg Bowl Measuring Cup with Piercing Tool Egg White Separator ...

Page 8: ...he ON OFF Switch to the ON position The indicator light will illuminate 7 When eggs are cooked an audible chime will sound until you toggle the ON OFF Switch to the OFF o position 8 Carefully remove the Lid and transfer the eggs to a bowl Cover with ice water by 1 inch and allow eggs to cool for about 10 minutes Keep hands safe by using an oven mitt to remove the Lid CAUTION Steam will be released...

Page 9: ...g For your safety avoid contact with steam as it is very hot and can cause burns Dumplings 1 Set the unit on a dry level surface and plug into an electrical outlet 2 Remove the Lid 3 Fill the Measuring Cup to the SOFT or MEDIUM line depending on your preferred doneness and pour onto the Heating Plate 4 Place the dumplings on the egg tray 5 Cover with the Lid and toggle the ON OFF Switch to the ON ...

Page 10: ... eggs Smaller or larger eggs may require less or more cooking time to reach desired result Indicator Light If your indicator light does not illuminate when switched to the ON position check to be sure the unit is plugged into a working electrical outlet Using Egg White Separator To separate the egg whites from the yolk set the separator over a bowl the included egg bowl works well for this Crack a...

Page 11: ... Just before serving sprinkle on a dash of paprika chives and dill EGG SALAD SANDWICH 7 hard boiled eggs 1 2 celery stalk diced 1 3cup mayonnaise 1 tsp yellow mustard 1 4 cup chopped green onion 1 4 tsp paprika salt and pepper to taste rye sandwich bread Once cooled remove shells from hard boiled eggs Chop and place eggs in a bowl and stir in the celery mayonnaise mustard and green onion Season wi...

Page 12: ... sweet potato into four 1 4 inch thick slices Pat dry Toast slices in toaster oven for about 10 minutes repeating the toasting process if necessary until golden and potato is tender Guacamole Mash together avocados lime juice olive oil salt and pepper Stir in red onion jalapeno and cilantro Meanwhile Prepare poached eggs according to directions under HOW TO OPERATE Top each sweet potato with guaca...

Page 13: ...nty period and no later than 30 days of the failure to perform This warranty does not cover normal wear or damage caused by shipping mishandling misuse accident alteration improper replacement parts or other than ordinary household use You may be required to return the product with shipping prepaid by you for inspection and evaluation Return shipping costs are not refundable The Company is not res...

Reviews: