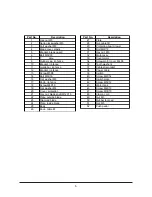
Assembly Instructions:
1. Insert the adjusting bracket (13) as per drawing (A) but do not tighten screws
2. Fit the diamond cutting wheel as per drawing (C)
•
Insert the flange (22) in the drive shaft as shown in the drawing
•
Mount the cutting wheel (21) on the flange (22) (note the direction of rotation)
•
Insert the counter-flange (20) and then tighten with the nut (19)
3. Align the adjusting bracket (13) in one direction with the cutting wheel and screw tight
4. Put on the guard hood (2) and fix with the thumb screw (5) and the nut (3)
5. Fasten the side cover (18) with the self tapping screws (16)
6. Insert the straight fence (8) as per drawing (B)
7. Screw in the two clamping screws (37) as shown and fasten the table in the inclined
position required
Operation:
Changing the Diamond Cutting Wheel
a. Unplug the machine
b. Take out the water trough
c. Undo the screws (16) and remove the side cover (18)
d. Undo the nut (19)
e. Take out the worn diamond wheel. Place a new one on the flange (22). Mount the counter
flange (20) and tighten with the nut (19)
f. Re-fit the side cover (18) with the screws (16)
Saw Operation
• Set up machine on level, non-slip ground. The machine should not wobble.
• Be sure the water level in the trough is high enough to contact the wheel and keep it
wet during for the entire operation of the saw.
• Direction of feed.
Always feed work into blade or cutter against the direction of rotation.
4
Summary of Contents for 1555811
Page 8: ......


