background image

Installing Your Heater

Before using the heater, The unit must be either wall-mounted or fitted to

its’

stand. First, Unpack the appliance and remove all the packaging. Check

that the appliance shows no signs of damage.

WALL MOUNTING

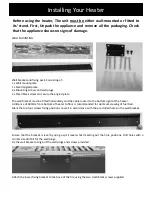
Wall bracket and fixing pack. Consisting of:
1 x Wall mount plate
1 x Small angled plate
6 x Mounting screws and wall plugs
2 x Small black screws to secure the angled plate

The wall bracket must be fitted horizontally and the cable routed to the bottom right of the heater.
A distance of 600mm from bottom of heater to floor is recommended for optimum viewing of fuel bed.
Mark the top four screws fixing positions on wall in accordance with the pre-drilled holes in the wall bracket.

Ensure that the bracket is level by using a spirit level whilst marking out the hole positions. Drill holes with a
correct size drill bit for the wall plugs.
Fix the wall bracket using 4 of the wall plugs and screws provided.

Attach the lower fixing bracket to the base of the fire using the two small black screws supplied.

Summary of Contents for NHFE320

Page 1: ...FLAME EFFECT HEATER OPERATING INSTRUCTIONS For Model NHFE320 ...

Page 2: ...This page is intentionally left blank ...

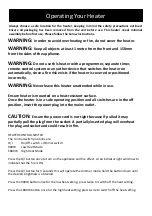
Page 3: ... To reduce the risk of fire keep textiles curtains or any flammable material a minimum distance of 1 metre from the air outlet General Care and Safety Guide Use only the voltage specified on the rating label of the appliance The heater must not be located immediately below a socket outlet Keep all objects at least 1 metre from the front sides and rear of the appliance This appliance is intended fo...

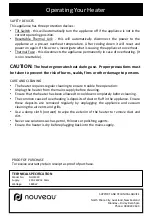
Page 4: ...ot remove plug from power socket by pulling cord always grip plug Do not place cord under carpet or cover with rugs or furniture Arrange the cord so it cannot be tripped over Don t place appliance on bedding or on thick long carpet where the openings may get blocked Switch off and use handle provided when moving Do not place appliance close to radiant heat source Do not insert or allow foreign obj...

Page 5: ...et must be fitted horizontally and the cable routed to the bottom right of the heater A distance of 600mm from bottom of heater to floor is recommended for optimum viewing of fuel bed Mark the top four screws fixing positions on wall in accordance with the pre drilled holes in the wall bracket Ensure that the bracket is level by using a spirit level whilst marking out the hole positions Drill hole...

Page 6: ... fire Two people will be required for this operation Then fit the one way screw into the hole on the bottom of the right lateral hook to stop the front surround from being removed FIREPLACE STAND It is possible to install the electric fireplace on a stand instead mounting it on the wall Remove the tempered glass panel from the metal body and place the heater face up on a suitable surface In the lo...

Page 7: ...ted on a heat resistant surface Once the heater is in a safe operating position and all switches are in the off position insert the power plug into the mains outlet CAUTION Ensure the power cord is not tight because if pulled it may partially pull the plug from the socket A partially inserted plug will overheat the plug and socket and could result in fire HEATER CONTROL SWITCH The control switch p...

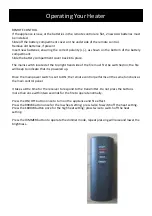
Page 8: ...on the fire will beep to indicate that it is powered up Once the main power switch is set to ON the remote control performs all the same functions as the main control panel It takes a little time for the receiver to respond to the transmitter Do not press the buttons more than once within two seconds for the fire to operate normally Press the ON OFF button once to turn on the appliance and fire ef...

Page 9: ...taken to prevent the risk of burns scalds fires or other damage to persons CARE AND CLEANING The heater requires regular cleaning to ensure trouble free operation Unplug the heater from the mains supply before cleaning Ensure that the heater has been allowed to cool down completely before cleaning The common cause of overheating is deposits of dust or fluff in the appliance Ensure these deposits a...

Page 10: ...This page is intentionally left blank ...

Page 11: ...This page is intentionally left blank ...

Page 12: ...se neglect shipping accident incorrect installation or work carried out by anyone other than a qualified electrical service technician PLEASE KEEP YOUR RECEIPT AS THIS WILL HELP VERIFY YOUR WARRANTY This warranty is additional to the conditions and guarantees of the Consumers Guarantee Act 1993 TWO YEAR WARRANTY Nouveau Two Year Warranty IMPORTANT Please complete and retain this warranty card Name...

Reviews: