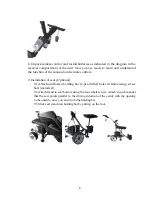
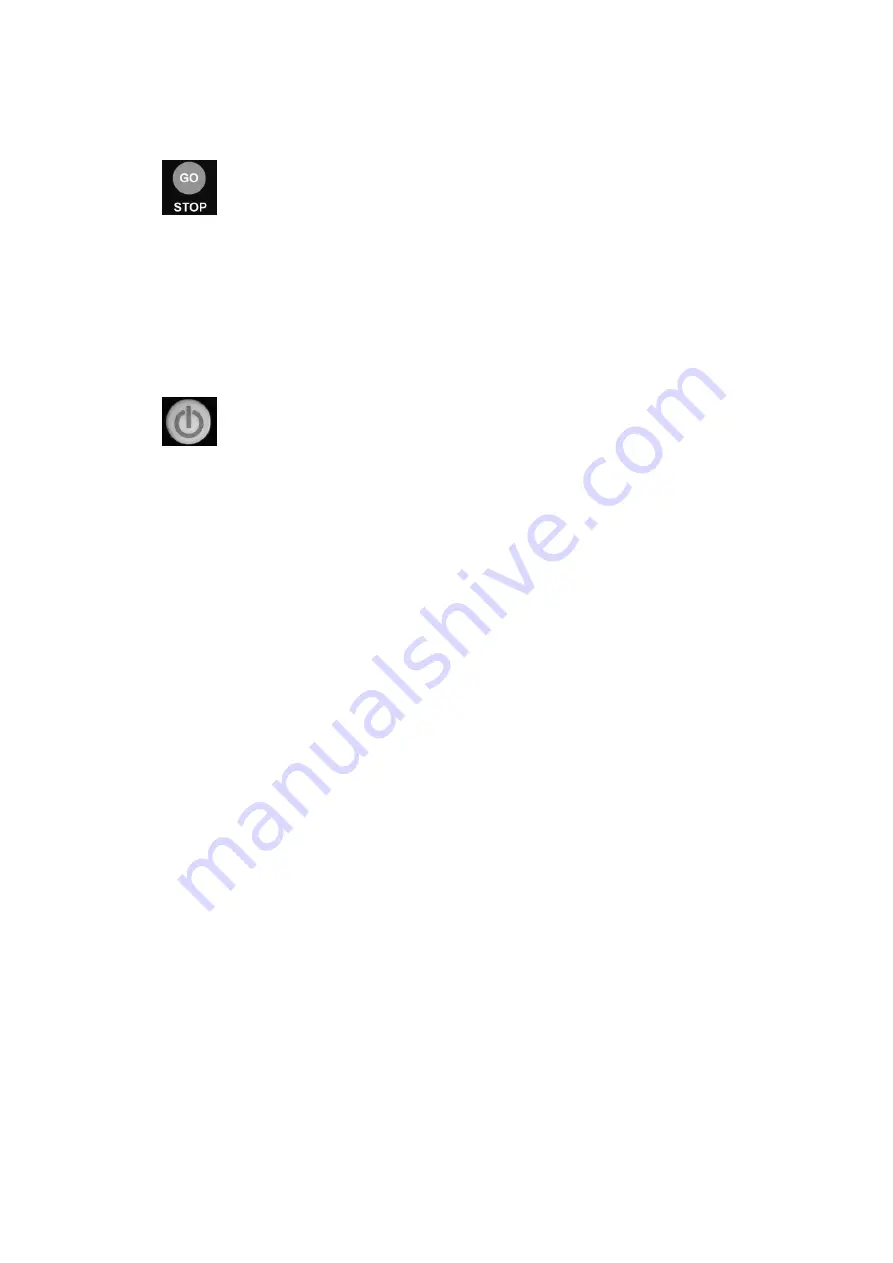
background image


3.1.3. New


Cruise and Brake Function: 

:    Easy  scrolling  action  lets  you  choose  your  preferred  speeds  to  suit 

your pace perfectly;   
The one press stop/start (power brake) function means your cart will always 

proceed at the speed you’ve selected.


Select  the  speed  to  match  your  pace.  The  cart  will  remember  its  last  setting 
when  you  stop,  and  travel  at  that  speed  automatically  when  you  start  again, 
except when you change the speed knob position.   
 

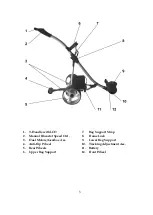
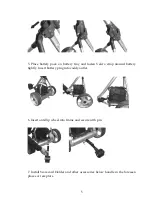
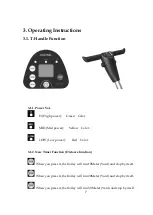
  Power  ON/OFF  button  controls  the  caddy

s  power  supply.  Press  for 

2-5 seconds in order to switch the caddy ON or OFF. After you have connected 
your battery, you need to press ON, and the battery LED will illuminate. Now 
your caddy is ready for operation. 


3.1.4. Speed controller 

Scrolling  of  the  Manual  Rheostat  Speed  Control  knob  lets  you  choose  your 
preferred  speed  to  suit  your  space  perfectly,  and  the  display  will  show  the 
preferred speed. The speed level is from 1 to 5. 


Summary of Contents for S1R-Digital

Page 1: ...Digital Remote Electric Golf Trolley Model S1R Digital S1R Digital S S2R User Manual Nova Caddy Golf Products www novacaddy com Tel 1 905 209 9937...

Page 2: ...Assembly Instructions 4 3 Operating Instructions 7 4 Important Safety Instructions 14 5 Electronic System 15 6 General Maintenance 15 7 Technical Specifications 17 8 Trouble Shooting 18 9 Frequently A...

Page 3: ...Balance between Functionality Performance Practicality and Value To ensure operate the golf trolley properly please read this instruction before using your S1R Digital 1 Packing List and Parts Glossa...

Page 4: ...CD 7 Bag Support Strap 2 Manual Rheostat Speed Ctrl 8 Frame Lock 3 Dual Motors Gearbox Ass 9 Lower Bag Support 4 Anti flip Wheel 10 Tracking Adjustment Ass 5 Rear Wheels 11 Battery 6 Upper Bag Support...

Page 5: ...wheel pushed in during this process in order to enable the axle extensions including the two pins to be inserted all the way into the wheel If not locked in the wheel will not be connected to the clut...

Page 6: ...d fasten Velcro strap around battery tightly Insert battery plug into caddy outlet 6 Insert anti flip wheel into frame and secure with pin 7 Install Scorecard Holder and other accessories below handle...

Page 7: ...Installation of seat Optional 9 1 Attach and fasten holding bar to pre drilled holes in frame using screw bolt included 9 2 Attach stand to seat bottom using the four small screws Attach in such mann...

Page 8: ...er Yellow Color LOW Low power Red Color 3 1 2 New Timer Function Distance function When you press it the trolley will run 10Meter Yard and stop by itself When you press it the trolley will run 20Meter...

Page 9: ...automatically when you start again except when you change the speed knob position Power ON OFF button controls the caddy s power supply Press for 2 5 seconds in order to switch the caddy ON or OFF Aft...

Page 10: ...the caddy stops turning and continues straight with the original speed prior to turning D Right Arrow Same as left arrow function E Forward Arrow Pushing the forward arrow will set the caddy in forwar...

Page 11: ...ithin 50 yards in order to prevent the loss of control of the caddy 3 3 Additional Function 3 3 1 Free wheeling Mode The caddy can be operated without power as a regular push cart In order to active t...

Page 12: ...Push the GO STOP button any time to pause or replay the caddy Turn the knob dead end of backward to stop the caddy completely Test 10M 20M and 30M timer function 3 4 3 Remote Control Operation Make s...

Page 13: ...l ventilated area 3 5 1 2 Please do not charge the battery near a heater or where heat accumulation may occur or in direct sunshine 3 5 1 3 In order to prolong the service life of the battery please a...

Page 14: ...extended periods of time 3 5 4 3 The new battery will take approximately 2 3 rounds and charging cycles before it reaches its full operating potential During the first couple of rounds it might still...

Page 15: ...harmed through an error or lack of skill in operation In such situations the caddy should be best operated with its manual controls or free wheeling model power off Also please make sure to always tur...

Page 16: ...tery level All lights ON Green Yellow Red means highest battery level Both of Yellow and Red on means middle battery level Only Red on means low battery level Important The electronics controller box...

Page 17: ...roblem Always disconnect the battery when you store the caddy and always put your caddy together before re connecting the battery If you are not planning to play for at least a month store the battery...

Page 18: ...x 8km hr 5 MPH 9 speed adjustable Distance Range per battery charge 20km 12 5 miles Climbing Capability 25 degree Max Load 40kg 88lb Battery and Charger Power 12V 36 Ah Battery life time 400 charge Ch...

Page 19: ...s 30A Check charger function Give a new full charge Ensure you have not completely discharged the battery Problems attaching wheels Remove outer cap and adjust quick release catch 9 Frequently Asked Q...

Page 20: ...dset d The caddy frequency may out of tune from remote Rebuild connection between remote and caddy ref to section 3 3 3 e Check antenna wire at good condition f If it still does not work open up the r...

Page 21: ...provided by someone other that a NovaCaddy authorized service department Any return made under this warranty must be accompanied by the items listed below 1 Contact us to get a RMA Return Material Au...

Reviews:

Related manuals for S1R-Digital