


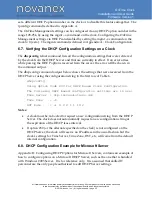


OnTime Clock
Installation and User Guide
Firmware Version 1
All claims based on information publicly available at time of printing. All other product or service names mentioned
in this document may be trademarks of the companies with which they are associated.
© 2015 Novanex, Inc. | All rights reserved | page 24
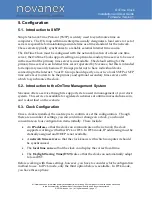
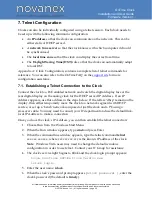
7. Telnet Configuration
Clocks can also be individually configured using a telnet session. Each clock needs to
be set up with the following minimum configuration.
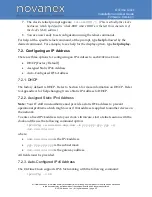
•
An
IP address
so that the clock can communicate on the network. This can be
either static or DHCP served.
•
A
network time server
so that the clock knows with which computer it should
be synchronized.
•
The
local time zone
so that the clock can display the correct local time.
•
The
Daylight Saving Time (DST)
rule so that the clock can automatically adapt
to local DST.
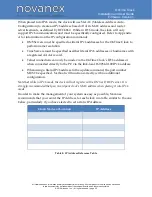
Appendix A: Clock Configuration, contains a complete list of telnet commands for
reference. You can also refer to the OnTime FAQ on the
support site
for more
configuration assistance.
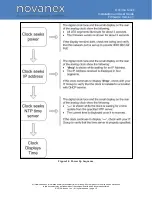
7.1. Establishing a Telnet Connection to the Clock
Connect the clock to a PoE enabled network and watch the digital display face or the
rear digital display on the analog clock for the DHCP served IP Address. If an IP
Address appears, use this address i
n the steps below. If the letters ‘dhcp’ remain on the
display, then either temporarily move the clock to a network segment with DHCP
service, or set up a ‘bench’ network compose
d of just the clock and a PC using a
crossover cable. You may need to consult your IT department and use the default link-
local IP Address to make a connection.
Once you have the clock
’
s IP Address, you can then establish the telnet connection:
1.
Choose Run from the Windows Start Menu.
2.
When the Run window appears, type
cmd
and press Enter.
3.
When the command line window appears, type the telnet command
telnet
xxx.xxx.xxx.xxx, where
xxx.xxx.xxx.xxx
is the known IP address of the clock.
Note
: Windows Vista users may need to change the default windows
configuration in order to use telnet. Contact your IT Group for assistance.
4.
The clock’s service light begins to blink and t
he clock login prompt appears:
Inova Solutions OnTime Clock Version xxx
iclock login:
5.
Enter the user name:
iclock
.
6.
When t
he clock’s password prompt appears
(
iclock password: )
, enter the
clock’s password (the default is
timely
).


