


OnTime Clock
Installation and User Guide
Firmware Version 1
All claims based on information publicly available at time of printing. All other product or service names mentioned
in this document may be trademarks of the companies with which they are associated.
© 2015 Novanex, Inc. | All rights reserved | page 34
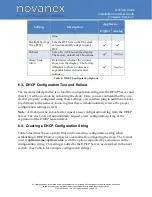
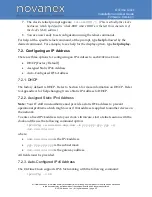
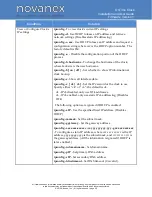
Appendix A: Clock Configuration
This section summarizes the configuration options available with the clock. For help
setting up a telnet session, refer to Section 7- Telnet Configuration. For additional
information, refer to the
support site
.
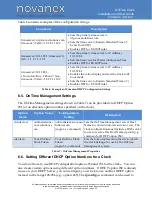
Condition
Solution
Get help for clock
commands
help
To see a list of all the telnet command names and options for
which help is available.
To see help for a particular command, type the
help
command
followed by the command name for which help is desired
.
For
example, to see help for the
display
option, type
help display
Display the configuration
settings for clock
config
To display all configuration parameters except those sent
by the DHCP Server. Use the DHCP config (dhcpconfig)
command to view these superseding options
Verify DHCP
Configuration settings
dhcpconfig
–
To list the option settings received from a DHCP
Server (for verification purposes only). Use the ipconfig
–
d
command to enable retrieving option settings from a DHCP server.
Display all Address
Resolution Protocol (ARP)
cache entries
arp
Display all Address Resolution Protocol (ARP) cache entries.
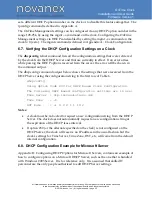
View current SNTP settings
sntp
To view the current time server and other SNTP settings
Test the Time Server
Synchronization
sntp -s
Display the SNTP settings, then invoke a time server
synchronization request and display the results.
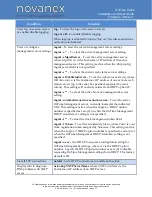
Specify the primary Time
Server
sntp
–
h hostname
,
where
hostname
is the hostname of the primary
time server; or
sntp -h xxx.xxx.xxx.xxx
, where
xxx.xxx.xxx.xxx
is the IP address of
the primary time server
Specify the secondary Time
Server
sntp
–
e hostname
where
hostname
is the hostname of the secondary
time server; or
sntp -e xxx.xxx.xxx.xxx
, where
xxx.xxx.xxx.xxx
is the IP address of
the secondary time server;
to be used in the event that the primary time server is unavailable


