3.5 Distance measurement while working
To set distance, select
“Menu” →”Set distance / Set start distance”.
To set depth
Menu” → “Set cut
depth / Set start depth”.
Example of making a ditch:
Excavate 2 metres long ditch from a reference point (stake) towards a machine (Fig 17)
1. Set starting distance to zero (0) (Fig. 18), if ditch starts nearer machine than stake, enter
starting distance as negative value (distance between the stake and beginning of the ditch)
2. Return back to the measurement / working, press
←
3. Bring bucket to the reference (stake) and press |
→
icon to set reference (Fig 18).
Pressing “Start depth and distance” will reset both depth and distance to predefined values.
4. Verify that the starting distance is zero or entered distance value
when bucket is at the stake. (zero in this example)
5. Start and continue working until distance is reached (2m in our example. Fig 18)
•
Reading increases when excavating towards machine.
Fig.
18 Distance values
If distance icon is pressed, only distance reading is resetted to the predefined “Set starting
distance” value.
The depth of the ditch can be set up:
Menu
” → “
Set cut depth
/
Set start depth
”, so depth and
distance both can be measured and monitored while working.
Note!
Instead using distance and depth measurements to creating a ditch, using advanced
slope for ditch may be more practical tool. See 3.7
User Manual. Xsite PRO SPI 14.2 Page 18 / 77
Fig. 17 Starting distance
Fig.
19. Target distance / distance reading when target is reached
Summary of Contents for XSITE PRO SPI 14.2
Page 1: ...XSITE PRO SPI 14 2 USER MANUAL Version 1 14 2 46 October 2018...
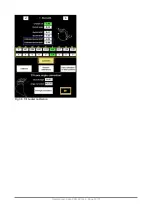
Page 33: ...Fig 36 Tilt bucket calibration User Manual Xsite PRO SPI 14 2 Page 30 77...
Page 76: ...User Manual Xsite PRO SPI 14 2 Page 73 77...
Page 77: ...User Manual Xsite PRO SPI 14 2 Page 74 77...

