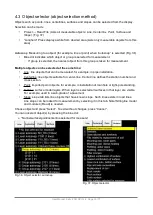
3.7 Creating an advanced or simple slope using the system
Set slopes: Select: Start screen
→ “Start” → “Menu” → “Set slopes”
Select slope type:
•
A) Simple slope
◦
Enter slope value for X (usually slope is made only one direction so Y is set to zero)
•
B) Advanced slope
(Fig 24)
◦
Enter values for each field. (usually slope is made only one direction so Y is set to
zero )
•
Return to the “work view”
•
It is recommended to use “free view” mode, marked with green circle below (Fig 24b).
•
Press “Start slope”
Fig. 24. Advanced slope tool, setting value b) view while working,
freeview
selected
An advanced slope is created by setting the length and slope values for each section. Four
individual sections can be defined.
Work view explained (figure in right):
•
Red line shows X axis
•
Green shows Y axis, blade of the
bucket
User Manual. Xsite PRO SPI 14.2 Page 21 / 77
Summary of Contents for XSITE PRO SPI 14.2
Page 1: ...XSITE PRO SPI 14 2 USER MANUAL Version 1 14 2 46 October 2018...
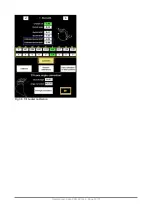
Page 33: ...Fig 36 Tilt bucket calibration User Manual Xsite PRO SPI 14 2 Page 30 77...
Page 76: ...User Manual Xsite PRO SPI 14 2 Page 73 77...
Page 77: ...User Manual Xsite PRO SPI 14 2 Page 74 77...

