14
OPERATION INSTRUCTIONS
1. Before inserting the plug into an electrical outlet, make sure that the electrical supply in
your area matches that on the rating label on the unit.
2. Carefully remove the heater from the plastic bag and the carton.
3. Place the heater on the wall, se
tting the master button to “-” position. Plug the cord set
into a AC220-
240V~ electrical outlet, with “BEE” sounds the “Power” light is on and the
heater will shows the default temperature, it will twinkle 3 seconds.
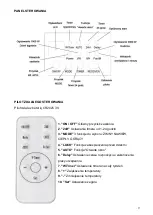
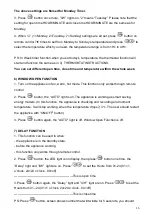
1) SET TIME
Before turn on the heater
, set the right time. Press remote control “
” button, control panel
shows current room temperature.
WEEK
Press “Set” button one time, ”I/W” lights on, press “
” buttons to set the week
from 1-7 (1=Monday, 2=Tuesday...7=Sunday)
HOUR
Press “Set” button again, ”II/H” lights on, press “
” buttons to set the Hours
from 01--
00 (01=1 o’clock, 02=2 o’clock...00=24 o’clock)
MINUTE
Press “Set” button again, ”Fan/M” lights on, press “
” buttons to set the
Minutes from 00--59 (01=1 Minute, 02=2 Minute etc.)
PS:
Press “Set” button, screen shows number that will twinkle for 5 seconds, you should
operate in time, otherwise appliance will get back to standby. (Appliance will keep the right
time until power off)
2) GENERAL OPERATION
1. Turn the heater ON by pressing the ON/OFF main button, the unit will blow the cold air
and “Fan/M” light is on.
2. Press the “MODE” button, the unit will blow the warm air and both “I/W” and “Fan/M”
lights are on.
3. Press the “MODE” button second time, the unit will blow the hot air and both “I/W” and
“Fan/M” lights are on.
4. Press the “MODE” button thrd time, the unit will blow the cold air and “Fan/M” light is on.
PS: Control panel and remote control are operated the same way.

