background image

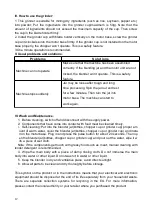
IV. How to use the grinder:

1. This grinder is suitable for milling dry ingredients (such as rice, soybean, pepper etc.)
into  powder;   Put   the   ingredients   into  the   grinder  cup(maximum   is  50g).   Note   that   the
amount of ingredients should not exceed the maximum capacity of the cup. Then screw
the cup in the blade holder firmly.
2. Install the grinder cup with blade holder vertically on the motor base, screw the grinder
cup anti-clockwise into the motor base firmly. If the grinder cup is not installed on the motor
base properly, the chopper won’t operate. This is a safety feature.
3.One minute operation is recommended.

V. Usual problems and solutions

Pro blems

Solut ions

Machine can not operate

Make sure that the machine has been assembled 

correctly. If the blending jar and the motor unit are not 

locked, the blender won’t operate. This is a safety 

feature. 

Machine stops suddenly

Jar may be loose after tough and long

time processing. Spin the jar out and rest

for a few minutes. Then turn the jar into

motor base. The machine can start to

work again.

VI. Wash and Maintenance

1. Before cleaning, switch off and disconnect with the supply power.
2. Components that have come into contact with food must be cleaned timely.

3.

Self-cleaning: Put into the blender jar(bottles, chopper cup or grinder cup) proper am

ount of warm water, cover the blender jar(bottles, chopper cup or grinder cup) and insta
ll on the motor base. Plug in and press the pulse button for about 20 seconds. Then op
en the blender jar(bottles, chopper cup or grinder cup) and pour out the water, wipe it w
ith a piece of wet cloth.

Note: If the components get touch with greasy food such as meat, manual cleaning with

tender detergent is recommended.

4.  Wipe the main body with a piece of damp rinsing cloth. Do not immerse the main

body into water or other liquid. Do not wash it in water or other liquid.

5. Keep the blender in dry and ventilative place, avoid direct sunlight.
6. Allow all parts to be clean and dry thoroughly before storage.

This symbol on the product or in the instructions means that your electrical and electronic
equipment should be disposed at the end of its life separately from your household waste.
There   are   separate   collection   systems   for   recycling   in   the   EU.   For   more   information,
please contact the local authority or your retailer where you purchased the product

12

Summary of Contents for SB1000 X-LINE

Page 1: ...SB1000 X LINE BLENDER INSTRUKCJA OBS UGI BLENDER USE INSTRUCTIONS Sport Mix Fit POLSKI STR 2 ENGLISH STR 10 1...

Page 2: ...yjmij wtyczk z gniazdka 10 Urz dzenie nie dzia a przy pustej b d zbyt przepe nionej butelce Nie u ywaj urz dzenia w spos b ci g y 11 Upewnij si e zasilanie jest wy czone podczas czyszczenia lub demont...

Page 3: ...nikatowym dziubkiem non drip 2 2 x Butelka 600 ml 3 Uchwyt no a 1 x adapter z udoskonalonym ostrzem do kruszenia lodu 4 Gniazdo pojemnika 5 Pokr t o prze cznika 6 Baza blender 7 1 x 50 gr m ynek do ro...

Page 4: ...lendera oraz prze cznik jest wy czony 2 Umyj butelk i upewnij si e butelka jest czysta w rodku Pokr j owoce na kawa ki o wymiarach ok 15x15x15mm maksymalny rozmiar Umie pokrojone kawa ki w butelce i d...

Page 5: ...cznik na pozycj P kilkukrotnie w celu wst pnego zmiksowania Nast pnie aby dalej zmiksowa zawarto prze cz na pozycj 1 a nast pnie 2 Nie uruchamiaj blendera w spos b ci g y przez okres d u szy ni 3 min...

Page 6: ...uche sk adniki np ry orzechy zio a pieprz kaw itp W ziarna do pojemnika m ynka maksymalnie 50g Ilo sk adnik w nie mo e przekracza maksymalnej obj to ci pojemnika Nast pnie zakr pojemnik m ynka w uchwy...

Page 7: ...by czyszczone regularnie 3 Samoczyszczenie Nalej do pojemnika dzbanka butelki m ynka odpowiednia ilo ciep ej wody Zakr pojemnik dzbanek butelk m ynek i zainstaluj na bazie blendera Pod cz blender do r...

Page 8: ...y z dnia 29 lipca 2005r o ZSEiE zabronione jest umieszczanie cznie z innymi odpadami zu ytego sprz tu oznakowanego symbolem przekre lonego kosza U ytkownik chc c pozby si sprz tu elektronicznego lub e...

Page 9: ...odnego z Instrukcja Obs ugi usterek powsta ych w wyniku niew a ciwego monta u sprz tu samowolnych dokonywanych przez u ytkownika lub inne nieupowa nione osoby napraw przer bek lub zmian konstrukcyjnyc...

Page 10: ...before use Ensure the mains voltage is the same as that on the rating label Pull out the power plug when not use 10 Do not operate with empty load or over load Do not continuously operate the product...

Page 11: ...ecipe big tumbler carrots and water ratio 2 3 240 g 360g Please use I II for blending 3 Plug in 4 Place the bottles with blade holder on the motor base with connector downside and then turn the bottle...

Page 12: ...ore cleaning switch off and disconnect with the supply power 2 Components that have come into contact with food must be cleaned timely 3 Self cleaning Put into the blender jar bottles chopper cup or g...

Reviews: