296
Novell eDirectory 8.8 Administration Guide
n
ov
do
cx (e
n)
22
Ju
n
e 20
09
4
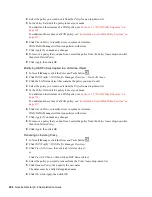
Select the policy you want to edit from the
Policy Name
drop-down list.
5
In the
Policy
field, edit the policy to meet your needs.
To understand the structure of a WAN policy, see
Section 13.3, “WAN Policy Structure,” on
page 314
.
To understand the syntax of a WAN policy, see
“Construction Used within Policy Sections” on
page 317
.
6
Click
Check Policy
to identify errors in syntax or structure.
WAN Traffic Manager will not run policies with errors.
7
Click
Apply
if you made any changes.
8
To remove a policy that you don't want, select the policy from the
Policy Name
drop-down list,
then click
Delete Policy
.
9
Click
Apply
, then click
OK
.
Modifying WAN Policies Applied to a LAN Area Object
1
In Novell iManager, click the
Roles and Tasks
button
.
2
Click
WAN Traffic
>
WAN Traffic Manager Overview
>
View LAN Areas
.
3
Click the LAN Area object that contains the policy you want to edit.
4
Select the policy you want to edit from the
Policy Name
drop-down list.
5
In the
Policy
field, edit the policy to meet your needs.
To understand the structure of a WAN policy, see
Section 13.3, “WAN Policy Structure,” on
page 314
.
To understand the syntax of a WAN policy, see
“Construction Used within Policy Sections” on
page 317
.
6
Click
Check Policy
to identify errors in syntax or structure.
WAN Traffic Manager will not run policies with errors.
7
Click
Apply
if you made any changes.
8
To remove a policy that you don't want, select the policy from the
Policy Name
drop-down list,
then click
Delete Policy
.
9
Click
Apply
, then click
OK
.
Renaming an Existing Policy
1
In Novell iManager, click the
Roles and Tasks
button
.
2
Click
WAN Traffic
>
WAN Traffic Manager Overview
.
3
Click
View LAN Areas
, then click a LAN Area object.
or
Click
View NCP Server
, then click an NCP Server object.
4
Select the policy you want to rename from the
Policy Name
drop-down list.
5
Click
Rename Policy
, then specify the new name.
The name must be a fully distinguished name.
6
Click
OK
, click
Apply
, then click
OK
.
Summary of Contents for EDIRECTORY 8.8 SP5
Page 4: ...4 Novell eDirectory 8 8 Administration Guide novdocx en 22 June 2009...
Page 72: ...72 Novell eDirectory 8 8 Administration Guide novdocx en 22 June 2009...
Page 118: ...118 Novell eDirectory 8 8 Administration Guide novdocx en 22 June 2009...
Page 130: ...130 Novell eDirectory 8 8 Administration Guide novdocx en 22 June 2009...
Page 188: ...188 Novell eDirectory 8 8 Administration Guide novdocx en 22 June 2009...
Page 222: ...222 Novell eDirectory 8 8 Administration Guide novdocx en 22 June 2009...
Page 240: ...240 Novell eDirectory 8 8 Administration Guide novdocx en 22 June 2009...
Page 264: ...264 Novell eDirectory 8 8 Administration Guide novdocx en 22 June 2009...
Page 290: ...290 Novell eDirectory 8 8 Administration Guide novdocx en 22 June 2009...
Page 322: ...322 Novell eDirectory 8 8 Administration Guide novdocx en 22 June 2009...
Page 540: ...540 Novell eDirectory 8 8 Administration Guide novdocx en 22 June 2009...
Page 548: ...548 Novell eDirectory 8 8 Administration Guide novdocx en 22 June 2009...
Page 616: ...616 Novell eDirectory 8 8 Administration Guide novdocx en 22 June 2009...


