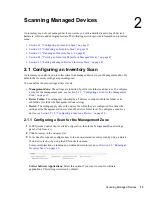
Scanning Managed Devices
23
n
ov
do
cx (e
n)
16
Ap
ril 20
10
the knowledgebase so that these new products are recognized in subsequent scans. For more
information, see
Chapter 6, “Creating Local Software Products,” on page 103
. To configure the
file types, do the following:
To search for files with an
.exe
extension, select the
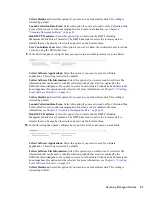
Collect .EXE Files
option.
To search for files with a different extension, specify the extension in the
Additional
Extensions
field. Separate each extension with a + sign, for example,
com+dll
.
To scan for particular file types, select from the following:
System:
Select this option to search for system files. This category is selected by
default.
Ancillary Application:
Select this option to search for files that are ancillary to, or
associated with, a product that is recognized by the ZENworks Knowledgebase. This
option is useful to create a comprehensive scan. This category is selected by default.
Other:
Select this option to search for all other files. This category is selected by
default.
To include directories with products that are recognized by the ZENworks
Knowledgebase, select
Include directories with recognized products
. This is useful to
create a comprehensive scan.
To limit the scope of the scan by including and excluding files and paths, configure which
files and paths to include or exclude from the collection by using
Add
and
Remove
to
specify which files and paths you want to include and exclude from the scan. You can edit
the files and paths in the list by selecting the file or path and clicking
Edit
. If you specify a
file or path in the
Files and paths to include in collection
field, the scan is limited to just
that file or path. If a file or path is specified in the
Files and paths to exclude from
collection
field, all files and paths are searched except the specified file or path. Paths
specified in the
Software Applications
panel are also skipped.
NOTE:
If you are specifying a path, you must include a trailing backslash (\). For
example, if you want to include all
.exe
files in the
dir
directory, type
C:\dir\
.
13
In the Advanced panel, configure diagnostic settings.
WARNING:
These options are intended for advanced diagnostics. Use them only under the
guidance of a Novell Support representative.
14
Click
Apply
or
OK
.
2.2 Scheduling an Inventory Scan
This section shows you how to schedule an inventory scan. By default, the inventory schedule is
already configured.
Summary of Contents for ZENworks 10 Configuration Management Asset Inventory
Page 4: ...4 ZENworks 10 Configuration Management Asset Inventory Reference novdocx en 16 April 2010...
Page 8: ...8 ZENworks 10 Configuration Management Asset Inventory Reference novdocx en 16 April 2010...
Page 12: ...12 ZENworks 10 Configuration Management Asset Inventory Reference novdocx en 16 April 2010...
Page 94: ...94 ZENworks 10 Configuration Management Asset Inventory Reference novdocx en 16 April 2010...
Page 114: ...114 ZENworks 10 Configuration Management Asset Inventory Reference novdocx en 16 April 2010...
Page 128: ...128 ZENworks 10 Configuration Management Asset Inventory Reference novdocx en 16 April 2010...
Page 132: ...132 ZENworks 10 Configuration Management Asset Inventory Reference novdocx en 16 April 2010...
Page 138: ...138 ZENworks 10 Configuration Management Asset Inventory Reference novdocx en 16 April 2010...
Page 144: ...144 ZENworks 10 Configuration Management Asset Inventory Reference novdocx en 16 April 2010...


