37
ENGLISH
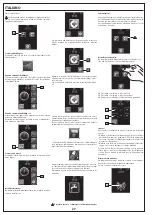
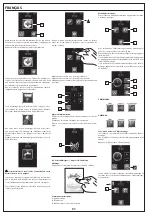
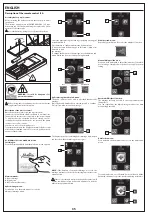
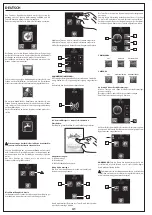
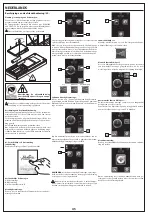
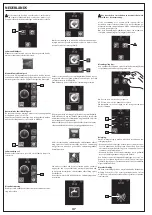
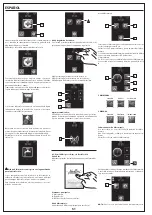
Fill the disinfectant tank (only on first use or when subse-
quently required), and press button 14 to release the system.
Then use button 15 to start the disinfection process.
The pump will activate and the disinfectant soon begins to
circulate. After 4 minutes, the pump stops for about 20 minu-
tes and then restarts for a further minute.
After this time, a symbol appears on the display to indicate
that the bath is ready to be emptied.
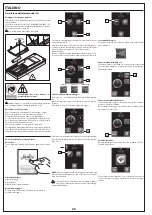
If the image below is displayed at the beginning of the di-
sinfection process, and disinfection does not start, adjust the
level of disinfectant.
Another reason for the disinfection process to fail to start may
be that there is insufficient water in the bath. In this case, the
image below will be displayed.
Top up the bath with water to restart the disinfection process.
Do not bathe in or use the water that has been used
for disinfection.
If the disinfection process is interrupted for any reason, the
disinfection symbol on the main menu lights up to warn that
disinfection has not been completed.
To cancel this warning, carry out a complete disinfection
cycle afresh.
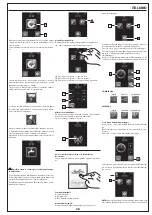
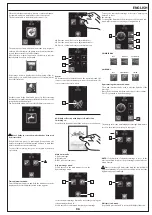
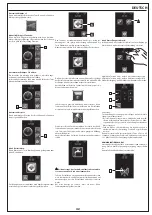
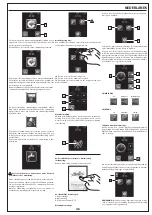
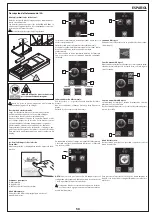
Time adjustment menu:
From the main menu, press and hold the time button on the
display until the time adjustment sub-menu appears.
16 Press the + and - buttons to adjust the hours.
17 Press the + and - buttons to adjust the minutes.
18 Press to confirm and return to the main menu.
16
17
18
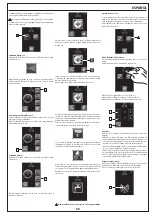
Draining:
In order to empty the pipes, the bath is equipped with a drai-
nage system.
• After a hydromassage, about 30 minutes after the bath has
been emptied, the blower is automatically activated (for
about a minute) to expel the water that has remained in the
pipes.
• When the bath has been used without a hydromassage,
drainage will need to be performed manually.
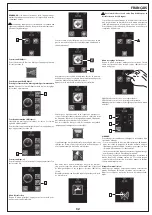
To do so, go to the hydromassage menu, and press and hold
button 6 for 4-5 seconds until the blower comes on. The blo-
wer will stop automatically after 1 minute.
Alarm:
19 Communication failure between the central unit and the
remote control. Check that the power unit is switched on.
If it is not, contact the service centre.
19
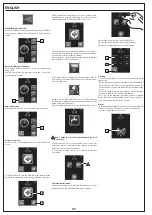
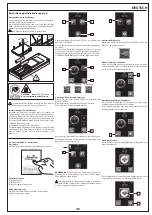
Manual Whirlpool function:
Press and hold button 11 to adjust the intensity of the Whirl-
pool massage. Simply release the button to apply the new
setting.
11
Automatic Whirlpool function:
The massage intensity is varied to create a pleasant modu-
lating effect.
You can return from the hydromassage menu to the main
menu using button 12.
12
Airpool sub-menu:
Repeatedly press button 13 to select the Airpool function.
13
Disinfection menu:
Press button 2 on the main menu to access the disinfection
menu.
To start disinfection, once the bath has been cleaned, fill the
bath with clean water up to the level used during normal use.
14
15
Summary of Contents for IRIS dx 600/20
Page 11: ...11 12mm CLACK 6mm 30 mm 30 mm Optional G3 8 G1 2 9 Service HYDRO ...
Page 15: ...15 IRIS sx 516 427 193 620 1500 A B E 240 70 70 298 516 70 72 539 100 ...
Page 16: ...16 IRIS dx 516 427 193 620 1500 A B E 240 70 7 0 298 516 70 72 539 100 ...
Page 17: ...17 15 16 ø6 mm ...
Page 18: ...18 S6 ø6 ø6 4x35 4x35 S6 17 18 ...
Page 19: ...19 19 20 150 mm 150 mm 150 mm ø 2 75 mm x2 150 mm 3 5x9 5 x2 ...
Page 20: ...20 21 22 ...
Page 21: ...21 23 24 ø6 S6 4x35 ...
Page 58: ...58 Note ...
Page 59: ...59 Note ...

