-59-
INTRODUCTION:
Whirlpool baths must be installed by trained personnel able to demonstrate to the
relevant authorities their knowledge and ability in the application of health and
safety regulations i.e. electricity and water supplies and waste water disposal. The
manufacturer provides training for technical assistance staff and therefore you are
advised to contact an authorised technical assistance centre for the purposes of
installation.
This symbol indicates important product instructions or important safety
information.
INSTALLATION:
IMPORTANT!
Before you start to assemble and install the product, carefully read through all the
instructions. Unpack the components and check that nothing is missing and that there
are no damaged or faulty components, remove the transparent protective film.
All components requiring maintenance (e.g. pump, electrical components, etc) must
remain accessible once final installation is complete.
Do not support the bath using the hoses during transport.
N.B.: This product is designed for installation on finished walls and floors.
Warranty claims must be produced with the purchase invoice and the product
assembling instructions.
The drawings and illustrations in this manual are provided for information purposes
only.
The manufacturer reserves the right to make changes and improvements without prior
notice.
I
NSTALLATION OF BATH WITH FRAME
:
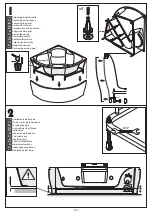
Follow the sequence of drawings given in this manual very carefully when installing a
bath with frame.
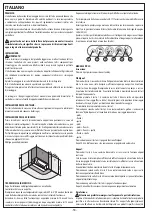
INSTALLATION OF ENCLOSED BATH:
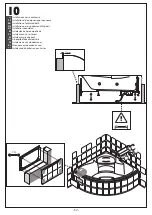
Before building the enclosing walls, it is best to position the bath and make the required
connections. The wall can extend inwards under the lip of the bath by not more than
1.5 cm. The drain must be connected in such a way that the bath can be pulled out of
the enclosure for maintenance, when necessary. To facilitate this operation do NOT fix
enclosed type baths to the floor. In this case, fix the bath by applying silicone on all four
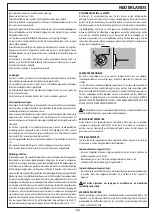
sides (see siliconing illustration on page 35/43/52).
Inspection panel required.
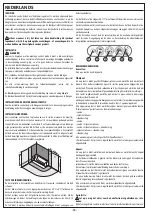
2250
2400
600
(I)
1
2
3
OPERATING TEST:
An operating test must be performed following installation. Check that the bath is clean.
Fill the bath with water at an infeed temperature of 40 °C (± 5 °C) up to a level above
the highest nozzle to allow the system to function.Switch on the system and run it for
10 minutes. Switch OFF the whirlpool function but do not empty the bath and after 10
minutes check all the hoses, couplings, etc. for any leaks.
The test should be repeated following any adjustments or substitutions. Backflow of
water towards the mains water supply must be avoided to ensure conformity with EN
1717 when filling the bath. Therefore if the taps are fitted so that the water fills the bath
from above the top of the bath then the taps must be positioned (at least in terms of
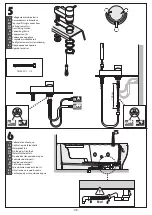
height) in accordance with the diagrams shown from page 26/36/44/45.
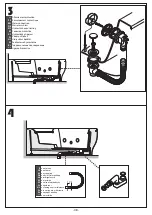
If the system involving a combined water inlet and overflow outlet is used to fill the
bath, a water outlet spout consisting of a non-return valve (not supplied) must be fitted
between the combined tap water inlet point and the delivery system located on the
discharge column.
USER MANUAL:
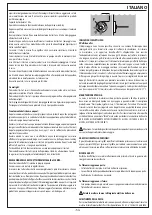
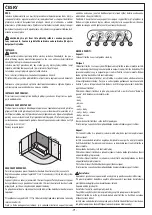
Turning on:
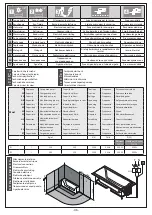
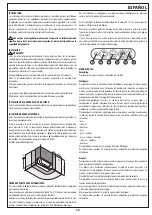
Press 5 for stand-by.
Whirlpool:
Press 2 to turn the whirlpool function on. The surround of the button becomes blue. If
there is not enough water in the bath, the pump does not start up and the surround of
the button flashes. When the bath is filled correctly, the pump starts up and the surround
of the button becomes blue. The level is monitored while the bath is in operation.
When button 1 is held down, the surround of button 2 becomes green and you can
select the massage function (air flow).When the required massage position is reached,
release button 1 to maintain that massage position. To change it, hold button 1 down
again.
When button 2 is pressed again, the surround becomes yellow and the “Hydro Sequence”
sequential massage starts up:
•
feet
•
hips
•
shoulders
•
feet
•
feet + hips
•
feet + hips + shoulders
•
feet + shoulders
•
shoulders
Press button 2 again to turn the Whirlpool function off.
If not turned off, 30 minutes after being turned on it goes off automatically.
Airpool:
When button 4 is pressed, the surround becomes blue and the continuous Airpool
function starts up.
If there is not enough water in the bath, the blower does not start up and the button
surround flashes. When the bath is filled correctly, the blower starts up and the button
surround becomes blue.
The level is monitored while the bath is in operation.
When button 4 is pressed again, the surround becomes green and the Airpool function
operates in short pulses.
When button 4 is pressed a third time, the surround becomes yellow and the Airpool
function operates in long pulses.
Pressing button 4 a fourth time turns the Airpool function off.
If not turned off, 30 minutes after being turned on it goes off automatically.
Disinfection:
IMPORTANT: never get into the bath when it contains disinfectant
solution.
The first time you disinfect the bath, fill the disinfectant tank with a specific product
or Dettol
Tank capacity: 1 litre.
The disinfection function can be activated with the bath in stand-by.
After cleaning the bath with normal detergent, fill it as for normal use.
Hold button 6 down until the surround of button 2 and button 6 flash red alternately.
If there is not enough water in the bath, the surround of button 2 flashes a neutral
colour as described above for the Whirlpool function (top up to the correct water level).
ENGLISH
Summary of Contents for Sense 7 Z2
Page 35: ... 35 12 B 870 1870 max 15 mm C13 ...
Page 89: ... 89 Note ...
Page 90: ... 90 Note ...
Page 91: ... 91 Note ...

