SymphoniePRO User Manual
Rev. 8
support@nrgsystems.com | Page 62
11 January 2018
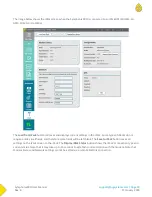
The Logger Config [Home][3][1][3] menu contains useful details about the data logger, including the serial
number, firmware version, and manufacture date.
The Physical Channels [Home][3][2][2] menu displays a list of which sensor has been cofigured in each channel
and details of each sensor’s configuration, including height, boom orientation, scale, offset, and serial number.
The Schedules [Home][3][3] menu provides configuration details for each communication type (MetLink
Initiated, MetLink Lisetning, Email), including the frequency and the date and time of the next scheduled
connection.
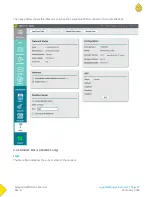
The iPack Config [Home][3][4][1] menu contains useful details about the iPack, including the serial number,
firmware version, manufacture date, and modem ID.
The Network Config [Home][3][4][2] and Modem Config [Home][3][4][3] menus provide additional details
about the cellular settings.
3.6 Office Testing
Before heading out to the field, you should verify that all equipment is working as expected. Make sure all
equipment has the latest firmware version and that you are using the latest version of SymphoniePRO Desktop
Application. Updates can be found on the NRG Systems website in the Technical Services section under
Software Downloads:
http://www.nrgsystems.com/technical-support/software
Why It Is Important
Office testing your SymphoniePRO system prior to installation in the field will save you time and money.
Communication capabilities rely on perfect coordination between device programming and accounts in addition
to ISP and network/firewall settings – if these are not set up correctly, the system will not communicate.
In the event you find a problem during office testing, SymphoniePRO Desktop Application’s test buttons, event
logs, and communications logs can be helpful in troubleshooting connection issues.
Note - Any connection test features disabled in SymphoniePRO Desktop Application will not be available from the
logger’s menus.
What You Will Need
If you haven’t done so already, read the rest of this manual, paying particular attention to the chapter covering
Field Installation. If you are ready to begin office testing your SymphoniePRO system, you should have already
completed the pre-installation configuration tasks described previously in this chapter.
You’ll also need a few test sensors with cables, the field wiring panel and related hardware, a USB cable, an SD
card, the antenna(es) included with your iPack, any cables or connectors used with your iPack, a Phillips head (+)
screwdriver, and a computer running the latest version of SymphoniePRO Desktop Application.
Summary of Contents for SymphoniePRO
Page 1: ......
Page 74: ...SymphoniePRO User Manual Rev 8 support nrgsystems com Page 74 11 January 2018 ...
Page 76: ...SymphoniePRO User Manual Rev 8 support nrgsystems com Page 76 11 January 2018 ...
Page 77: ...SymphoniePRO User Manual Rev 8 support nrgsystems com Page 77 11 January 2018 ...
Page 78: ...SymphoniePRO User Manual Rev 8 support nrgsystems com Page 78 11 January 2018 ...
Page 134: ...SymphoniePRO User Manual Rev 8 support nrgsystems com Page 134 11 January 2018 ...
Page 137: ...SymphoniePRO User Manual Rev 8 support nrgsystems com Page 137 11 January 2018 ...
Page 139: ...SymphoniePRO User Manual Rev 8 support nrgsystems com Page 139 11 January 2018 ...
Page 142: ...SymphoniePRO User Manual Rev 8 support nrgsystems com Page 142 11 January 2018 ...


