

2
4. Place the Mowbray over the toilet with the cutaway
of the seat at the front and the integral splash guard
placed centrally over the toilet bowl.
Note:
Make sure the seat and toilet frame are fully secure
before use.
5.2 Securing the Feet to the Floor (M48817)
1. Insert
the
fl
oor
fi
xing legs into the toilet frame.
2. Slide the legs so the frame is at the required height
for the user.
Note:
Make sure that all legs have been adjusted to the
same height. Height adjustment is not possible once the
legs are secured to the
fl
oor.
3. Align the holes and replace the E-clips.
5.2.1 Mark the Hole Positions
Place the toilet frame in the required location and mark
the hole positions to be drilled.
5.2.2 Drill the Fixing Holes
1. Remove the toilet frame from the required location,
then drill the holes in the positions marked, as
appropriate for the chosen
fi
xings.
2. If you are using rawl plugs for the installation, insert
the rawl plugs into the
fi
xing holes.
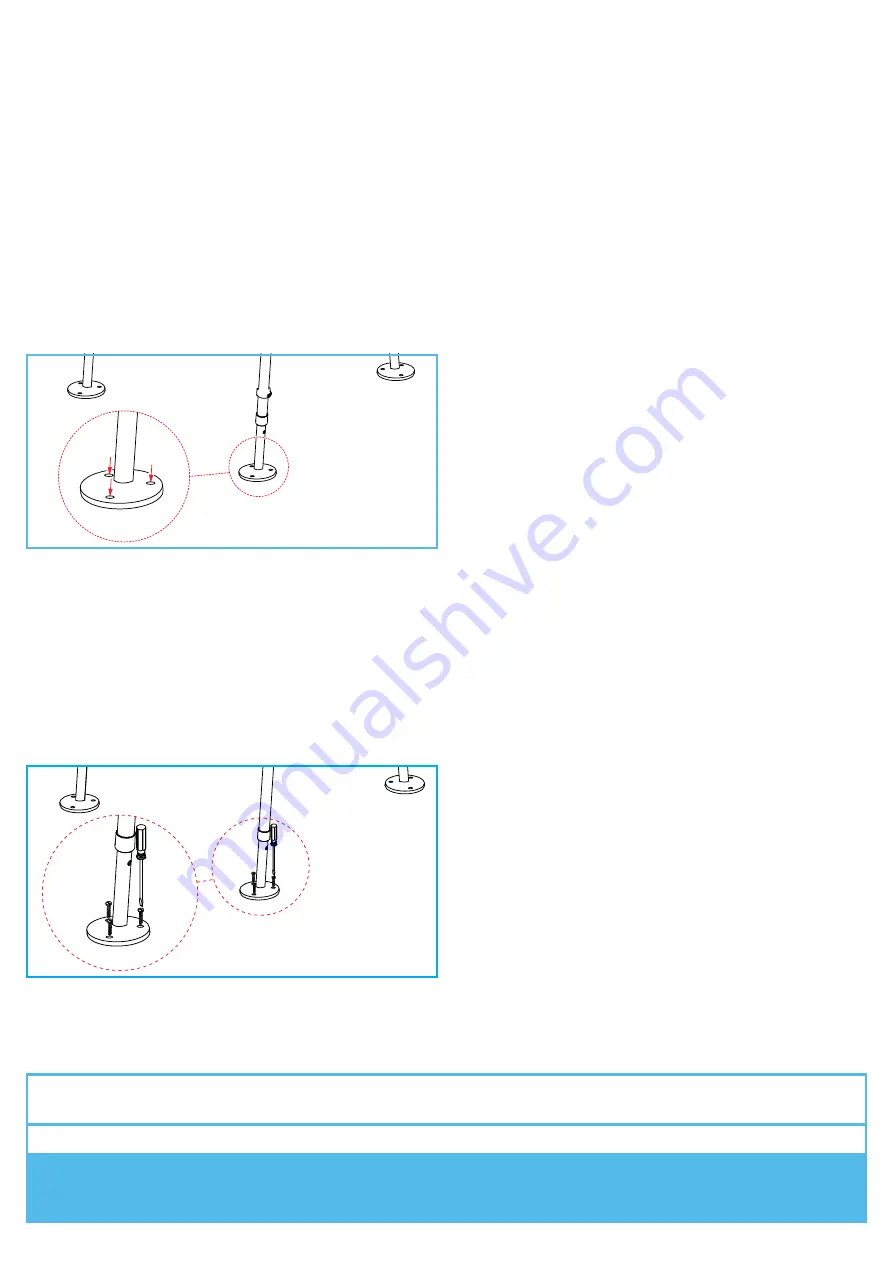
5.2.3 Fix the Feet to the Floor
Using an appropriate tool for the chosen
fi
xings, secure
the
fl
oor
fi
xing feet to the
fl
oor.
Note:
Check that all
fi
xings are fully secure before use.
5.3 Fitting the Optional Floor Fixing Kit to M48805
Please refer to the user instructions provided with the
optional
fl
oor
fi
xing kit (F11572).
6. MAINTENANCE
Check that all
fi
xing clips are inserted correctly and that
there is no excessive movement.
If a
fl
oor
fi
xing kit has been
fi
tted, check the
fi
xing screws
are secure.
Inspect the product regularly for signs of wear or damage,
pay particular attention to the condition of the ferrules.
Any suspected faults or damage should immediately be
reported to the supplier and the product taken out of use.
7. CLEANING
INSTRUCTIONS
Please check the suitability of the cleaning products
before use. Do not use abrasive cleaners or cloths as
these could permanently damage the surface and
invalidate any warranty.
Regularly clean with a non-abrasive cleaner.
To disinfect, wipe with a dilute bleach solution, and rinse
thoroughly with fresh water.
This product is suitable for thermal decontamination and
can be steam cleaned or autoclaved on cleaning cycles
up to 70°C.
Allow product to fully dry prior to use/storage.
8. ACCESSORIES & SPARE PARTS
F11572 - Floor Fixing Kit
L84207 - Extra Wide Seat
For further information please visit our website or call
Customer Services on the details below.
9. PRODUCT
DISPOSAL
This product must be thoroughly cleaned/sterilised prior
to disposal.
This product is manufactured from metal & plastic and
can be disposed of through Local Authority Household
Waste and Recycling Centres or through Local Trade
Waste Collectors.
10. PRODUCT GUARANTEE
NRS Healthcare guarantee this product for a period of
12 months, from the date of purchase, against faulty
materials and workmanship.
This guarantee does not cover; abuse, misuse,
interference or tampering with any part of the product.
Any guarantee issued by NRS Healthcare does not
a
ff
ect your statutory rights.
M48805-UI-7 28-06-2022
NRS HEALTHCARE
Sherwood House, Cartwright Way, Forest Business Park
Bardon Hill, Coalville, Leicestershire, LE67 1UB, UK.
Tel: Customer Services: 0345 121 8111
Email: customerservice@nrshealthcare.co.uk
NRS Healthcare
is a leading supplier of community equipment and daily living aids.
Please visit one of our websites to view our full range of products:
www.healthcarepro.co.uk or www.completecareshop.co.uk


