background image

3

Remove the steel washer, saddle-washer, then 
remove the bolt.
Adjust the handle height to the required position, 
then secure using the bolt, saddle washer, steel 
washer and hand-wheel. Refer to Section 4.2.
Repeat for the opposite handle.

Note: 

Make sure both handles have been set to the 

same height.

5.  USING THE ROLLATOR
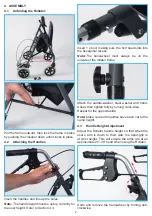
5.1    Brake Operation

To slow down or stop the rollator, pull both brake 
handles up.

To apply the parking brake, push the brake handles 
down until they lock into place.

Note: 

Make sure both brake handles have been 

applied.

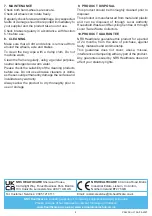
Pull both handles up to release the parking brakes.

Warning: 

If the brakes fail to stop or lock the wheels, 

stop using the rollator immediately.


Do not use the 

rollator again until the brakes have been checked 
and correctly adjusted. Refer to Section 5.2.

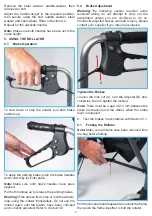
5.2    Brake Adjustment 

Warning: 

The following section requires some 

technical ability, do not attempt to carry out the 
adjustment unless you are con

fi

dent to do so. 

Incorrectly adjusted brakes can lead to injury, please 
contact your supplier if you require assistance.

A

B

Tighten the Brakes

Loosen the lock nut (A), turn the adjuster (B) anti-
clockwise, then re tighten the locknut.

Note: 

There must be a gap of 2-3 mm between the 

brake mechanism and the wheel, when the brake 
lever is released.

6.  Test the brakes in accordance with Section 5.1. 

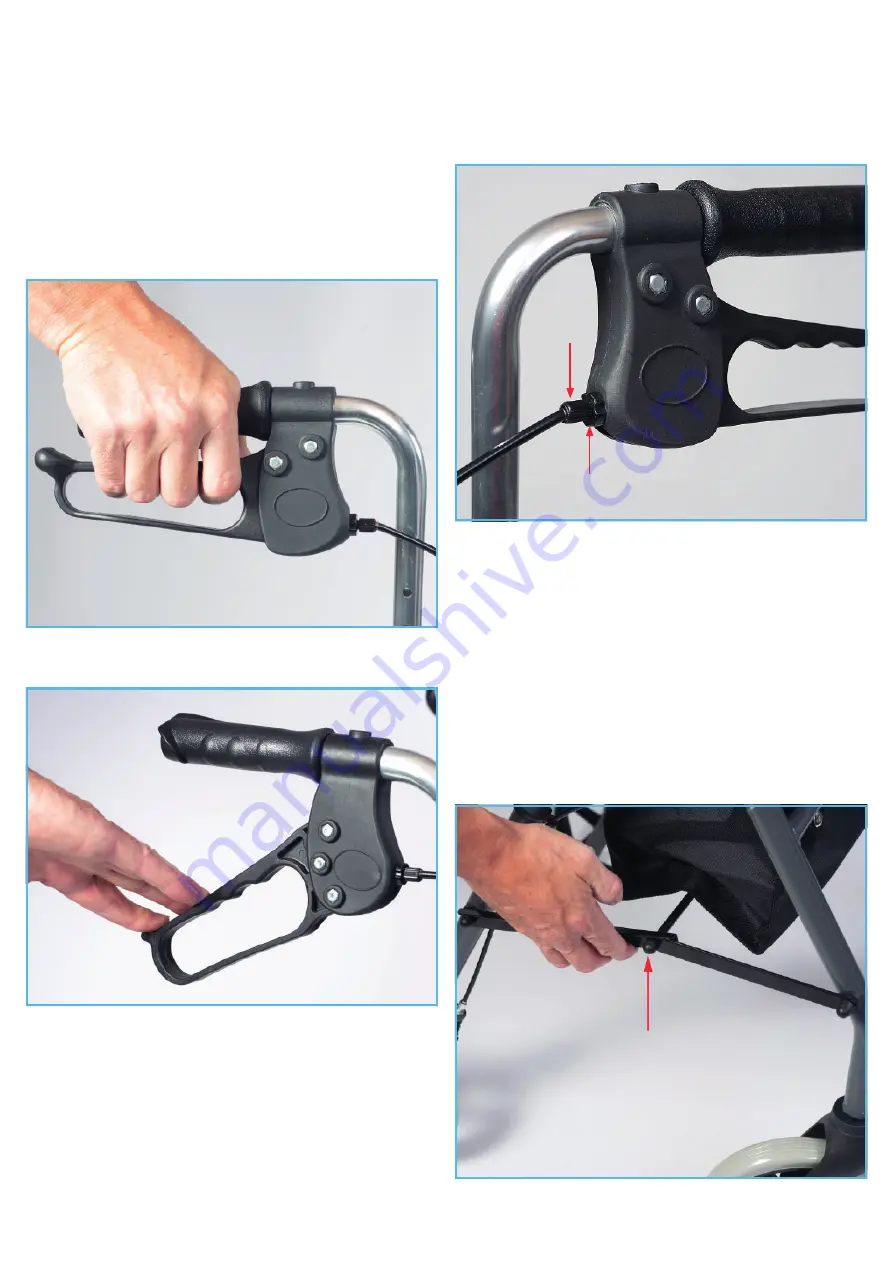
6.1   Folding the Rollator

Note: 

Make sure all items have been removed from 

the bag before folding.

Pull the crossbar handle upwards to unlock the frame, 
then push the frame together to fold the rollator.

Summary of Contents for NRS 4

Page 1: ...tems from the handles as this will affect the stability of the rollator Make sure the rollator is locked in the open position before use Do not adjust the rollator while in use Ensure the brakes are fully operational Make sure the rollator is locked in the open position before use Do not sit on the seat without locking the brakes first Do not use the seat without the backrest in place Do not use th...

Page 2: ... hexagonal recess Note The hand wheel must always be on the outside of the rollator frame Attach the saddle washer steel washer and hand wheel then tighten fully by turning clock wise Repeat for the opposite side Note Make sure both handles have been set to the same height 4 3 Handle Height Adjustment Adjust the Rollator handle height so that when the user s arm is down to their side the hand grip...

Page 3: ...lator immediately Do not use the rollator again until the brakes have been checked and correctly adjusted Refer to Section 5 2 5 2 Brake Adjustment Warning The following section requires some technical ability do not attempt to carry out the adjustment unless you are confident to do so Incorrectly adjusted brakes can lead to injury please contact your supplier if you require assistance A B Tighten...

Page 4: ...prior to disposal This product is manufactured from metal and plastic and can be disposed of through Local Authority Household Waste and Recycling Centres or through Local Trade Waste Collectors 10 PRODUCT GUARANTEE NRS Healthcare guarantee this product for a period of 24 months from the date of purchase against faulty materials and workmanship This guarantee does not cover abuse misuse interferen...

Reviews: