Operating Instructions
The fan can be operated either manually
using the control panel on the top of the fan
or by using the remote control supplied with
the product.
Refer to Page 3 of this manual for images of
the manual control panel & remote control.
FIG 7
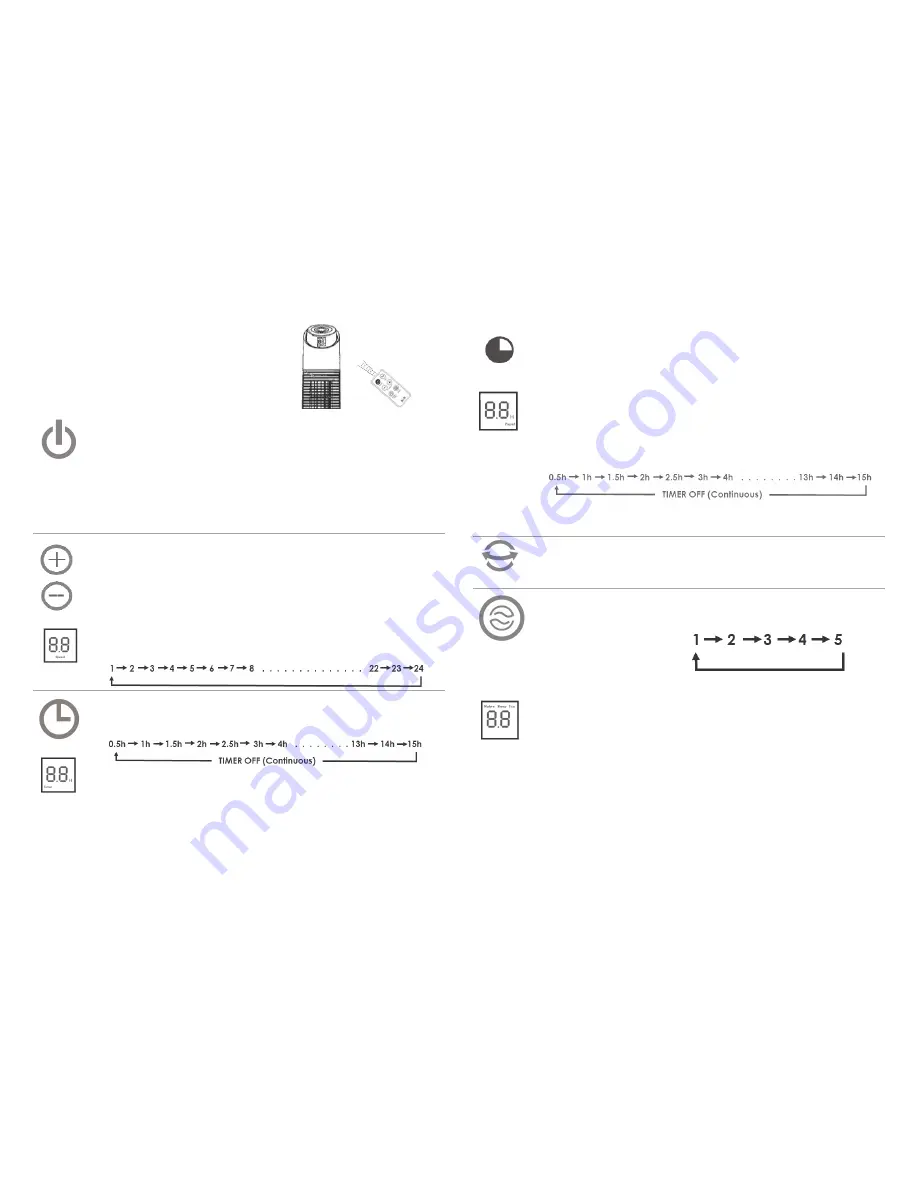
ON/OFF
ON/OFF:
Connect the fan to the power supply and using the manual controls on
the top of the fan or on the remote control press ON/OFF once to switch on the
fan and press again to stop the fan from running.
•
When the fan is unplugged from the mains supply, it is not possible to turn ON
the fan via the remote control. Use the manual controls to turn ON the fan and
either use the manual controls or remote control to turn OFF the fan.
•
If you wish to turn off the digital display (eg: night time use), press and hold the
ON/OFF button on the manual controls for 3 seconds. To reactivate the display,
press any button.
SPEED
SPEED:
When the fan is first plugged into the electrical supply, the fan speed will be
set at 12 – medium speed. Subsequent uses will remember the previous setting.
•
To increase the speed using the manual controls rotate the dial clockwise or
use the “
⊕
” button on the remote control.
•
To decrease the speed, rotate the dial anticlockwise or use the “Θ” until you
reach your preferred speed setting. There are 24 speeds to choose from.
•
The digital display on the front of the fan will flash the word SPEED during the
selection process. When no button is pressed for 3 secs the fan speed is set and
the display will indicate the speed selected.
TIMER
TIMER:
With the fan powered
ON,
press the PRESET/TIMER button on the manual
controls and then rotate the dial clockwise to increase or anticlockwise to
decrease the timer to set the required length of operation between 0.5hr & 15hrs.
•
When using the remote control, press the PRESET/TIMER button once and then
press “
⊕
”to increase or “Θ” to decrease timer to set the length of operation.
•
The digital display on the front of the fan will flash TIMER during the selection
process. When no button is pressed for 3 secs the selection will be set.
•
To turn off the digital display press and hold the ON/OFF button for 3 seconds.
To reactivate, press any button.
The fan will operate normally and automatically turn off at the selected time.
Use in conjunction with the fan modes – see page 5-6.
Operating Instructions (cont’d)
PRESET
To use
PRESET
timer for delayed start – the unit must be
OFF
and plugged into the
mains.
Press the PRESET/TIMER button on the manual controls and then rotate the dial
clockwise to increase or anticlockwise to decrease the timer to set the
required delayed start 0.5hr and 15hrs.
On the remote control - press PRESET/TIMER once and then“
⊕
” to increase or
“Θ” to decrease in 0.5hr increments up to 3hrs, then one hour increments up
to 15hr delayed start – this will be displayed in blue at the top of the main
panel.
The fan will start when the desired time is reached.
It is also possible to set desired fan speed or mode settings while the fan is off.
It is not possible to use PRESET if the fan is operating on the rechargeable
battery and is unplugged from the mains supply.
OSC
OSC:
Press OSC to select the oscillation function. The fan will swing in a 90
°
arc to
circulate the air around the room. Press OSC again to turn off this function.
MODE
NATURE
MODE
settings
have five levels of fan speed (instead of 24) which vary according
to the set fan speed. These are summarised as follows:
Level 1 = speed 1 – 5
Level 2 = speed 6 – 10
Level 3 = speed 11 – 15
Level 4 = speed 16 – 20
Level 5 = speed 21 – 24
NATURE
Mode simulates natural breezes and rhythms and varies according to
the fan speed set - press the
MODE button once
and use the “
⊕
”or “Θ” buttons
on the remote control or rotate the dial on the manual controls clockwise to
increase or anticlockwise to decrease to the required setting
•
Use in conjunction with TIMER or PRESET and OSC functions. The natural
breeze will continue to fluctuate according to the speed level set until the
timer duration is reached.
•
The digital display NATURE will flash during the selection process. When no
button is pressed for 3 secs the selection will be set. The digital display will
show Preset/Timer and Speed sequentially.
•
To turn off the digital display (for night time use) – press and hold the ON/OFF
button for 3 secs on the manual controls. Press any key to reactivate the
display or be sure to use in conjunction with the timer function to turn off the
fan after a specified period.
4
5


