Page 7
Adjusting the Seam Phantom
®
To ensure the tightest possible seams, each Seam Phantom® is checked for squareness before it leaves
the factory. Slight variations in polishers can affect the finished product so shim washers are provided
to make final adjustments. A newly assembled Seam Phantom®/polisher should initially be checked
with a good square and then tested and adjusted utilizing a sample seam ground on scrap stone as
follows:
1.
On a scrap piece of stone set up the Glide Guide and grind the first half of a finished seam
per the instructions on page 9 thru 11 of this manual, steps 1 thru 6 and steps 8 thru 12.
Skip step 7, “Back Grind”. Dress the entire edge of the stone with the turbo pads to 150 grit.
Make sure all the chips in the upper edge of the seam have been eliminated.
2.
On a second scrap piece of stone create the mating half of the seam in the same way. Make
sure all the chips in the upper edge of the seam have been eliminated.
3.
Place the two halves of the finished seam together. Make sure the top of the sample is even
and flat and observe the gap at the edge of the seam. The seam should be tight on the top
edge. A slight gap on the bottom edge is acceptable and sometimes desirable. It is a matter
of personal preference. Some fabricators prefer to make perpendicular tight seams from
top to bottom. Other fabricators prefer a slight gap on the bottom to ensure the top is
always tightest.
4.
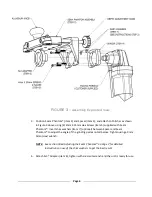
Add shim washers to the attachment screws, between the spacer and Seam Phantom®, as
required to create the desired seam.
a)
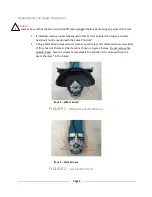
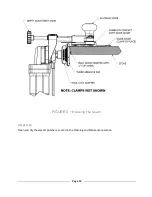
To correct a gap on the top edge, shim washers can be placed between the spacer and
Seam Phantom® on the top two attachment screws. Utilize one or two washers on each
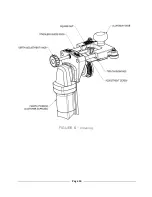
screw as required. See Figure 3 for correct washer location.
NOTE: A single washer added to the top two attachment screws changes the angle of
the turbo pad by approximately ¼ degree and will result in approximately .005”
additional stone removed at the bottom of a 3cm sample (the approximate
thickness of a human hair). This will correct an approximately .010” gap at the
top of a finished seam when both halves are brought together.
b)
Shim washers may also be utilized on the lower two attachment screws to close an
overly large gap on the lower edge of the seam.
5.
After the washers have been added repeat the process to ensure the desired seams are
being produced.
6.
The Seam Phantom® is now set to produce consistent tight seams. Occasionally this process
may need to be repeated as the plastic base plate that slides on the Glide Guide wears.
Summary of Contents for 0010-1
Page 14: ...Page 14 FIGURE 6 Cleaning...


