4
Access Individual Camera Settings
E-IPCAM-DHNPO-V2P
To access the
E-IPCAM-DHNPO-V2P
web interface to change its settings:
1. Connect the camera to a POE connected Ethernet cable to power it ON, or connect the supplied 12VDC
power supply. The Ethernet cable must be connected to the same local network your PC is connected to.
Note: By default, this camera obtains an IP address from a DHCP server on the local network. To find
the IP address of the camera, consult the DHCP client list on the DHCP server of your wireless router or
use the search tool (SADP.exe available from our
) and follow the instructions. (See image at
bottom of page.)
2. Open a browser (Internet Explorer, Firefox, etc) on that PC and enter the IP address found with the search
tool.
If no DHCP server exists, the default IP will be
192.168.1.64.
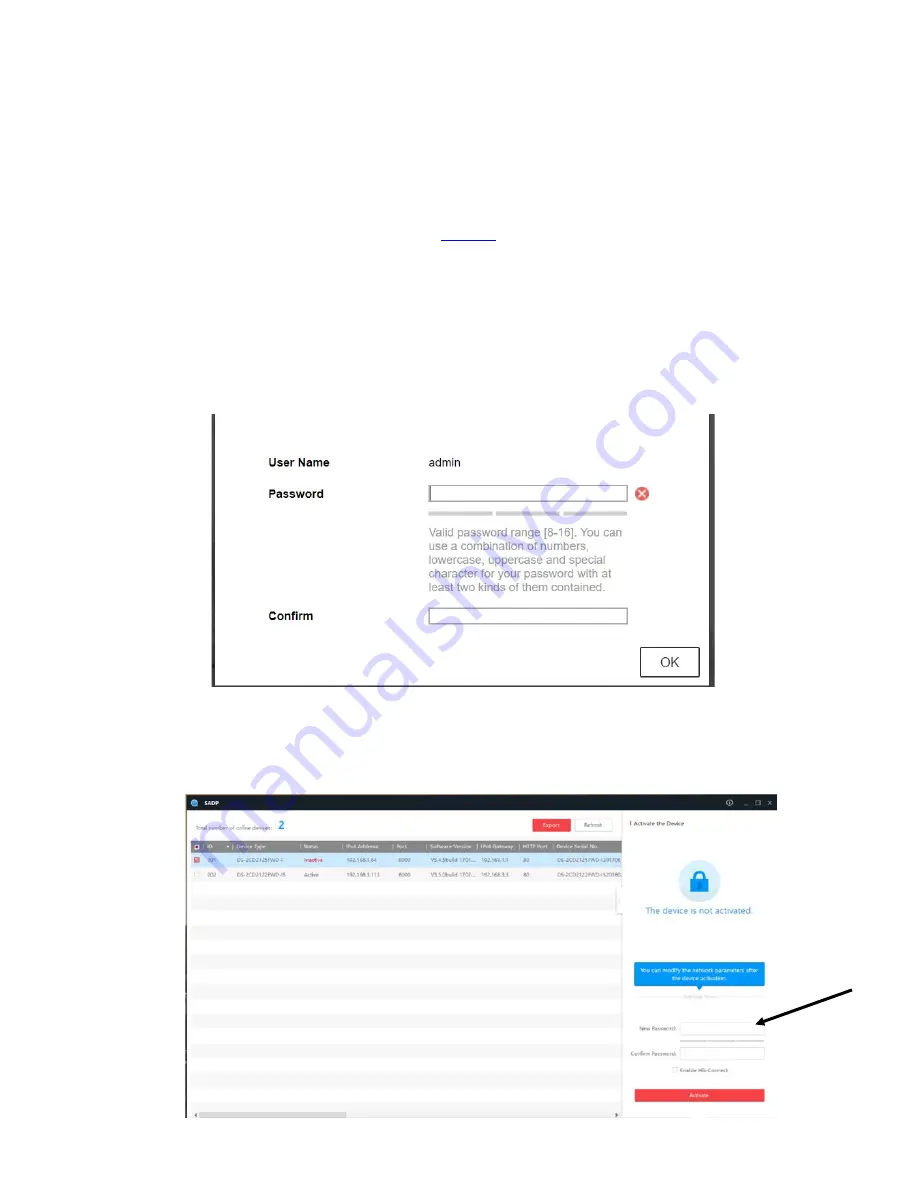
3. The first time you do this, the Activation window will pop up. Assign a password. The password must contain
a minimum of 8 characters, including upper case letters, lower case letters, and numbers.
Note: No special
characters can be used.
Be sure to make note of it after entering it. Then click "OK".
If you are using the SADP discovery tool to identify the IP address of the
E-IPCAM-DHNPO-V2P
, you will be
able to assign the password from the discovery tool window (below).


