NTI RACKMUX-V
15/17
RACKMOUNT LCD MONITOR WITH KEYBOARD AND MOUSE
6
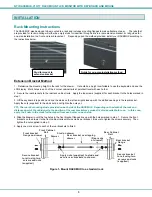
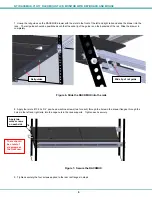
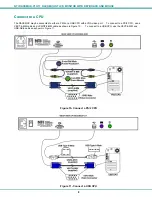
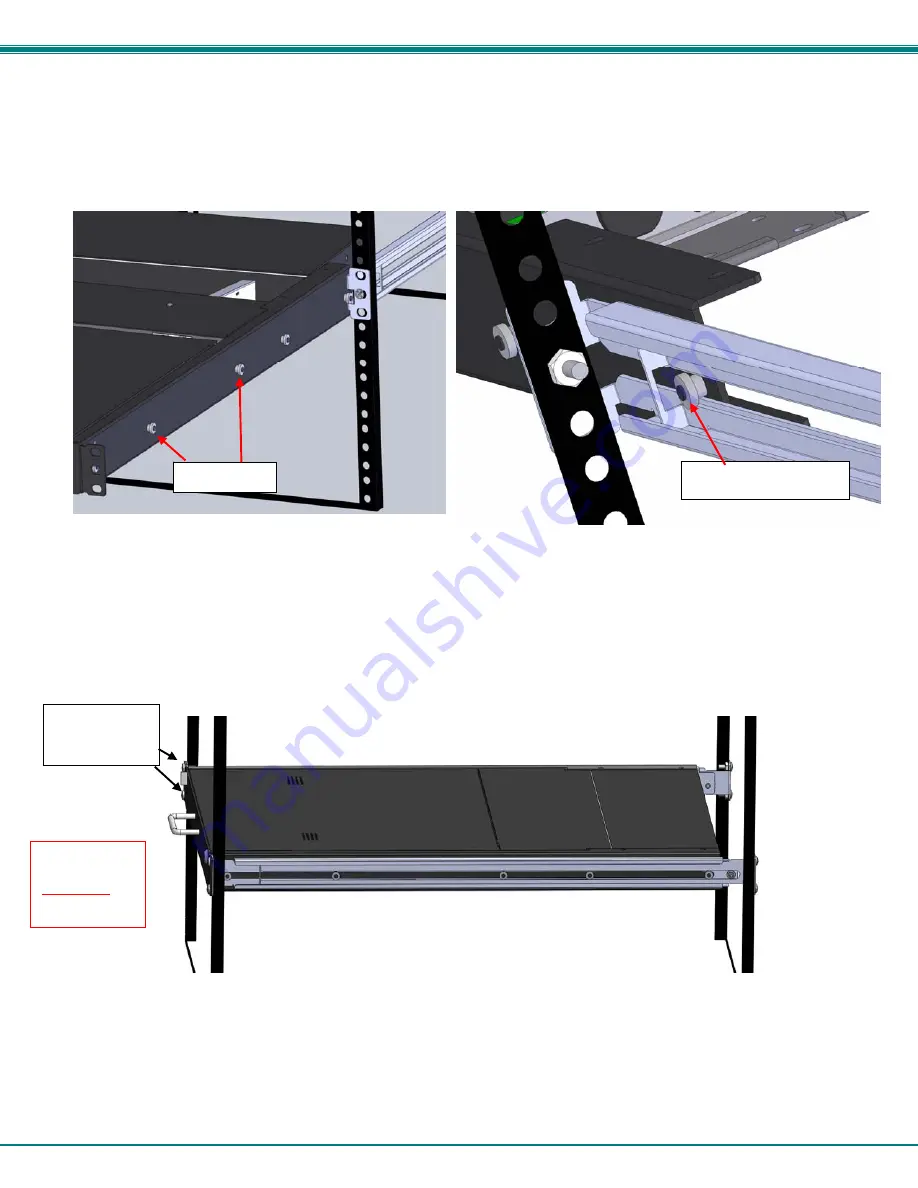
7. Lineup the rail guides on the RACKMUX drawer with the slots in the front of the left and right rails and slide the drawer into the
rack. The rail guides should be positioned such that the wide lip of the guide is on the backside of the rail. Slide the drawer in
completely.
View of rail guide from the front of the rack support View of rail guide from the backside of the rail
Figure 6- Slide the RACKMUX into the rails
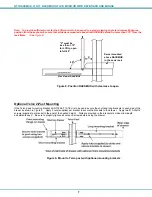
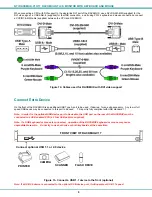
8. Apply four more #10-32 x 3/4” pan-head machine screws (two for each) through the holes in the drawer flanges, through the
holes in the left and right rails, into the cage nuts in the rack supports. Tighten each securely.
Figure 7- Secure the RACKMUX
9. Tighten securely the four screws applied to the rear rail flanges in step 4.
Rail guides
Wide lip of rail guide
Apply two
more screws
on each side
There should
be a total of
six screws at
the front now.


