NTI RACKMUX-V
15/17
RACKMOUNT LCD MONITOR WITH KEYBOARD AND MOUSE
13
5. Enter the desired network connection settings (IP address, subnet mask, gateway) as compatible with your network.
Make note of these settings in case you need them later.
6. With the settings updated, press
“
Apply
”
to implement the changes in the KVM on IP. Your browser connection to the KVM
on IP is no longer valid.
7. To restore connection to the KVM on IP, change the IP address on the PC back to an address compatible with your network
and now also compatible with the KVM on IP.
Having configured the KVM on IP to be compatible with your network, you can now make a direct cable connection (crossover
adapter not needed) to your network through a router or switch.
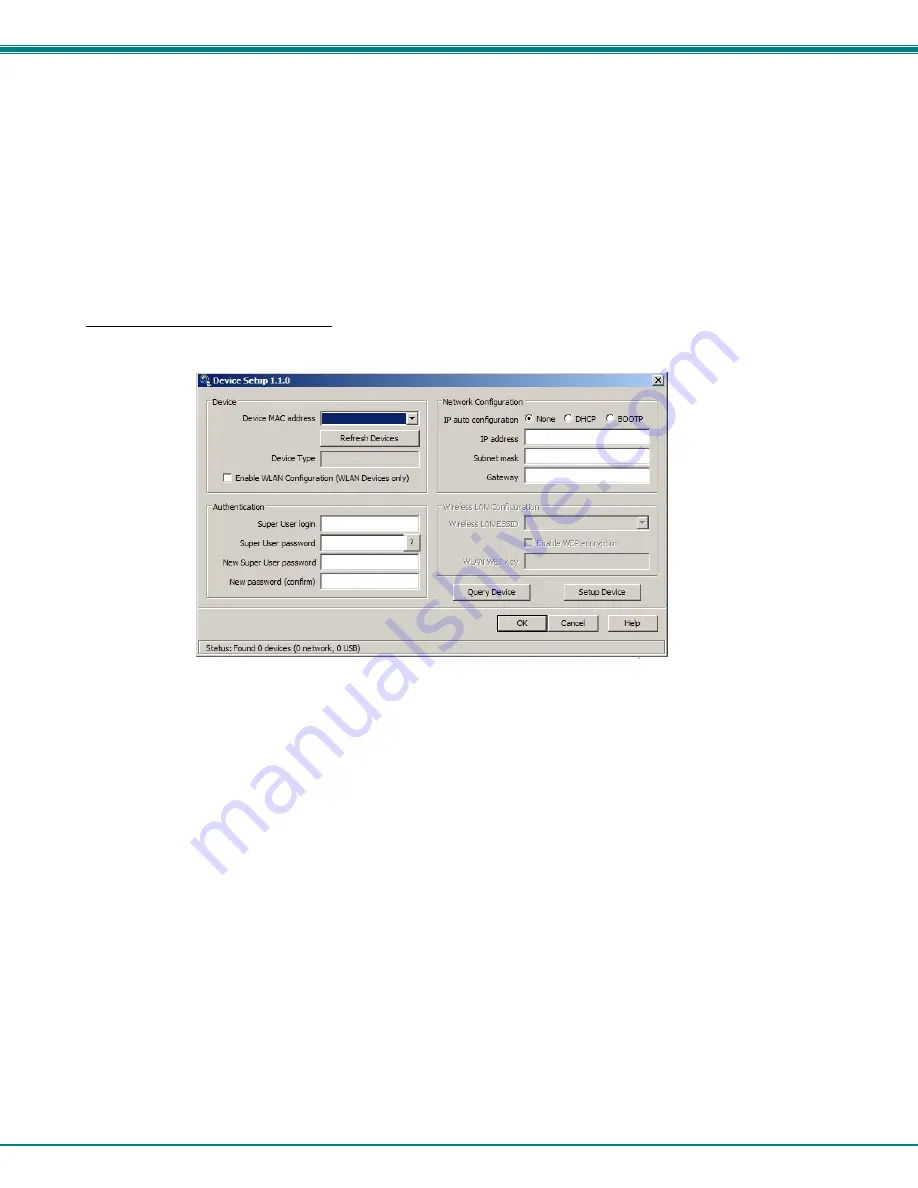
Software IP Address Change
1. Locate the program
psetup.exe
on the CD this manual is found on, in the “KVMonIP” subdirectory. Double-click on it.
2. Click
Refresh Devices
. The program will detect any network connected IP-KVM devices and display them by their MAC
addresses.
3. Click
Query Device
to find the current IP configuration of the selected MAC address device.
4.
Set
IP auto configuration
as “None”; and enter the new IP address and Subnet mask.
5.
Enter
super
and
pass
as the login and password.
6.
Click
Setup Device
. If the “super” login was authenticated, it’ll show “Successfully configured device”. Otherwise it will show
“Permission Denied”.
7. With a successful IP address change, login to the KVM on IP using your browser.


