background image

NTI RACKMUX KVM Drawer with NODEMUX Switch 


13


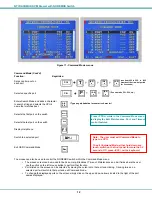
Broadcast Mode 

To activate Broadcast Mode press <Ctrl> + <B> from the Command Mode menu. 

 
(use with extreme caution or commands intended for one CPU will be sent to all CPUs) 

Broadcast Mode allows the operator to send keystrokes to all active CPUs simultaneously (even those CPUs the user cannot 
connect to due to lack of security access).   
 
However, Broadcast Mode has some critical requirements: 


BROADCAST mode must be OFF when booting any attached CPUs. 


BROADCAST mode must be ON and COMMAND MODE must be OFF for keystrokes to reach attached CPUs. 


NOTE:  The user must type somewhat slowly when in Broadcast Mode (less than 20 wpm) and cannot use the 
<Backspace> key

.  


Broadcast Mode is not supported by any ports that have MAC CPUs attached. 

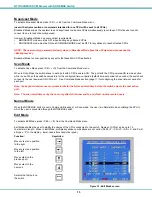
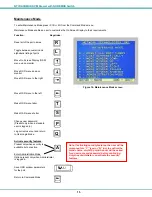
Scan Mode 


To activate Scan Mode press <Ctrl> + <S> from the Command Mode menu. 
 
When in Scan Mode the switch scans to each port with a CPU powered-ON.  The port with the CPU powered-ON remains active 
while in use. When the switch becomes idle for the configured time-out period (default time-out period is 5 seconds) the switch will 
connect to the next powered-ON CPU port.    See Command Mode section (page 11) for configuring the scan time-out period for 
each port. 
 

Note: The keyboard and mouse must remain idle for the full scan dwell time before the switch selects the next active 
port. 


Note:  The scan dwell time set by the user only effects that user and has no effect on other switch users.   

Normal Mode 

 
When the NODEMUX switch is not in Command, Broadcast, or Scan mode,  the user is in Normal Mode, controlling the CPU to 
which the user is connected through the NODEMUX switch.  

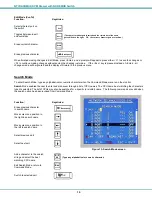
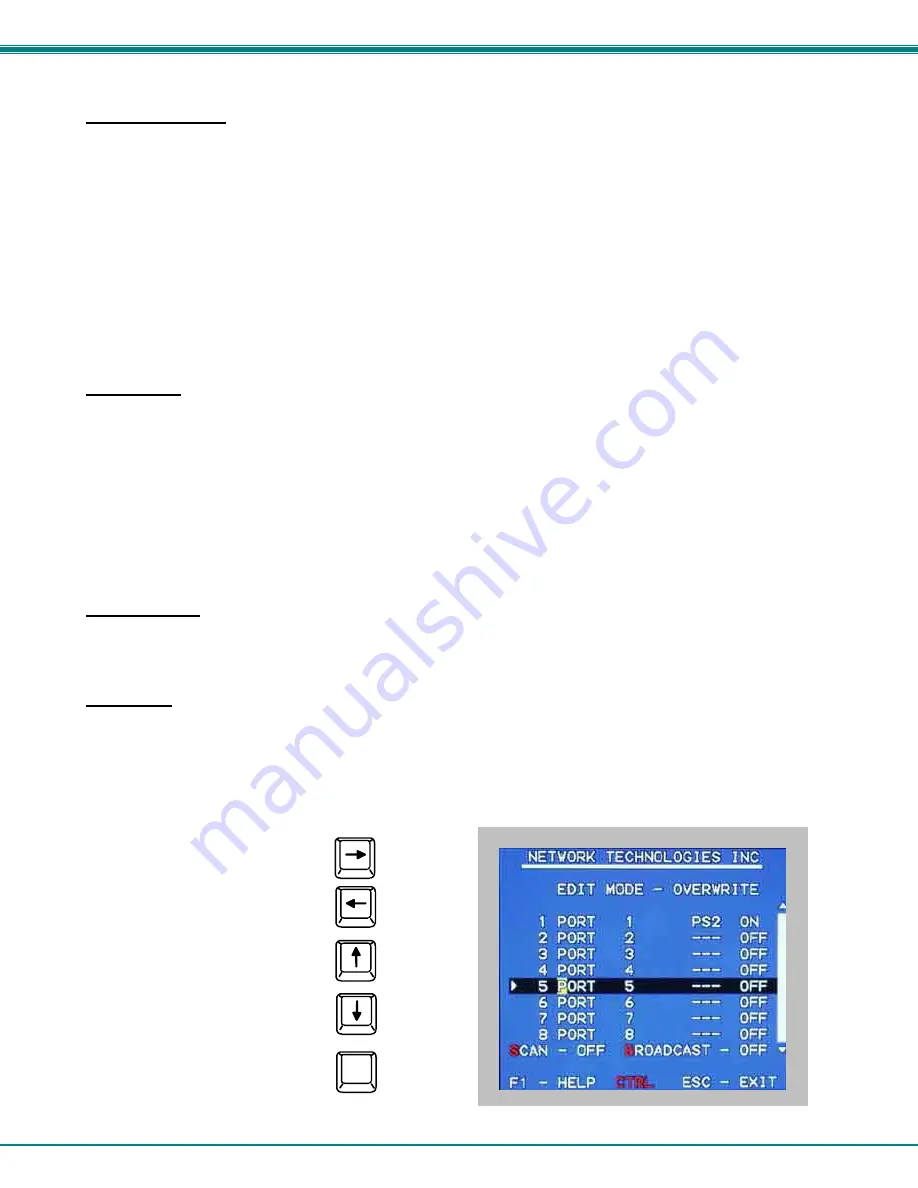
Edit Mode 

 
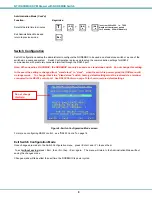
To activate Edit Mode press <Ctrl> + <E> from the Command Mode menu. 
 
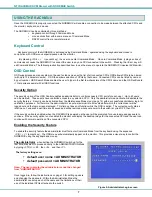
Edit Mode enables the user to modify the names of the CPUs connected to the switch.  Names of CPUs can be up to 12 
characters in length.  When in Edit Mode, multiple keystroke combinations are not valid (<Shift>+P, <Ctrl>+P, <Alt>+ P, and P will 
all type a “P” to the display - lower case letters cannot be typed).  


Function:  


   Keystroke: 

 
Move cursor one position 
to the right


Move cursor one position 
to the left 
 
Move cursor to the 
previous port


Move cursor to the  
next port 


Selects the first port on


the switch 


      Figure 12- Edit Mode screen 

Home

Summary of Contents for RACKMUX-V15-4UNV

Page 1: ...8UNV RACKMUX V17 4UNV RACKMUX V17 8UNV KVM Drawer with Universal KVM Switch Installation and Operation Manual RACKMUX Series NETWORK TECHNOLOGIES INCORPORATED Tel 330 562 7070 Fax 330 562 1999 1275 D...

Page 2: ...system or transmitted in any form or by any means electronic mechanical photocopying recording or otherwise without the prior written consent of Network Technologies Inc 1275 Danner Drive Aurora Ohio...

Page 3: ...me List 10 System Access List 11 User Access Functions 11 Command Mode 11 Broadcast Mode 13 Scan Mode 13 Normal Mode 13 Edit Mode 13 Search Mode 14 Maintenance Mode 15 Help Mode 16 RS232 CONTROL 16 RS...

Page 4: ...ser Login screen 8 Figure 8 Administration Mode menu 8 Figure 9 Switch Configuration Mode screen 9 Figure 10 Administrator password change 10 Figure 11 User Name List screen 10 Figure 12 Command Mode...

Page 5: ...nitor and 4 port NODEMUX RACKMUX V17 4UNV KVM Drawer with 17 TFT LCD monitor and 4 port NODEMUX RACKMUX V15 8UNV KVM Drawer with 15 TFT LCD monitor and 8 port NODEMUX RACKMUX V17 8UNV KVM Drawer with...

Page 6: ...upplied but REQUIRED A set of 2 cables for each CPU being connected to the switch PS 2 CPU to Switch VEXT xx MM for video interface VKTINT xx MM for keyboard and mouse interface OR Legacy SUN CPU to S...

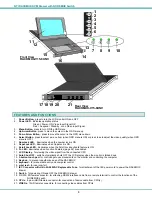
Page 7: ...ed 11 LCD Display for viewing the video signal from the connected CPU 12 Auto Shut OFF switch automatically shuts OFF the LCD display when the monitor is folded down 13 3 button touch pad for controll...

Page 8: ...t rails with two screws per bracket Be sure to tighten the screws securely Then tighten the nuts applied in step 3 5 Apply one more screw to each of the rear brackets to finish Figure 1 Mount RACKMUX...

Page 9: ...Warning Hardware is not hot pluggable to SUN CPUs SUN CPUs must be powered OFF and unplugged before connecting any cables 13W3M 15HDF Sun 13W3 Male Video Connector 8 Pin miniDIN Female Connector 15HD...

Page 10: ...ed components to work properly 1 Using the key unlock the drawer and slide the keyboard and LCD Display out far enough to raise the display to a comfortable viewing angle 2 Power ON the NODEMUX with t...

Page 11: ...rator can activate or deactivate the security features Security can be activated from the Maintenance Mode menu page 15 with a successful administrator login for verification purposes Furthermore the...

Page 12: ...stroke Adds a character to the user name password Removes previous character from the user name password Submit user name password Exit USER LOGIN and return to previous mode This function is only ava...

Page 13: ...d alone to slave when the switch is power cycled the OSD menu will no longer work To change it back to a stand alone switch factory default settings must be restored via a terminal connected to the RS...

Page 14: ...of users and provides control for adding new users up to 63 changing or assigning user passwords and changing access rights for any given user User names may be up to 12 characters long may not conta...

Page 15: ...nu enables a user to name the CPUs connected to the NODEMUX switch and connect to them using that name The OSD is positioned on the monitor displaying 8 CPU names at a time The screen can be used for...

Page 16: ...utton to perform that function Ports listed on the screen can be selected by moving the cursor onto that port and clicking Clicking twice on a selected port will switch to that port and exit Command M...

Page 17: ...configured time out period default time out period is 5 seconds the switch will connect to the next powered ON CPU port See Command Mode section page 11 for configuring the scan time out period for ea...

Page 18: ...enter and maneuver through a list of CPU names The CPU name best matching the characters typed is selected The list of CPUs may also be searched for a specific or similar name The following commands a...

Page 19: ...o the left Make OSD menu taller Make OSD menu shorter Change user password Present only when a standard user is logged in Log current user out and return to User Login Mode Activate security features...

Page 20: ...ions and Configuration Remote Connection The RS232 Interface is designed to meet the RS232C standard and can be controlled from any CPU or other controller with an RS232 communications port The pin ou...

Page 21: ...ne factory default settings must be restored via a terminal connected to the RS232 control port See the RS232 Command CF on page 19 to restore default settings Loop Back In order for an RS232 command...

Page 22: ...ss Enter and Y to save them To exit without saving press Esc then N then Esc again The menu will return to the Administration Mode without saving the changes made Changes made will take effect the nex...

Page 23: ...OK OR CR syntax or transmission error occurred CA change all output channels FORMAT CA AA XX CR CA change all outputs command followed by at least one space AA unit address XX input CPU to connect to...

Page 24: ...transmission error occurred CF reset all connected units regardless of address to factory default configuration settings WARNING THIS COMMAND WILL RESET ALL RS232 DAISY CHAIN CONNECTED NODEMUX SWITCH...

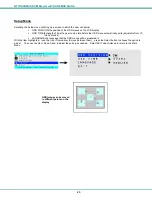
Page 25: ...The Up and Down Arrow buttons are used to navigate through the menus Move the cursor up or down as desired to highlight an item for selection Once an item is highlighted pressing the Menu button will...

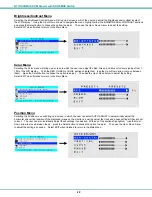
Page 26: ...h the RED GREEN or BLUE sections highlighted use the Up or Down arrow to move between them press the Select button to choose the option to adjust Then use the Up or Down Arrow to adjust the setting Se...

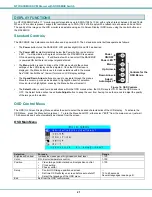
Page 27: ...idle before the OSD menu automatically exits adjustable from 10 to 60 seconds LANGUAGE the language that the OSD menus will be presented in With the item highlighted use the Up or Down arrow to move b...

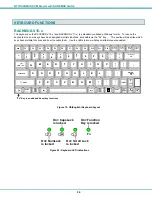
Page 28: ...hem Use the LEDs to know what special features are enabled Figure 19 US English Keyboard Layout Figure 20 Keyboard LED Indications ESC F1 F2 F3 F4 F5 F6 F7 F8 F9 F10 F11 F12 NUMLCK PRT SC INSERT DELET...

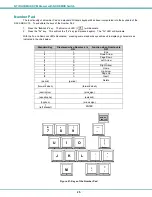
Page 29: ...illuminate With the Fn and NumLock LEDs illuminated pressing some standard keys will result in displaying characters as indicated in the chart below Standard Key Displayed when NumLock is ON Function...

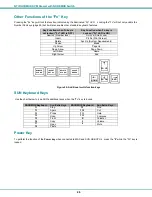
Page 30: ...ete Sys Rq System Requirements Pause Break Up Arrow Page Up Down Arrow Page Down Left Arrow Home Right Arrow End Figure 22 Additional multi function keys SUN Keyboard Keys Use the chart below to type...

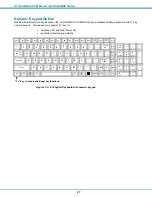
Page 31: ...C Power Key enable SUN extra key emulation Figure 23 U S English Keyboard with numeric keypad ESC F1 F2 F3 F4 F5 F6 F7 F8 F9 F10 F11 F12 PRT SC DELETE SYS RQ PAUSE BREAK SCR LCK ENTER BACKSPACE 0 9 8...

Page 32: ...board and mouse to a SUN type CPU The chart below shows the capabilities of the keyboard controlling certain CPU types Translation Capabilities CPU Device Sun Mac Windows RACKMUX Keyboard Extra keys e...

Page 33: ...THIS COMMAND PROBLEM No Keyboard or Mouse SOLUTION Shut down CPU s Power cycle the switch Turn on CPU s DEFAULT PASSWORD RESET In the event the Administrator password is lost or forgotten the passwor...

Page 34: ...0 000 hrs Contrast Ratio 500 1 LCD 17 Display area 337 92mm W x 270 336 H 17 inch diagonal Panel Type TFT Active Number of Pixels 1280 H x 1024 V Number of Colors 16 2 Million 6 bits FRC Pixel Pitch 0...

Page 35: ...rce No Contact pressure required Lifetime Plastic Overlay Minimum 10 000 000 strokes Sample Rate Up to 100 samples sec INDEX Administration Mode 8 Administrator password change 10 Broadcast Mode 13 Co...

Page 36: ...bor is two 2 years from the date of purchase Please contact Network Technologies Inc at 800 742 8324 800 RGB TECH or 330 562 7070 or visit our website at http www networktechinc com for information re...

Reviews: