P3245-1M
Multimeter digital, True RMS
23
Appendix C: Changing the fuse
Warning: To avoid electrical shock or damage to the multimeter, ensure
that the insides of the casing stay dry at all times.
Change the fuse:
To change the fuse, perform the following
steps:
1.
Ensure that the rotary switch is at the
position. Remove test leads and any
connectors from the input terminals.
2.
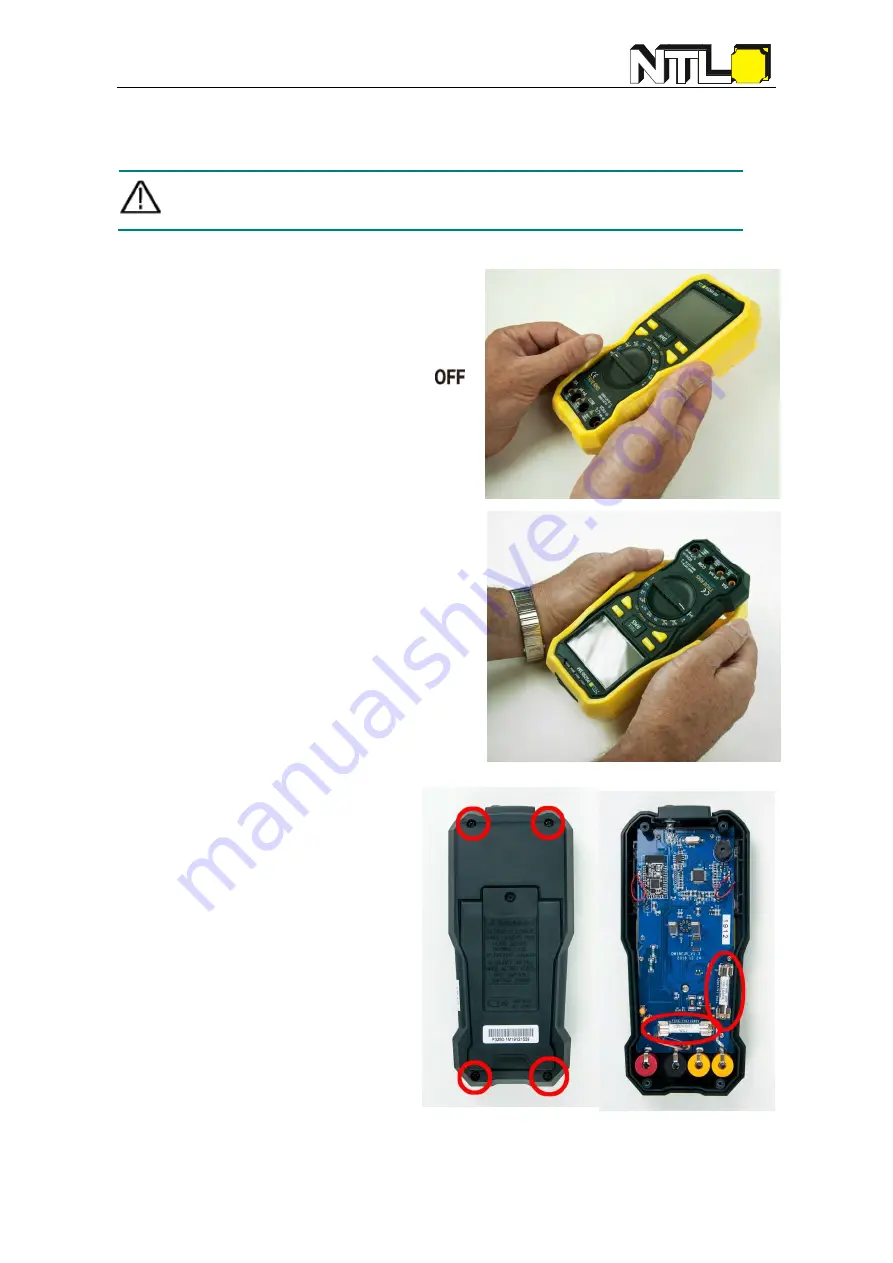
Remove the yellow protective cover. Most
suitable to start is the place you can see in
picture 1 (on the side of the Multimeter, at
the same height as the rotary switch).
3.
Proceed removing the protective cover –
see picture 2.
4.
Turn the device, to see the reverse side.
5.
Loosen the screws (see picture 3) and
remove the cover.
6.
Now you can see both fuses (look
at picture 4).
Check them e.g. with another
multimeter.
7.
If damaged you must, change
them.
Fuse types:
L = 32 mm / D = 6 mm
15 A / 1000 V
(order no. DG415-00)
1 A / 1000 V
(order no. DG401-00)
Material: ceramic
8.
Proceed in reverse order, to reassemble the device.


