24
Before Using the Handset
SH-01G_E_02.fm
[24/28]
Before using Bluetooth tethering, register the other party’s
Bluetooth device in advance (
n
P. 78 “Using Bluetooth
function”).
As for the settings on the Bluetooth device, refer to its manual.
1
In the home screen, [
R
]
/
[Settings]
/
[More...]
/
[Tethering]
2
Select an item
USB tethering
: Set whether to use the USB tethering.
・
Check the details of the precautions before use.
Wi-Fi tethering
: Set whether to use the Wi-Fi tethering.
・
Check the details of the precautions before use.
Set up Wi-Fi hotspot
: Make settings for Wi-Fi tethering such
as network SSID and security.
Wi-Fi tethering Easy Connection
: Set whether to use the
tethering by connecting to WPS compatible access points.
Bluetooth tethering
: Set whether to use the Bluetooth
tethering.
・
Check the details of the precautions before use.
1
In the home screen, [
R
]
/
[Email]
:
Only when an account is not set up, the account setup
screen appears.
2
Enter mail address and password
/
[Next]
:
Provider information is preset for some mail accounts, and a
receiving mail server and a sending mail server are
automatically set.
:
When you use an account whose provider information is not
preset, it is necessary to set a receiving mail server and a
sending mail server manually. For details on those settings,
contact the Internet service provider you use.
3
Set up an account
/
[Next]
4
Enter an account name and your name
/
[Next]
1
In the home screen, [
R
]
/
[Settings]
/
[Add
account]
2
Select an account type
3
Set up an account
:
In the home screen, [
R
]
/
[Settings] to find the added
account on the displayed menu.
■
Deleting your account
1
In the home screen, [
R
]
/
[Settings]
2
Select an account
/
[
z
]
/
[Remove account]
/
[Remove account]
:
Operation methods may differ depending on the account.
■
Retrieving your Google account password
If you forget your Google account password, retrieve it.
1
In the home screen, [
o
]
2
Enter “
(
https://www.google.com/ncr
)
” in the URL
entry field
/
[Go]
/
[Sign in]
/
[Need help?]
/
follow the instructions on the screen and
operate
■
Importing from docomo nano UIM card
1
In the home screen, [
R
]
/
[docomo
phonebook]
/
[Contacts]
2
[
z
]
/
[Import/Export]
/
[Import from SIM card]
:
If there are multiple accounts, the screen for selecting to
which account to register is displayed.
3
Select the contact to import
:
To import all contacts: [
z
]
/
[Import all]
■
Importing from microSD Card
1
In the home screen, [
R
]
/
[docomo
phonebook]
/
[Contacts]
2
[
z
]
/
[Import/Export]
/
[Import from SD card]
:
If there are multiple accounts, the screen for selecting to
which account to register is displayed.
:
If there is only one phonebook data saved on the microSD
Card, the data is automatically imported.
3
Select the phonebook data to import
/
[OK]
■
Exporting to microSD Card
1
In the home screen, [
R
]
/
[docomo
phonebook]
/
[Contacts]
2
[
z
]
/
[Import/Export]
/
[Export to SD card]
3
Select the contact to export
/
[OK]
/
[OK]
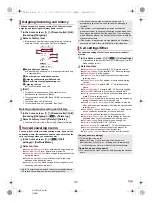
The incoming/charging lamp notifies you that there is a
missed call, the handset is being charged, etc. by illuminating/
flashing.
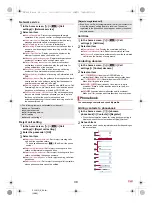
[USB tethering]
The tethering function is available on Windows Vista, Windows
7, Windows 8, Windows 8.1 and Linux.
A microSD Card inserted in the handset cannot be mounted on
a PC during USB tethering.
For details on USB tethering, refer to the following website.
(
http://www.android.com/tether#usb
)
[Wi-Fi tethering]
While the handset is functioning as an access point, it cannot
access the Internet via Wi-Fi connection.
Make settings for Wi-Fi access points in [Set up Wi-Fi hotspot].
For details on Wi-Fi tethering, refer to the following website.
(
http://www.android.com/tether#wifi
)
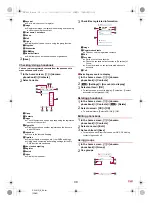
[Set up Wi-Fi hotspot]
At the time of purchase, Network SSID is set to [SH-01G_AP]
and Security is set to [WPA2 PSK] while Password is set
randomly. Change the settings if necessary.
Setting up mail account
Setting up Google account etc.
When activating the app that requires an account without
setting one up, the account setup screen appears.
Keep a separate memo of the set account and password.
Importing/Exporting phonebook
Incoming/Charging lamp
State of lamp
Color
State of handset
Illuminating
Ruby (Red)
Charging in progress (Battery
level is approx. 94% or less)
Illuminating
Emerald (Green) Charging in progress (Battery
level is approx. 95% or more)
Flashing
Ruby (Red)
Charging unavailable
SH-01G_E.book 24 ページ 2014年11月12日 水曜日 午前9時59分


