70
Oth
e
r E
x
clusive
App
licatio
ns
c
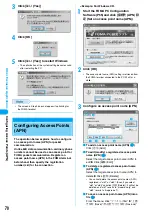
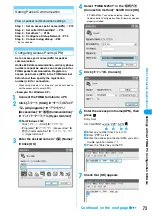
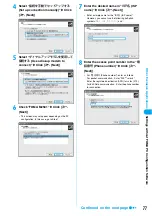
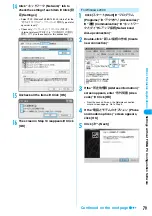
Click [
はい
(Yes)]
d
Click [OK]
e
Click [
はい
(Yes)] to restart Windows
• The optimization of the system setting becomes valid
after restarting the PC.
•
The screen in Step 3 does not appear if optimizing for
the FOMA terminal.
Configuring Access Points
(APN)
The operation below explains how to configure
an access point name (APN) for packet
communication.
Unlike 64K data communication, ordinary phone
numbers cannot be used as an access point for
FOMA packet communication. Register an
access point name (APN) in the FOMA terminal
beforehand, then specify the registration
number (cid) for the connection.
<Example: For Windows XP>
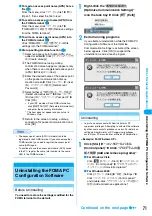
a
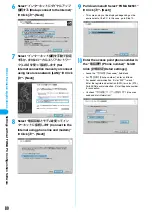
Start the FOMA PC Configuration
Software (P55) and click [
接続先
(APN)
設
定
(Set an access point name (APN))
b
Click [OK]
• The access point name (APN) setting is retrieved from
the FOMA terminal connected to the PC. Wait for a
while.
c
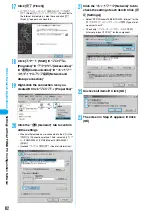
Configure an access point name (APN)
■
To add an access point name (APN) (
a
)
Click [
追加
(Add)]
■
To edit (modify) a registered access point
name (APN) (
b
)
Select the target access point name (APN) to
edit
y
Click [
編集
(Edit)]
■
To delete a registered access point name
(APN) (
c
)
Select the target access point name (APN) to
delete
y
Click [
削除
(Delete)]
• You cannot delete the access point names (APN)
registered in “cid1” or “cid3”. (Even if you select
“cid1” or “cid3” and click [
削除
(Delete)], it will not be
deleted, and “cid1” reverts to “mopera.ne.jp” and
“cid3” reverts to “mopera.net”).
■
To save an access point name (APN) into a
file (
d
)
From the menu, click “
ファイル
(file)”
y
“
上書
き保存
(Save)”/“
名前を付けて保存
(Save as)”
a
b
c
d
e
f
Co
nfig
urin
g Acce
ss Poin
ts (A
PN)


