195
Continued
Setting How to Display a List of Mails
You can select the display style of Inbox, Outbox, and
Draft lists using the following four methods. The set
display style is applies to all folders.
body
2lines
Inbox 1/25
15:51 ドコモ一郎
Photo contest
12:34 ドコモ二郎
Concert ticket next mo
11/13 携帯なつ子
Yesterday s subjec
11/12 携帯なつ子
Happy Birthday
11/11 docomo.taro
Place set for meetin
11/10 携帯はる子
Sorry, 20 minutes l wi
The application deadline
of the next photo conte
st is the day after tomo
rrow. To apply, either r
eply to this mail or cal
l us. We hope to hear fr
om you.
Inbox 1/25
15:51 ドコモ一郎
Photo contest
12:34 ドコモ二郎
Concert ticket next mo
11/13 携帯なつ子
Yesterday s subjec
11/12 携帯なつ子
Happy Birthday
11/11 docomo.taro
Place set for meetin
11/10 携帯はる子
Sorry, 20 minutes l wi
1line+body
1line
Inbox 1/25
Photo contest
Concert ticket next
Yesterday s subj
Happy Birthday
Place set for meet
Sorry, 20 minutes I
Plan for next week
Long time no see you
Place changed
Check attendees
Contest result
Info on class re
The application deadline
of the next photo conte
st is the day after tomo
rrow. To apply, either r
eply to this mail or cal
l us. We hope to hear fr
om you.
Inbox 1/25
Photo contest
Concert ticket next
Yesterday s subj
Happy Birthday
Place set for meet
Sorry, 20 minutes I
Plan for next week
Long time no see you
Place changed
Check attendees
Contest result
Info on class re
1
From the Mail menu, select [Mail setting]
→
list setting] and press
.
2
Select the display style and press
.
The display style of a mail list is set.
●
When [body] or [1line+body] is set, the beginning
of the mail at the cursor is displayed.
Even if the mail is previewed, the status is still to be read.
●
For the Draft list, the preview display does not appear.
●
The preview display may not appear depending on the
character string (URL, etc.) in mail.
●
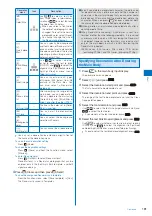
When you press
in the Mail list display, the display
can be changed (P.190).
Assigning Separate Folders for Mail
You can save requirements to sort received or sent mail
so that they can be automatically assigned to folders.
Up to 30 sorting requirements can be saved.
Example: Setting a sorting requirement for received mail
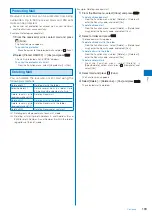
1
From the Mail menu, select [Mail setting]
→
[Sort
inbox] and press
.
Sort inbox
Sorting requirement field
To set a sorting requirement for sent mail
From the Mail menu, select [Mail setting]
→
[Sort outbox].
To delete a sorting requirement
Move the cursor to the sorting requirement field and
from the Function menu, select [Delete]
→
[Delete one]
→
[Yes]. To delete several sorting requirements, from
the Function menu, select [Delete]
→
[Select&delete],
select sorting requirements, press
(Complete), and
select [Yes]. To delete all sorting requirements, from the
Function menu, select [Delete]
→
[Delete all], enter the
Security code, and select [Yes].
To reorder the sorting requirements
From the Function menu, select [Reorder]
→
a sorting
requirement, move the cursor to a folder to move to,
press
(Move), and press
(Complete).
To cancel editing
From the Function menu, select [Cancel].
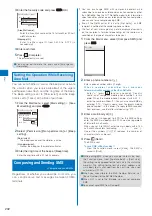
2
Select the sorting requirement field and press
.
Sort rule1
Sorting criteria
Folder to sort into
3
Select the sorting method at [Sorting criteria].
[Address]:
Specify a mail address. The mail address portion after
the @ mark is required. However, when you set the mail
address to “phone number@docomo.ne.jp”, enter the
phone number only.
[Group]:
Specify a group.
[Subject]:
Enter a subject or a part of it within 100 full-width or 200
half-width characters.
[None]:
Sort mail that does not meet any specified sorting
requirement.

