15
Easy Setup (Packet Communication)
Note that packet communication could be expensive if you
exchange large volumes of data such as viewing sites or
Internet home pages that contain images or downloading
files.
When Using “mopera U” or “mopera”
When you use “mopera”, the maximum transmission/reception
speed is 384kbps.
1
Start the FOMA PC setup software and click [
かん
たん設定
].
2
Select [
パケット通信
] and click [
次へ
].
3
Select [
『
mopera U
』への接続
] or [
『
mopera
』への接
続
] and click [
次へ
].
When you select [
『
mopera U
』への接続
], the confirmation
window for subscription appears. If you have already
subscribed to “mopera U”, click [
はい
].
4
Click [OK].
The host (APN) is loaded from the FOMA terminal. Wait for
a few moments.
5
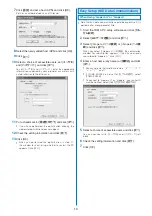
Enter a host name (any name) at [
接続名
] and click
[
次へ
].
You cannot enter half-width characters, “¥” “/” “:” “
*
” “?”
“<” “>” “|” “”” and “!”.
When you use either “mopera U” or “mopera”, your
caller ID must be notified. For overseas use, select [
設定
しない(推奨)
].
“mopera” is only supported [PPP
接続
]. “mopera U” is
supported both [PPP
接続
] and [IP
接続
]. For overseas
use, select [IP
接続
].
6
Set [
ユーザ
ID] and [
パスワード
] and click [
次へ
].
You can connect with [
ユーザ
ID] and [
パスワード
] left
blank.
7
Check the setting information and click [
完了
].
8
Click [OK].
When Using Other Providers
1
Start the FOMA PC setup software and click [
かん
たん設定
].
2
Select [
パケット通信
] for the connection type and
click [
次へ
].
3
Select [
その他
] for the host and click [
次へ
].
4
Click [OK].
The host (APN) is loaded from the FOMA terminal. Wait for
a few moments.
5
Enter a host name (any name) at [
接続名
].
You cannot enter half-width characters, “¥” “/” “:” “
*
” “?”
“<” “>” “|” “”” and “!”.
Select [PPP
接続
] for the connection type.
Select [IP
接続
] for connection type for overseas use.
A connection to some access points may not be
available depending on the connection type they
provide.
About whether you should notify your caller ID, follow the
instruction of your provider.
■
Advanced setting (Setting of TCP/IP)
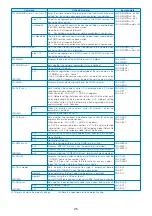
When you click [
詳細情報の設定
], the setting window of [IP
アドレス
] and [
ネームサーバー
] appears. If any entries are
required as information for dialing up to your provider or
office LAN, enter the appropriate addresses according to
the provided instructions.
6
Click [
接続先
(APN)
設定
].


